The most exciting phrase to hear in science, the one that heralds discoveries, is not ‘Eureka!’ but ‘Now that’s funny'...
Why is prerelease testing an important part of the release process?
To ensure the quality of our products we need to make sure that newly developed features did not disrupt old ones and that old ones still work as expected. Because of that, before every release, it is crucially important to do a regression test and confirm that both newly developed and old features work in the best way possible.
Things that should be done before you even start testing
Whether it is a release of mobile or web apps, make sure all features are merged in the release candidate build and that the respective backend features are deployed to your test environment. Once this is done, you can start doing your magic.
Mobile Apps
Preparation is the key!
- Have your test cases ready before going into regression testing.
- Create a test plan (if it is available in a tool where you keep test cases) and test execution (test run) with all test cases related to the current release.
TIP: Name your test execution as specific as possible - it will be easier for you to find it later. :) For example, name the release version and platform on which you are performing the regression test, you can also add a name (ticket number) of the test plan if it is available.
- Make sure to discuss the scope and effort needed with your team. If you are doing a regression test for the first time (whether you just started your QA career or you are the first time on a project), make sure to take enough time to complete it.
- Make sure your test environment is as close as possible to production.
- If you have automated tests of parts of the app, focus on manually testing those parts that were left uncovered, but don't completely ignore those that were covered.
Choosing mobile devices for regression test
There is no silver bullet when it comes to choosing devices for your regression test. The first step would be to find out all the supported devices and the minimum supported version of OS.
The ideal would be to do a regression test on all of them but most of the time it is not possible because of limited time for testing.
The best practice would be to check which mobile devices are used the most and pick the two most common ones. Also, make sure that one of the devices has the most used OS and another one the minimum supported OS version.
If you have some extra time, you can do at least a smoke test on some other supported/most used devices.
TIP: Mix it up - don't use the same devices from regression test to regression test. In that way, you'll be covering more of the spectrum each time you do it.
Opening tasks for regression tests
As it mostly takes a few hours, or even a few days to do a regression test, a good practice is to open a dedicated task for it. This way, everybody from the project team knows what you are working on during a sprint. As you have to dedicate some time for the regression test, you can give a time estimate for that task, and include it into the sprint plan.
Along with the time estimate, you can include some basic info in the task:
- devices/browsers you are going to test on
- release version/platform/environment you are going to test on
- link to the test execution in TestRail, X-Ray, or any other tool that you use
Besides regression tests, you can open tasks for smoke and other types of tests as well. Especially when they take a considerable amount of time to be finished.
Testing, testing, and more testing...
- Run a regression test of the release candidate on a non-production environment by following the test cases from the test execution.
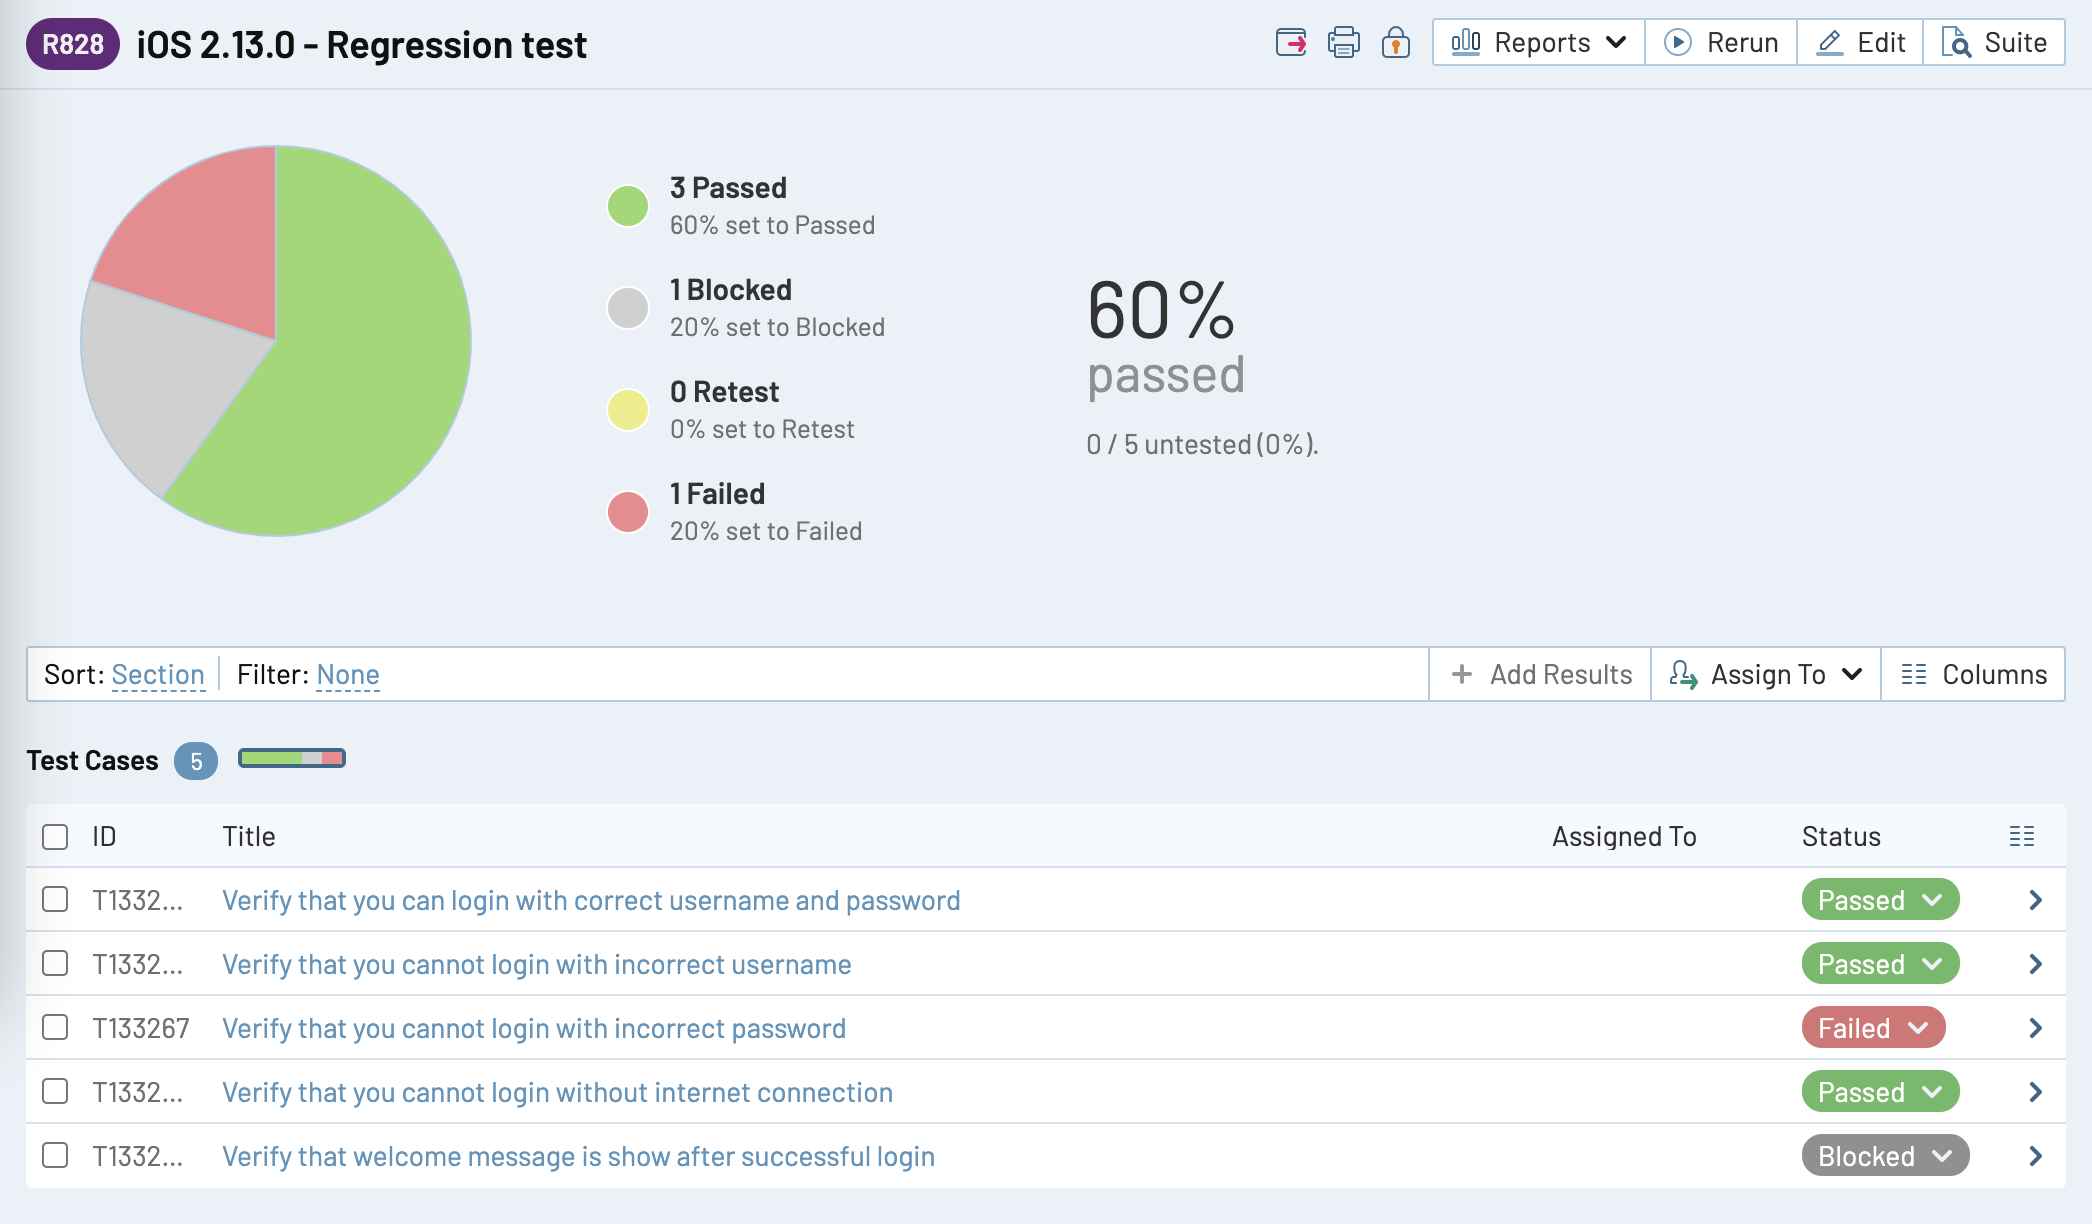
Sneak peek how a typical test execution looks like in TestRail:

At the top, there is an overview with this fancy pie chart that shows your progress (how many test cases passed, failed, are blocked...) and underneath are test cases. Pay attention to the naming of the regression test and used devices :)
- Make sure to check the Prince of Versions scenarios for mandatory and optional updates.
- Report bugs as soon as possible after uncovering them. Make sure that you discuss them with your team so they can be prioritized, fixed, and a new build can be created for you to continue testing ASAP.
- Retest the affected area of the app in each release candidate build.
Pro Tip 1: Communicate all the way
Keep informing the project team of your progress in daily meetings or via Slack. Let them know if you have any problems, you need help or you just need more time to finish your testing.
Pro Tip 2: Do not complicate things too much
Don't go too deep into all the features, optimize testing in a way to touch all areas of the app but also focus on those features that are truly critical and/or have been affected by the new release.
Pro Tip 3: Rely on your instincts
Make exploratory testing part of your regression test. The test cases themselves are a great guide, but you should rely on your instinct as well.
Pro Tip 4: Finish your testing
The app should not go to production before you went through all test cases in your test execution. After that, you will have a good app overview and if it is good enough for release or not.
What to do after testing?
Once all blockers are fixed and the app is ready for release, share and discuss the test results with your team. Type down a short report and share it in the project group via Slack (or email) or use your daily meetings to do so.
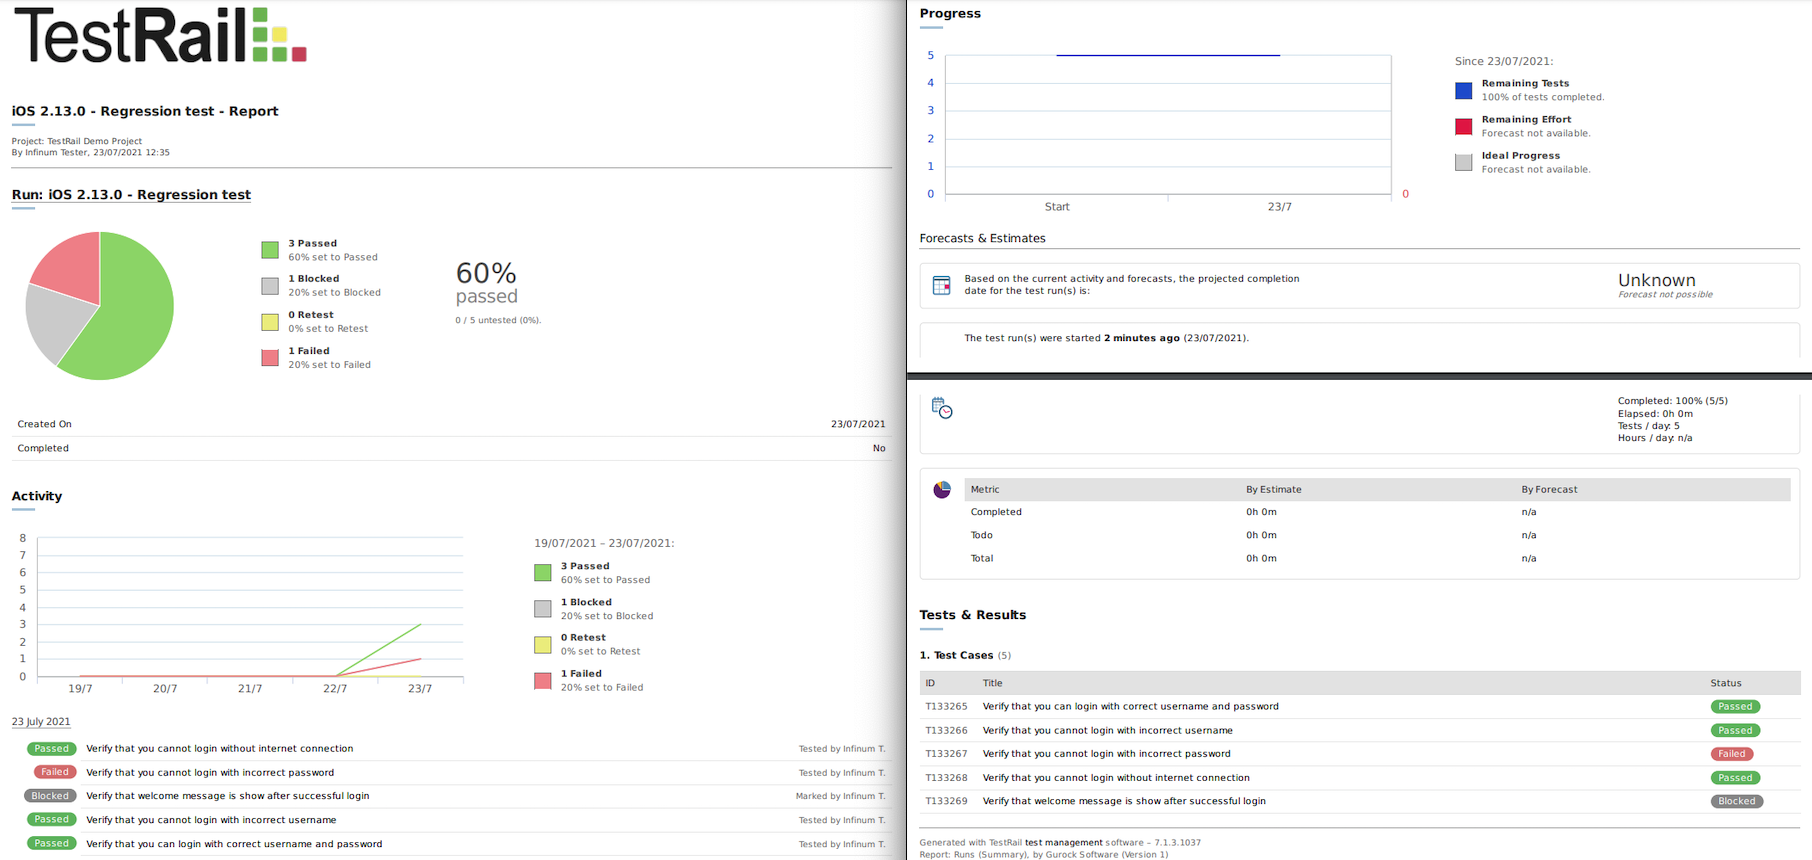
Most of the tools (such as Jira and TestRail) have the option to create test report documents in PDF format. This comes in handy when you need to share a report with a client. Here is just an example of how a generated report from TestRail looks like:

One more thing that you can do is organize a testing session. More about the event can be read here.
3,2,1 Launch!
The app will be submitted to its respective store and once approved, it will be released to a limited part of the audience (phased/staged release) or it can be released to all users at once.
Just because you finished testing does not mean that your job is done. In the period after the production release, here is what you need to do:
- Check Crashlytics daily for a week or two for crash issues.
- Take a look at reviews on its respective stores.
Houston, we have a... crash
Stop the phased/staged release in case of crash spikes. In that case, the team needs to work on a hotfix build and the whole prerelease process needs to be repeated.
Google Play Beta/TestFlight - Optional
Google Play Beta/TestFlight testing is used so that limited (invited) users can test applications in the production environment.
Once the app is available for installation on Google Play Beta/TestFlight, you need to do the following:
- Make sure that you are added as a beta tester on Google Play Beta or that you are invited to TestFlight. (You will need to install and login into TestFlight on your mobile device)
- Install the current store build from the App Store or Google Play Store.
- Set it up and update it with the new Google Play Beta/Testflight build.
- Do a limited regression test on production to check the most important flows and functionalities.
What’s the difference between an internal, closed, and open test on Google Play?
Before you release your app to production, you can create releases on three testing tracks: internal, closed and open. Each of them can help you gather the feedback you need to make improvements to your app throughout its development and/or before the release to production.
In order to join a test, users need a Google Account (@gmail.com) or a Google Workspace account.
| Aspect | Internal Testing | Closed Testing | Open Testing |
|---|---|---|---|
| Purpose | Initial quality assurance | Gather targeted feedback | Test with a large group |
| Tester Limit | Up to 100 testers | Lists of up to 2,000 users | No predefined limit |
| Tester Selection | Internal testers | Specified email addresses | Anyone can join |
| Feedback Collection | Private feedback | Private feedback | Private feedback |
| App Visibility | Limited to internal users | Limited to specified users | Visible on Google Play |
| Pre-release Versions | Yes | Yes | Yes |
| Tester Access | Google Account required | Google Account required | Google Account required |
| Concurrent Testing | Can run concurrently | Can run concurrently | Can run concurrently |
| Configuration Testing | Recommended for partial configurations | N/A | N/A |
The information was retrieved from the Play Console support page where you can find out more about Google Play test tracks.
TestFlight testing tracks
Similar to Google Play test tracks, TestFlight also offers options to internally or externally test your apps.
| Tester Type | Maximum Number of Testers | Tester Role Requirements | Enrollment Method |
|---|---|---|---|
| Internal Testers | Up to 100 | Account Holder, Admin, App Manager, Developer, or Marketing | Team enrollment |
| External Testers and Groups | Up to 10,000 | No specific role requirements | Email invitations or Public link sharing |
If you want to find out more about TestFlight testing tracks, check out this page.
Web Apps
Since most of the things that are mentioned in the Mobile Apps part are applicable for Web Apps, there is no need to write it all again but we will mention only differences.
Choose browsers
- Make sure that you find out which browsers are supported for your app.
- Choose the two most used browsers. The first should be your main testing browser, and on a second one you should do a limited regression test (with paying attention to browser differences). If there is time, you can do a limited regression test on other supported browsers as well.
Not applicable for Web Apps:
- No need for testing Prince of Versions
- No need for testing Google Play Beta/TestFlight