Automation does not do what testers used to do, unless one ignores most things a tester really does. Automated testing is useful for extending the reach of the testers work, not to replace it.
General prerequisites
Before installing Appium, ensure the core dependencies and required development tools are installed and configured. In general you will need:
Platform specific prerequisites
iOS / macOS
- one of the latest Xcode versions
- Xcode update might require you to update your macOS as well
- Xcode command line tools
Android
- Android Studio
- Android SDK tools
The easiest way to install Android SDK tools is through Android Studio:
- Open Settings
- Search for Android SDK
- Open the SDK Platforms tab
- Select the checkbox next to the API version(s) you want to install
- Open the SDK Tools tab
- Select the Android SDK Platform-Tools checkbox
- Select the Android SDK Build-Tools checkbox
- Click Apply and wait for the packages to install

Environment variables
Set JAVA_HOME and ANDROID_HOME environment variables.
- Open the profile file:
- zsh:
open ~/.zshrc - bash:
open ~/.bashrc
- zsh:
- Type in the following (make sure to use your username and versions):
export ANDROID_HOME=/Users/<username>/Library/Android/sdk
export PATH=$PATH:$ANDROID_HOME/platform-tools/
export PATH=$PATH:$ANDROID_HOME/build-tools/<version>
export PATH=$PATH:$ANDROID_HOME/tools/bin

export JAVA_HOME=`/usr/libexec/java_home`
export PATH=${JAVA_HOME}/bin:$PATH
export PATH=${PATH}:${JAVA_HOME}
Install Appium
Make sure to check Appium requirements before installing.
Appium team provides support only for the most recent version of Appium. Reffer to Appium migration docs if you wish to upgrade from an older major Appium version.
To install latest Appium version simply run:
npm install -g appium
Appium drivers
However, Appium does not include drivers by default and you need to install them using Appium. They have to be installed separately for each platform on which you intend to run the tests. You can learn more about Appium drivers ecosystem here.
iOS driver:
appium driver install xcuitest
Android driver:
appium driver install uiautomator2
Appium-related tools
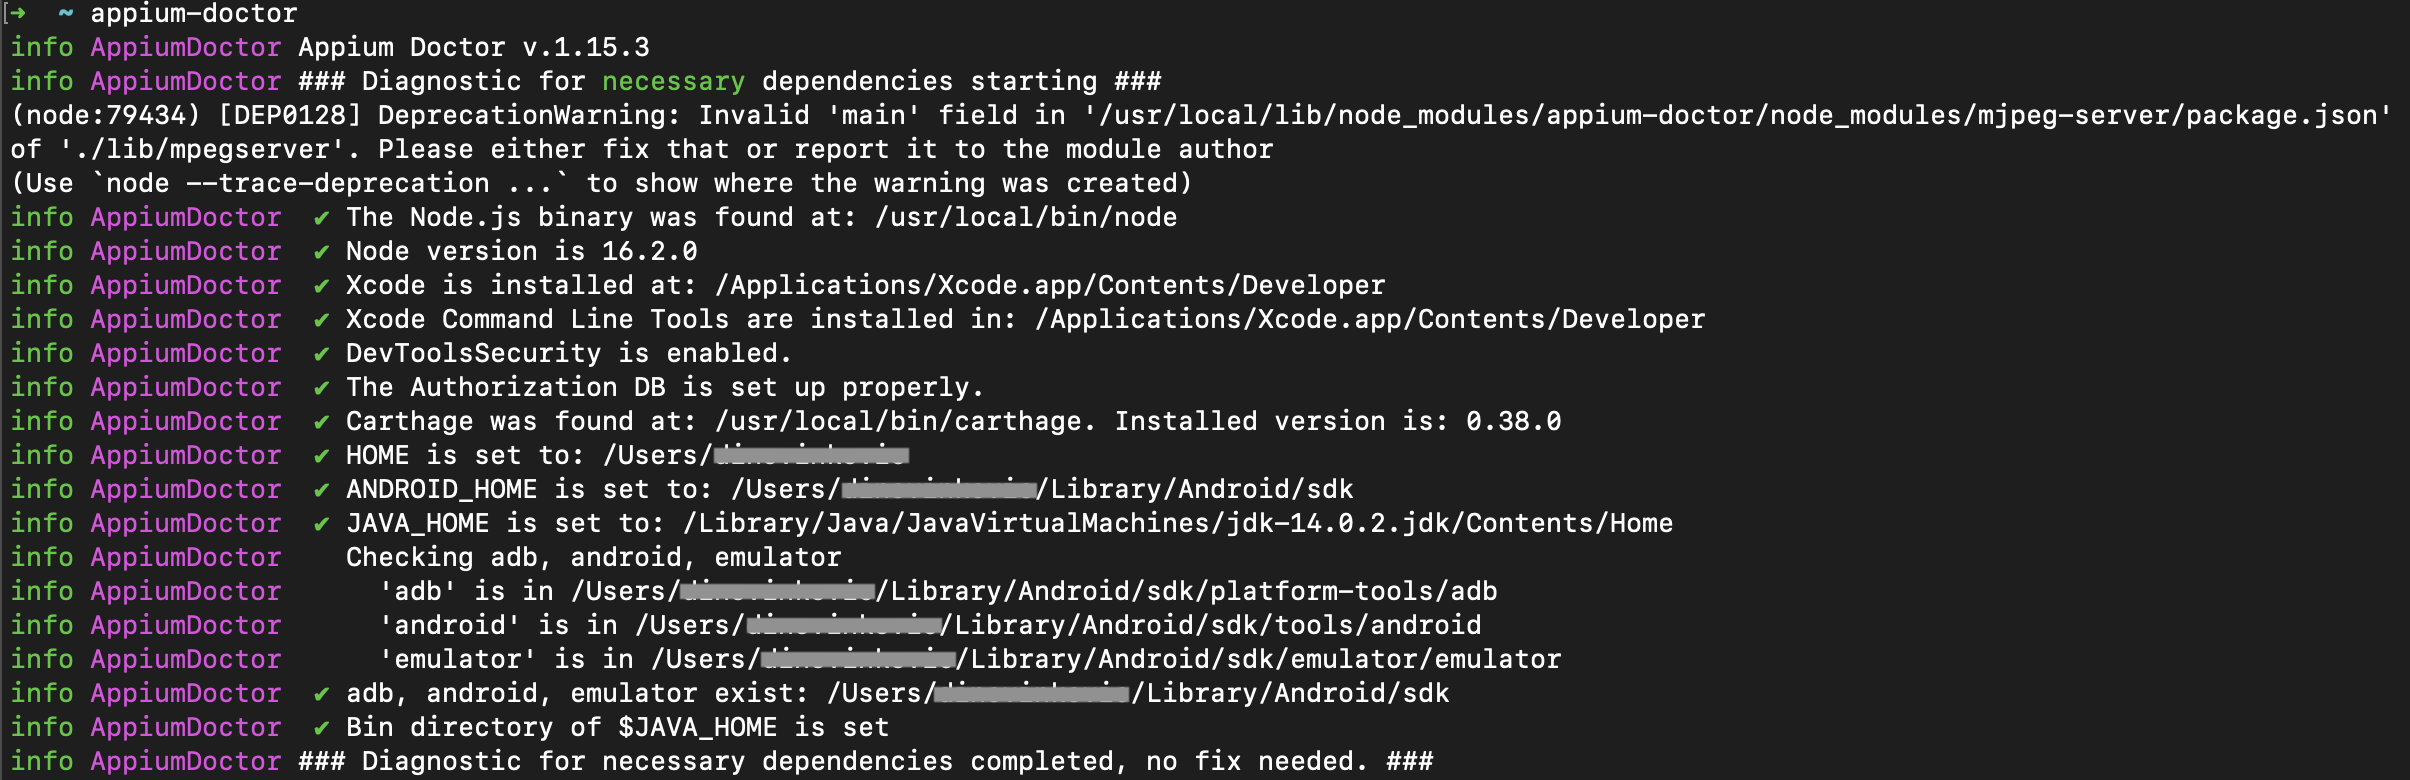
Appium Doctor CLI tool can be used to validate proper environment setup for Android and iOS automation. You can install it by:
npm install -g @appium/doctor
To check if dependencies are installed correctly run:
appium-doctor
The necessary dependencies should have a green check mark:
Capabilities
Capabilities are parameters that you need to define to start an Appium session. They have to be defined as key-value pairs.
Some are mandatory, such as platformName and udid. Most are optional but can be very useful in your project. For example, accepting all permissions by default without having to do it in your tests.
Example:
capabilities = {
   "appium:app": "project/builds/b1.103.ipa",
   "appium:automationName": "XCUITest",
   "appium:platformName": "iOS",
   "appium:platformVersion": 17,
   "appium:udid": 1R2TV3BD,
   "appium:deviceName": "iPhone",
   "appium:xcodeOrgId": "A1B5C3D5E2",
   "appium:xcodeSigningId": "iPhone Developer",
   "appium:useNewWDA": False,
   "appium:usePreinstalledWDA": True,
   "appium:updatedWDABundleId": "com.appiumApp.WebDriverAgentRunner",
   "appium:autoAcceptAlerts": True,
   "appium:noReset": True,
}
NOTE:
Some capabilities should not be combined since they might interfere with each other. See Reset Strategies for more details.
If you use
autoAcceptAlerts(iOS only), it could happen that some of the native app dialogs get accepted / declined when you don't expect it. You might want to avoid this capability and handle the dialogs within the test.If using
useNewWDA, it might not work as expected due to Apple restrictions.- Set it to true if you want to apply different startup options for WebDriverAgent for each session.
- It should be stable on Simulator. However, it gets tricky with real devices.
- For real devices it is better to have WebDriverAgent client installed manually, without having it reinstalled during each session.