It's hardware that makes a machine fast. It's software that makes a fast machine slow. — Craig Bruce
Jenkins is an open source automation server. It provides a multitude of plugins to support building, deploying and automating a project. Therefore, it is quite customizable and could differ from project to project. A job configuration will also depend on your project - how the project is set up, which plugins you want/have to use, which framework you are using, and so on.
Maybe the team is already using Jenkins, and it is configured to match the current way of work. In that case, you could probably reuse the current configuration, with minor tweaks.
This is just a short primer on creating a new job with a few examples.
There are multiple ways to set up a Jenkins job. For more information on Jenkins, check the official documentation.
Prerequisites
Jenkins should be installed and set up (plugins installed, connected to a VCS, etc.) on your machine.
You need an admin account to manage Jenkins' system configuration.
Creating a job
Log into Jenkins
Open Dashboard
Select New Item in the left-hand side menu
Enter the job name
- NOTE: Avoid using spaces since it may cause issues
- You might want to include the name of the VCS branch being used in the name of the job to easily distinguish it from other jobs
Select Freestyle project
- If you already have a job created, and you want to reuse its configuration, you can create a new item from an existing one
- In the Copy from field, type in the name of the branch from which you want to copy the configuration
Click OK
- The configuration page will open
Enter the job's description
- The description will be shown under the job name on the job details page
- It is useful when you want to quickly see information about the job without going into its configuration
In the Source Code Management section, select the VCS you want to use (e.g. Git)
In Repository URL, enter the link to your GitHub repository
In Branches to build, enter the branch you want to use when running the job (e.g. */main)
In the Build Triggers section, select the trigger option you want to use
In the Schedule, enter the cron syntax to specify when to run the job
- For example:
H 22 * * 1,3,5 - This will run the job on Monday, Wednesday and Friday starting at 22 PM
- For example:
In the Build Environment section, select Abort the build if it's stuck
- This is an important option since if the build gets stuck it might go on for days if not handled properly
In the Time-out strategy section, select Absolute
- In the Timeout minutes, enter after how many minutes you want to abort the job
- NOTE: This is just one of the approaches, and not the best one since the timeout is hardcoded. If the build normally takes longer than the specified timeout, the Jenkins will abort it
In the Build section, click the Add build step button and select Execute a shell
In the Command field, enter the commands to run when the job starts
- For example, you can specify a script and the commands to run when the job starts
./scripts/start_appium_server.sh
python3 -m pytest
In the Post-build Actions section, select an action you want to do after the job is done
- You might want to archive artifacts such as logs, zip or jar files
- You can also send an email notification with the job results
Apply and save the changes
Multibranch pipeline
In a Multibranch Pipeline project, Jenkins automatically discovers, manages and executes Pipelines for branches that contain a Jenkinsfile in source control.
This way, you can have different Jenkinsfile for each branch of the same project.
Prerequisites:
Jenkinsfileshould be added to the root of your project
Open Jenkins
Select New Item in the left-hand side menu
Enter a name for your pipeline/job
- NOTE: Avoid using spaces since it may cause issues
Select Multibranch Pipeline
Click OK
- A configuration page will open
Enter the job's description
- The description will be shown under the job name on the job details page
In the Branch Sources section, select the VCS you want to use (e.g. Git)
In Project Repository, enter the link to your GitHub repository
Save the project
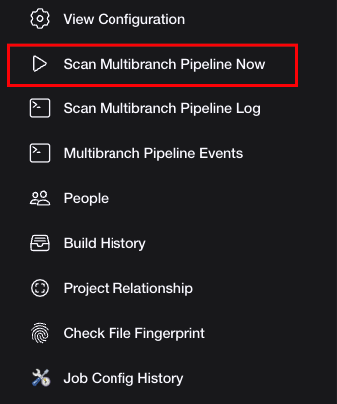
- Jenkins automatically scans the specified repository and creates items for each branch in the repository that contains a
Jenkinsfile - In case the scan does not start automatically, click the Scan Organization Folder Now / Scan Multibranch Pipeline Now in the left-hand side menu
- Jenkins automatically scans the specified repository and creates items for each branch in the repository that contains a
For more information on Jenkins Pipeline, check the official documentation.
How to start a job manually
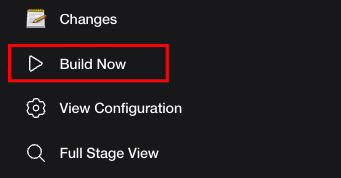
Open Jenkins
Click the job name to open its details page
Click Build now in the left-hand side menu
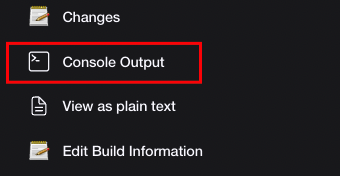
Check console log
Once the job is started, you will have access to the logs for that job. Open the console log to check the logs after the job is done. You can even check the log while the job is running since it's updated in real time.
Open Jenkins
Click the job name to open its details page
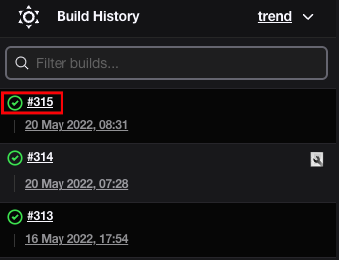
Open a build's details by clicking the build number in the Build History section
Click Console Output in the left-hand side menu