Fellow testers, we cannot not to find bugs.
What is git?
Git is a Version Control System (VCS). There are various version control systems, but git is by far the most popular one, both for individual and company use. On a very basic level, there are a couple of awesome things a VCS offers:
tracking changes in your files
the option to revert to a previous version
simplified collaboration on files and projects with other people
You should already have git installed on your Mac. To check the version, run the following command in the terminal:
git --version
In case you don’t have it installed, the command above will also start the installation the first time you run it.
Terminology
Repository (often called repo) is a location where your files and folders are stored.
Origin is the name of the originally cloned remote repository. The name origin is used instead of the repository's URL for easier referencing.
Main is the name of the default branch that git creates when first creating a repository. In most cases, main means the main branch. Sometimes you might hear or read about the master branch, which is the old default branch name that you can still see in some older projects.
The names main and origin are a standard convention and don't have a special meaning. Although they can be renamed to whatever you want, it’s better to leave them as it is.
Basic git commands
git init initializes a git repository. It can be used to create a new repository or to convert an existing directory into a git repository
git clone creates a local copy of a remote repository
git branch creates, lists or deletes branches (depending on the option it is used with)
git add prepares changes for commit, i.e. tells git which file(s) you want to include in the following commit
git commit saves the changes to your local repository. Think of it like clicking the Save button
git status shows the status of modified files
git pull updates your local files by downloading content from the remote repository. You use it when a team member has made commits to a branch on a remote repository, and you want to add those changes to your local environment
git push sends the changes (commits) made locally to the remote repository
git merge joins two or more branches together
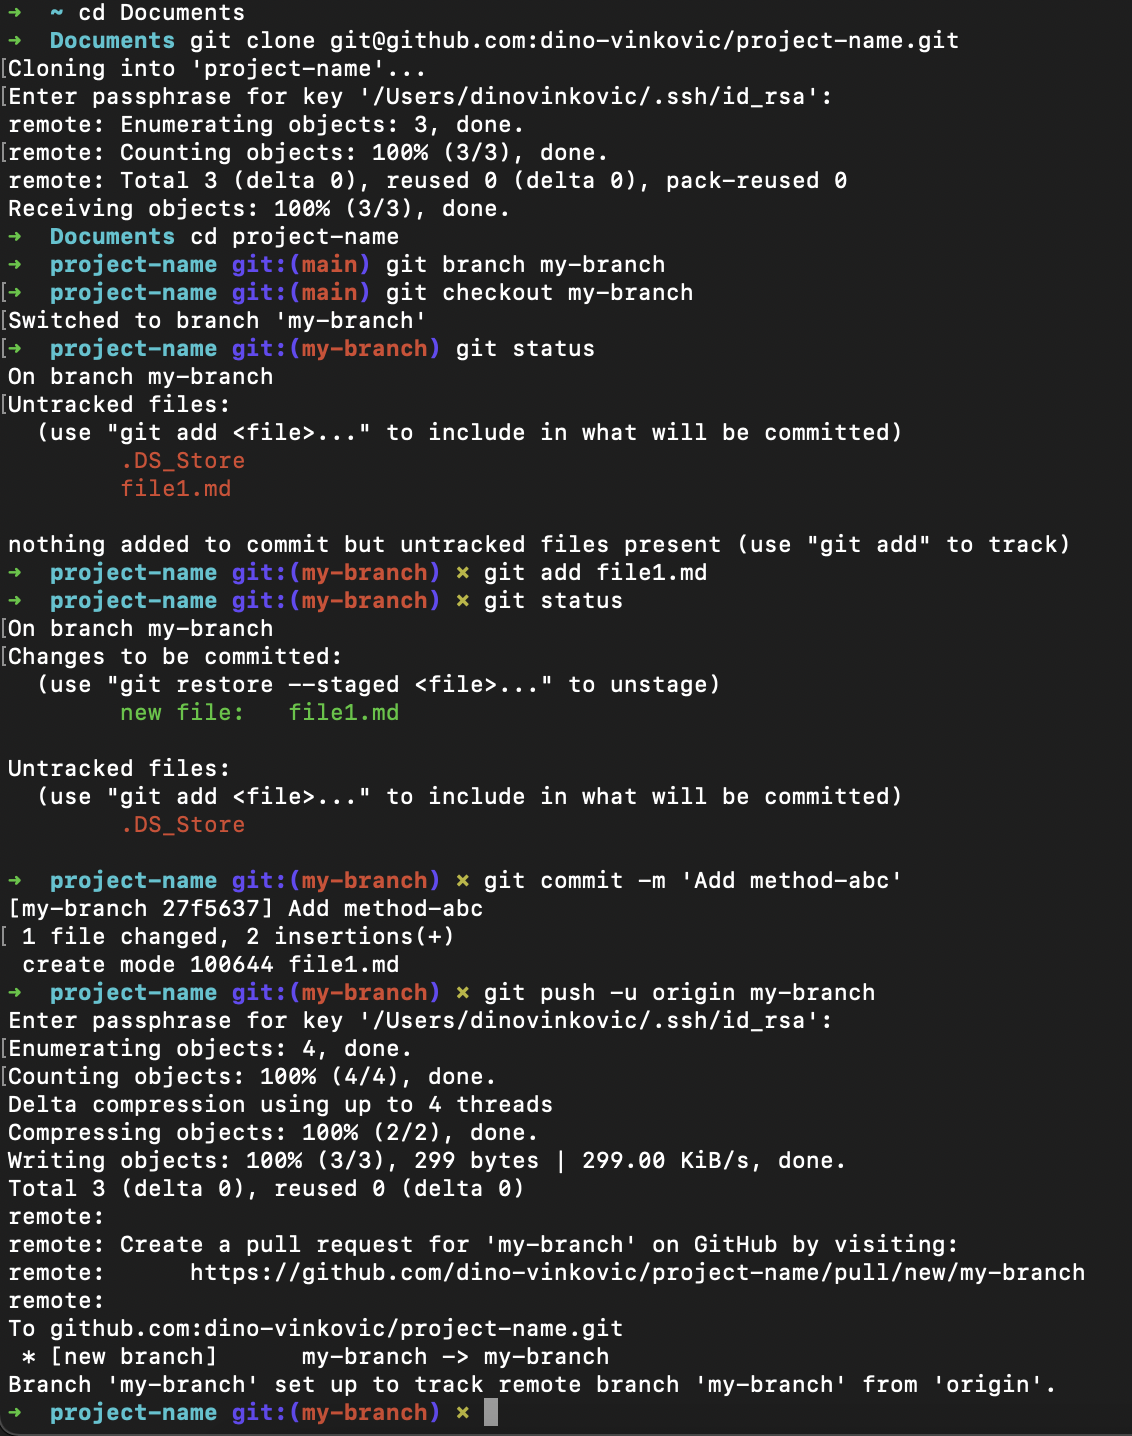
How to stage, commit and push changes
Once you have a local copy of the remote repository on your machine, you can start working on it. The first thing you want to do is create a new line of development, that is, create a new branch on which you will work (for more information on branches, check Using Git - Advanced). Afterwards, you can make the changes to your files, stage them, commit and push to the remote repository.
Create a new branch that will store your changes
git branch my-branchSwitch to the newly created branch
git checkout my-branchMake the changes, e.g. edit files file1.md and file2.md
Stage the modified files
To stage a single file
git add file1.mdTo stage all modified files
git add .
Check the status of the staged files
git statusCommit the changes (with an easy-to-understand message)
git commit -m "Add method-abc"Push the changes to the remote repository
git push --set-upstream origin my-branchgit push --set-upstream origin my-branchconfigures the relationship between the remote and your local repository when you push the changes for the first time. Later, you can simply usegit pullandgit push.
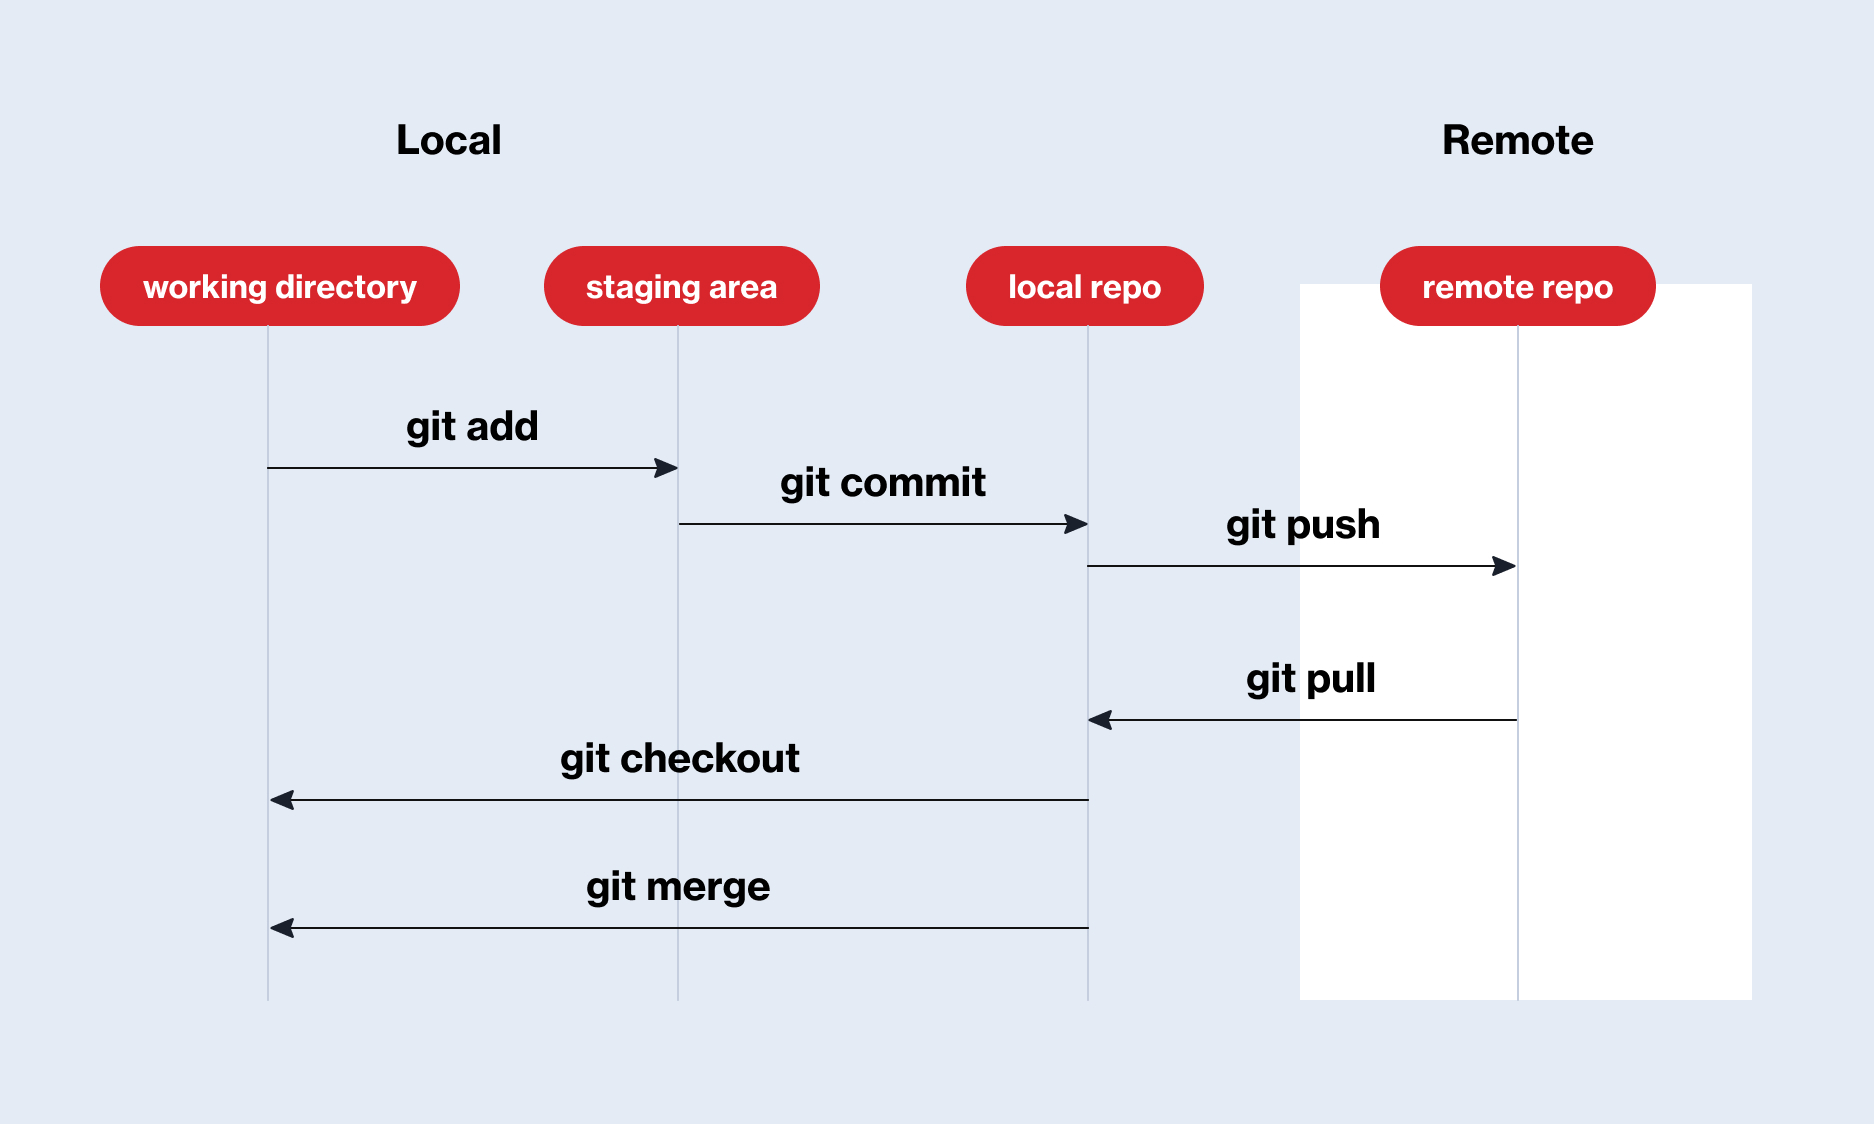
This is how a complete workflow would look like: