What is WordPress?
WordPress is an open-source Content Management System (CMS), often used as a blog publishing application, supported by PHP and MySQL. WordPress has many features, including a plugin architecture and a template system.
www.wordpress.org
On this website, you can download and install a script called WordPress. For this, you need a web host that supports minimal requirements and little time. WordPress is fully customizable and can be used for almost anything.
For additional information and tools mentioned in this article, check out the Eightsgift DevKit.
How to use WordPress?
There are several different roles a user can play. If you get an Administrator approach, you'll have absolute control of everything, the whole CMS system: adjusting settings, adding and changing content, installing plugins, themes, and many more. Of course, that also carries a lot of responsibility. You can seriously screw up something as the Administrator, and it can cost you dearly, so be careful.

To access the WP admin page, you have to use: {domain}/wp-login.php (e.g., https://infinum.com/wp-admin/post.php). The data entry page will appear, and you need to enter a username and password. After entering the correct data and clicking a Login button, you can access the WordPress system for content management/dashboard.
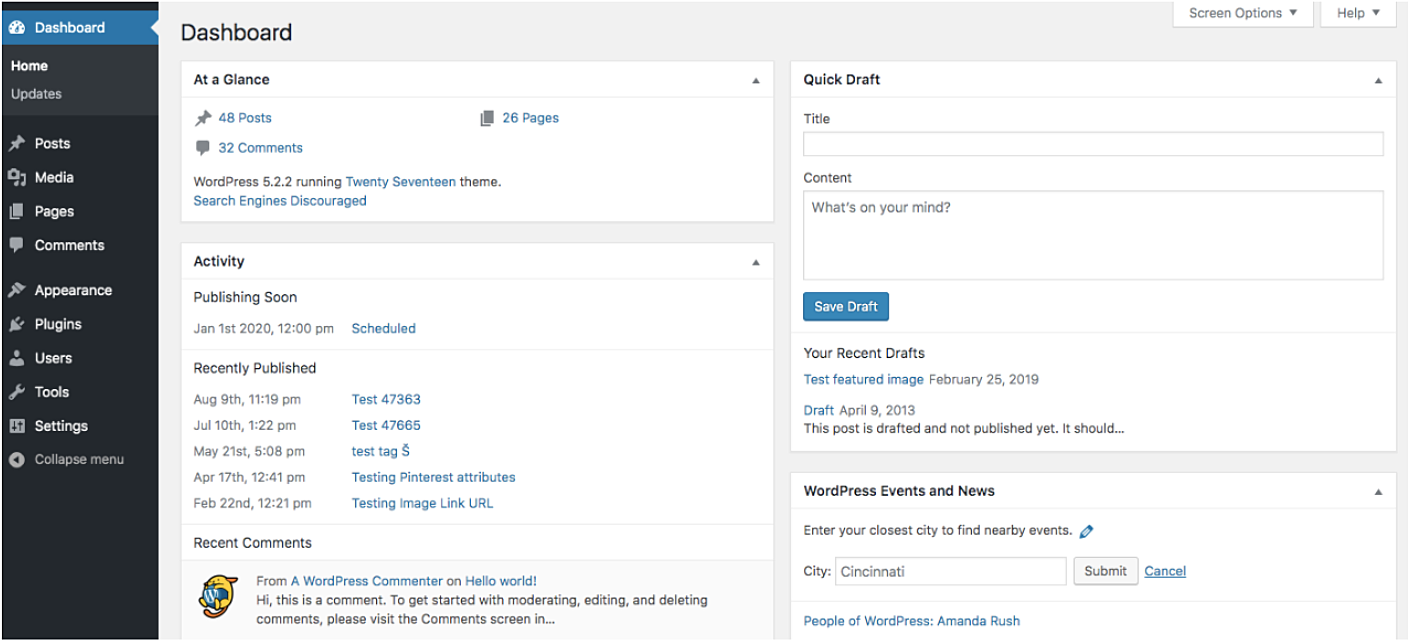
WordPress dashboard
The Dashboard is the centerpiece of WordPress. You can add new and edit existing content, upgrade your site with plugins, tools, create new users, and more. Depending on what you want to add to your website, you will choose a specific menu item.
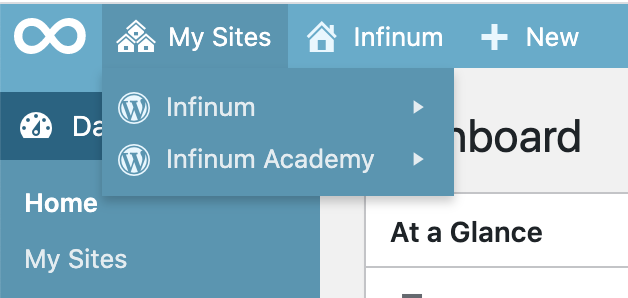
You can also use one dashboard for multiple WP projects by using multisite.
POSTS - used to create, publish and edit articles (posts), categories and tags. Each new post is automatically published on the front page as well. By setting categories on articles, you can select all articles of a certain category (on the page itself).
MEDIA - used to manage media files (images, documents, music files…) that you can add to articles or pages. The media library contains a display of all media files that you use in your system.
PAGES - Pages are the "static" parts. They are most commonly used for content that is rarely changed, such as the contact page, the "about us" page, etc.
COMMENTS - used to manage comments if you have enabled leaving comments. If you have set that you must approve the comment, you will do the same through this interface.
APPEARANCE - used to control the layout of the page itself (the theme you are using). You can change themes, add widgets, edit menus, edit the header and background through this part. If you know the rules of writing HTML, CSS, and PHP, you can edit your page by writing the code.
PLUGINS - Plugins allow you to increase the functionality of WordPress itself. Through this menu, you can manage existing add-ons, add new ones, or if you know how to program using editors (editors) to change certain properties yourself. There is indeed a multitude of plugins that you can download from the Internet; Moreover, you can download them through the WordPress system itself. After installation, they need to be activated, and most of them need to be further edited (adjusted). If you do something you don't like, you can deactivate it but also delete it completely.
USERS
Users bring a list of registered users and allow you to add new or edit existing ones. You can also set roles for users through this system. User roles are:
- Administrator - this role can do whatever they want with the system. That is why the Administrator should be only one person who is responsible for the site itself.
- Editor - a role that can write and publish their articles, but can also open and edit existing articles for editing purposes; This person can, for example, correct errors in texts or refine them, etc., and is a perfect role to set to QA.
- Author - a role with these rights can write articles and publish them. Because the person alone can publish an article without your permission, it is good that you truly trust that person.
- Contributor - a role that can write articles but cannot publish them.
- Subscriber - a role with no right to change the content on the page itself.
TOOLS
It brings tools that are useful for working inside and outside the system.
SETTINGS
Settings allow you to change your system settings. Things that can be set in settings are divided into General, Writing, Reading, Discussion, Media, Privacy, and Permalinks.
Gutenberg
Since the release of the 5.0 version, WordPress has a new default content editor. Named the WordPress Gutenberg editor during development, "Gutenberg" is now called the "WordPress editor" or "block editor". Gutenberg is the name of the project for the WordPress block editor, which replaced the TinyMCE editor. Gutenberg's main role is to manage the WP blocks. What does that mean? In essence, Gutenberg replaced one field for editing that the TinyMCE editor had with many individual blocks. These blocks allow you to create more complex designs than those in the old classic Editor.
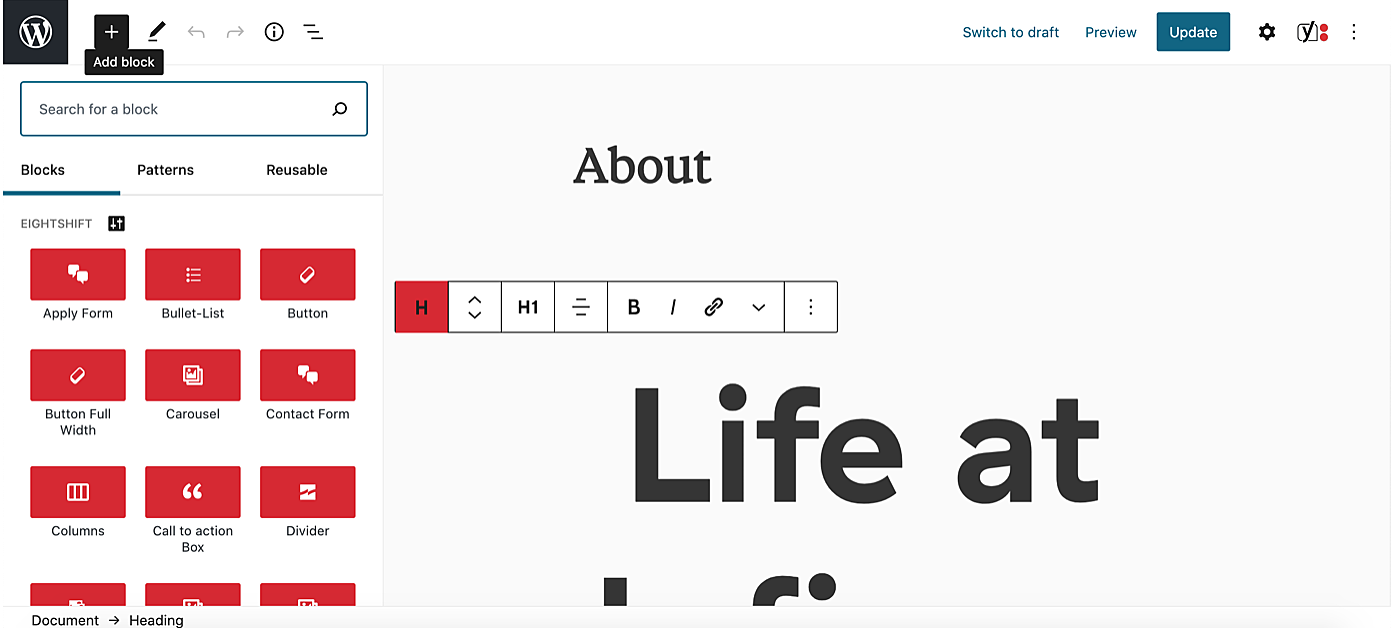
What is a block? A block can be almost anything. For example, you can have blocks for text, images, video, buttons, widgets, tables, etc. And most importantly, developers will be able to create their blocks that you can access via plugins. Now you can create WP content just like you use LEGO cubes.
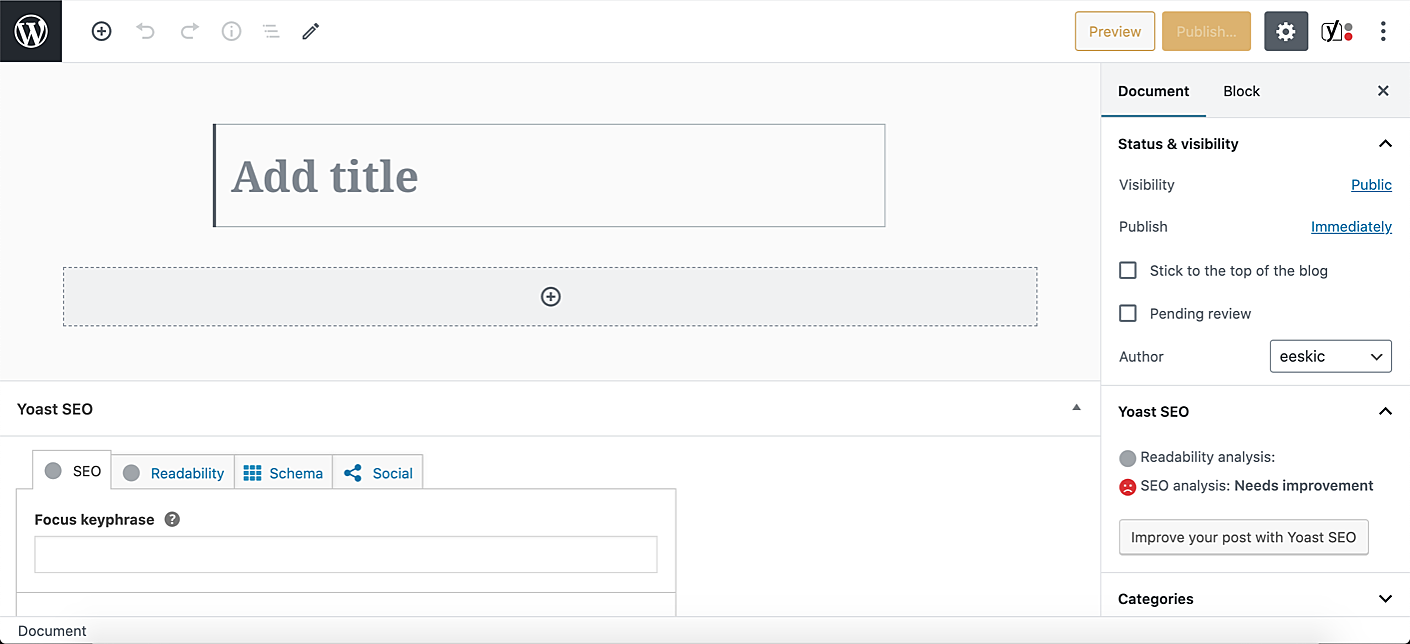
Adding blocks
![]()
You can add a block by clicking on the icon in the top left corner. You can search for the block you want to add and choose it. When you select a block, you will get the block editor on the right side of the screen to adjust various setups regarding that block.
Add and edit new content
WordPress has two main types of content:
- static page(s)
- article (post)
WordPress posts have a publication date and are displayed by date on the site's blog page. On the other hand, pages are constant content on your site. These can be pages like "About us" or "Contact". Pages are not affected by the time they are posted.
The article or page itself can, of course, have images and videos in various formats; Once written article or page can be re-edited, refined, and saved for future publication or, of course, deleted. If it is your role other than the Administrator will have rights as described earlier.
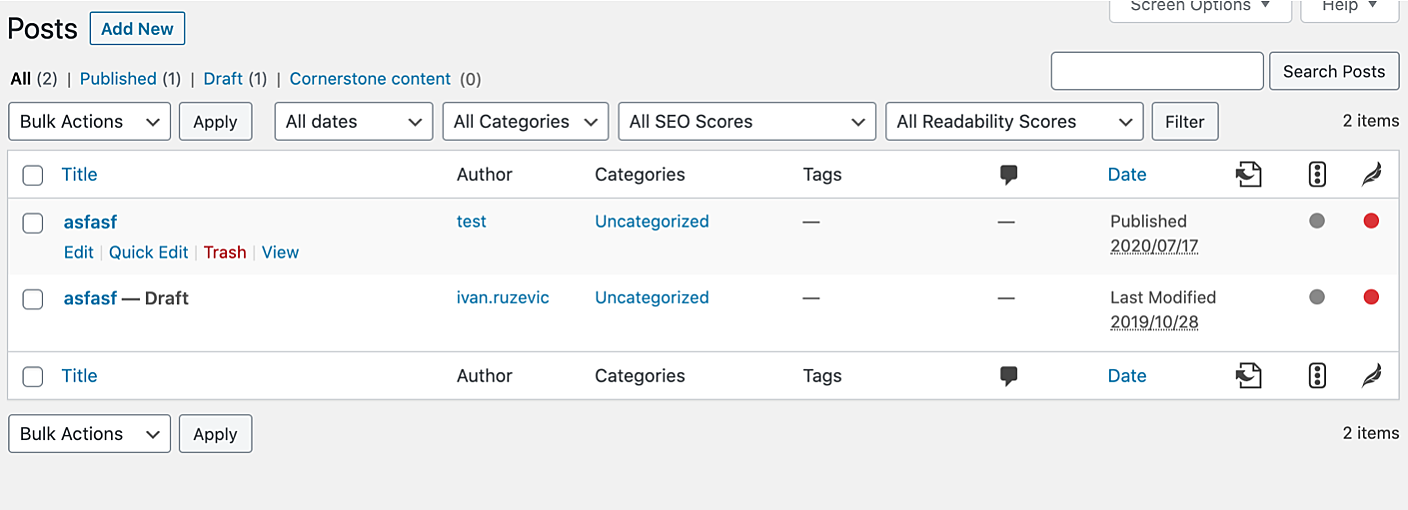
Adding new content
To add a new post, select Posts from the menu, then Add new. In front of you, a window as in the picture will open. To save, press the publish button. To add a new page from the menu, select Pages and Add new.
Editing content
To change the content of previously written articles, select Posts, and hoover on the article you want to refine or modify. The Edit option allows you to open the entire article, as when you wrote it. For fast changes, use Quick Edit. Trash deletes your article, while with the View option, you can view the article.
Useful WordPress plugins
The most common WordPress plugins, which are also used on Infinum web, are:
Contact Form 7 - Contact Form 7 is used to manage multiple contact forms and allows customization to the form and the mail contents flexibility with simple markup.
Advanced Custom Fields PRO - Advanced Custom Fields PRO is used to add fields in admin dashboard settings.
WP Rocket - WP Rocket is a cache plugin used for caching the WordPress page.
Dashboard monitor - This is Infinum's plugin used for checking errors within the code.
Yoast SEO - Yoast SEO is used for search engine optimization.
Redirection - Redirection plugin is used as a redirect manager for WordPress. It manages 301 redirections and keeps track of 404 errors.
How to use WordPress for frontend testing?
Frontend testing in WordPress is crucial to ensure that changes made to the website work correctly for users and maintain a smooth user experience. As a QA tester, your focus should be on verifying both the visual appearance and functionality of the content you've added or modified. Here are some essential steps to perform frontend testing effectively:
Staging Environment Testing: Before applying any changes to the live site, it is highly recommended to conduct frontend testing on a staging environment. Staging environments are replicas of the live site where you can test changes without affecting the actual users. This allows you to catch any issues before deploying updates to the production site.
Responsiveness and Cross-Browser Testing: WordPress websites need to work flawlessly across various devices and browsers. Test your website on different screen sizes, including desktops, laptops, tablets, and smartphones. Check compatibility with major browsers like Chrome, Firefox, Safari, and Edge to ensure a consistent user experience.
Functional Testing: Verify that all website functionalities are working as intended. This includes checking navigation menus, buttons, links, forms, and interactive elements. Test form submissions to ensure they reach the correct destination or database.
Images and Media Testing: Confirm that images and media files load correctly on all devices and that there are no issues with broken images or slow loading times. Optimize image sizes to improve website performance.
Content Layout and Styling: Ensure that content is displayed correctly, with appropriate fonts, colors, and spacing. Check for consistency in design elements across different pages.
Mobile Testing: Given the increasing use of mobile devices, it's essential to test your website thoroughly on various mobile platforms. Check for mobile-specific issues such as touch functionality and mobile menu behavior.
Accessibility Testing: WordPress websites should be accessible to all users, including those with disabilities. Use tools like screen readers to test the website's accessibility and compliance with accessibility standards (e.g., WCAG).
Performance Testing: Assess the website's performance and loading speed. Use tools like Google PageSpeed Insights or GTmetrix to identify performance bottlenecks and optimize the website accordingly.
Cross-Platform Testing: If your website includes additional platforms, such as mobile apps or integrations with third-party services, perform cross-platform testing to ensure seamless integration and functionality.
Version Compatibility: After updating WordPress or plugins, retest the frontend to ensure that everything is still working correctly. Sometimes, updates can cause compatibility issues that affect the frontend.
Regression Testing: Whenever new features or updates are introduced to the website, conduct regression testing to ensure that existing functionalities are not adversely affected.
Bug Reporting: If you encounter any issues during testing, document them thoroughly and report them to the development team. Include steps to reproduce the problem, screenshots, and any other relevant information to aid in debugging and fixing the issues.
By following these frontend testing practices, you can ensure that your WordPress website functions smoothly, looks appealing, and provides an excellent user experience to your visitors.
As QA, you will be testing the visual and functional things regarding WordPress. You will need to make sure that any content added or changed is looking good on the frontend. It's recommended you always do this on staging first and later do a production re-check. For example, if you are testing buttons, you can edit that button in WordPress in various ways such as its width, height, text, or color. Whenever you are testing anything on the frontend, you should make sure no content on any screen is overlaying with each other. Sometimes you will have to test forms on WordPress. You can test a form by checking its visual display on the page in various viewports, and you should also check if that form is working. You can test it by checking which plug is in use for forms, and there you can check if the form was successfully sent, e.g., Hubspot.
WordPress - common bugs
The most common bugs you will probably encounter while testing WordPress are:
Issues with uploading images in admin - sometimes you will notice that the page's images are missing, or you cannot upload new ones. When you try to upload an image, you get an error. Firstly, check your role and capabilities. If you have a role that can edit images, then Congrats!, you found a bug.
Images displaying on frontend - very often, you will encounter a problem with images not being displayed properly on the frontend or not displaying at all. You might encounter a lazy loading problem with images as well. If you notice images are taking a lot of time to load, the issue might also be:
- Larger picture
- Slow internet speed
- Server performance issues
User role capabilities - sometimes, you will encounter an issue regarding the capability the user role should have, but it's missing. For example, the admin role does not have all capabilities (e.g. the role has problems with post-editing). The best solution is to have a list of capabilities for every role and test each of them. You will need WP dev, who's probably the admin role, to change your roles while testing.
Content display on different screens - even when our developers use a wrapper that gives them the options to set how the block behaves on your cell phone, tablet, and large displays, it is common that the block doesn't behave as expected, so it's very important to check both small screens and very large screens.
When WordPress gets an update, it's common that some things break during that process. The best way to test an update is to do a smoke test of the entire wp-admin and frontend. Ensure user roles still have the capabilities they should have and that nothing is looking funny on the front. Also, check the forms on your page because some common issues are related to form behavior. Depending on the update, different issues can occur. For example, on our Infinum web, when we updated to 5.5. WP, we lost all of our images because lazy loading was added. On this page (https://wordpress.org/news/category/releases/), you can find the version you update from and the version you update to and fly through the new changes on each version in between.
Although WP plugins can be useful, they are often avoided because the integration can be quite challenging and can slow down the web. Plugins you can find on almost any Infinum wp projects are Yoast, WP rocket, and Advanced custom fields Pro. There can be a situation where plugins aren't compatible, but this depends on a case-by-case scenario. You can find the list of incompatible plugins here.
What do you need to know before WordPress testing?
- You need to test both WP admin and frontend.
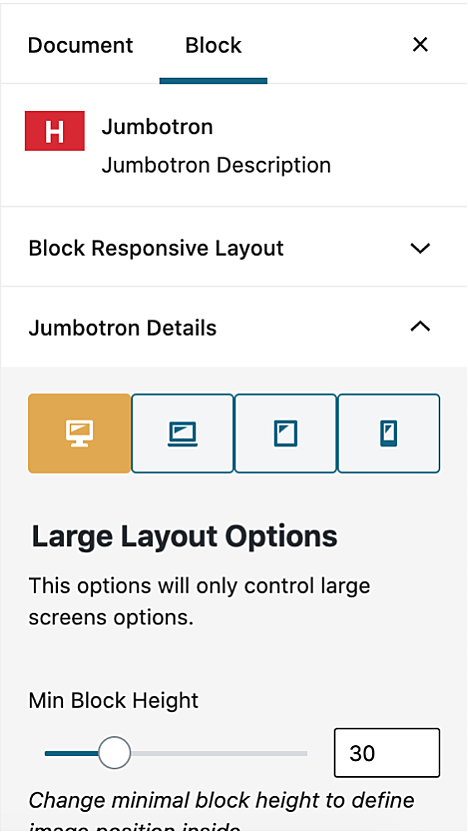
- Pages are created not by design but by blocks and components.
- Every block is adjustable.
- Some values are hardcoded.
- Test every block independently.
- Create new page for QA only.
Testing WordPress Forms and Integrations
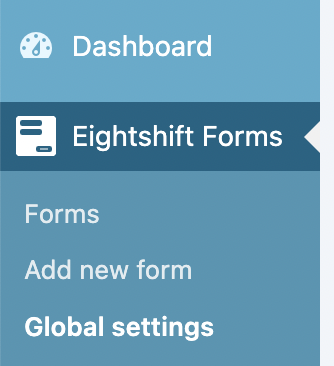
Testing WordPress forms and integrations is essential to ensure that these components function seamlessly and provide a smooth user experience on your website. Integrating popular services like HubSpot, MailerLite, Workable, Mailchimp, Goodbits, Moments, and Jira can enhance your website's functionality and streamline various processes. Everything regarding forms can be found in admin's menu under eightshift forms.
Here are some guidelines for testing WordPress forms and these integrations:
1. WordPress Forms Testing
Form Functionality: Test all types of forms used on your WordPress site, such as contact forms, subscription forms, feedback forms, and registration forms. Verify that all form elements, including text fields, checkboxes, radio buttons, dropdowns, and submit buttons, work as expected.
Form Validation: Check form validation for required fields, email addresses, phone numbers, and other input formats. Ensure that users receive appropriate error messages for invalid submissions.
Form Submissions: Verify that form submissions are correctly processed and saved to the database or sent to the designated email addresses. Check that confirmation messages or redirect pages appear after successful form submissions.
Confirmation Emails: For forms that trigger confirmation emails, test whether the emails are sent promptly and contain the correct information.
Form Security: Test the forms for security vulnerabilities, such as SQL injection, cross-site scripting (XSS), and cross-site request forgery (CSRF). Implement security measures to protect user data.
File Uploads: If your forms allow file uploads, ensure that the uploaded files are processed correctly and securely.
Spam Protection: Implement anti-spam measures, such as CAPTCHA or honeypots, to prevent spam submissions.
To get more falimiar with testing WP forms, check out this video tutorial from Eightshift Development kit.
Getting familiar with Eightshift forms
Step-by-step guide to creating your first form
2. Integrations Testing
HubSpot Integration: HubSpot integration in WordPress allows seamless lead capture and customer relationship management. It is used to collect and manage user data, enabling personalized marketing efforts.
- Standard Testing Steps:
- Verify that lead capture forms are displayed correctly on the website.
- Submit test leads and check if they are successfully synchronized with HubSpot's CRM.
- Test automated email marketing campaigns triggered by form submissions.
- Ensure that data is accurately synced between WordPress and HubSpot.
MailerLite Integration: MailerLite integration facilitates email marketing automation and subscriber management for newsletters and campaigns. It streamlines the process of reaching out to users with targeted content.
- Standard Testing Steps:
- Confirm that user subscriptions through WordPress forms are accurately added to the designated MailerLite lists.
- Test automated email campaigns to ensure they are triggered and delivered correctly.
- Check for any data syncing issues between WordPress and MailerLite.
Workable Integration: Workable integration in WordPress simplifies the job posting process and candidate application tracking. It helps manage the hiring process more efficiently.
- Standard Testing Steps:
- Verify that job postings are displayed accurately on the website.
- Test the application process by submitting test job applications.
- Ensure that candidate data is seamlessly processed and organized within Workable.
Mailchimp Integration: Mailchimp integration allows WordPress websites to manage newsletter subscriptions and automate email marketing campaigns for targeted audiences.
- Standard Testing Steps:
- Confirm that newsletter subscription forms work correctly on the website.
- Check for successful synchronization of subscriber data between WordPress and Mailchimp lists.
- Test automated email campaigns triggered by specific actions.
Goodbits Integration: Goodbits integration in WordPress simplifies the creation of newsletters using curated content from WordPress, making it easier to engage subscribers with quality content.
- Standard Testing Steps:
- Verify that content from WordPress is accurately pulled into Goodbits for newsletter creation.
- Test newsletter customization options, such as layout and styling.
- Check for successful delivery of newsletters to subscribers.
Moments Integration: Moments integration enables automatic sharing of WordPress content on various social media platforms, streamlining content promotion efforts.
- Standard Testing Steps:
- Test the integration's connection with social media accounts for content sharing.
- Ensure that WordPress posts are shared correctly on social media channels.
- Check for any issues with post formatting or link sharing.
Jira Integration: Jira integration in WordPress facilitates seamless issue tracking and project management, making it easier for teams to collaborate on development tasks.
- Standard Testing Steps:
- Test the integration's ability to create and sync issues from WordPress to Jira.
- Verify that updates made in Jira are correctly reflected in WordPress.
- Ensure smooth communication between WordPress and Jira platforms.
To get more falimiar with testing WP integrations, check out this video tutorial from Eightshift Development kit.
Integrating third-party services
Syncing your forms with third-party integrations