Flavors are different versions of an app, with the same structure but changed looks. The differences vary from color palettes to completely different branding, including logos, fonts, and other visual elements.
Apps that can be utilized for different brands or industries are often made to support multiple flavors. We’ll go through an ideal workflow for easily creating multiple flavors based on quite a bit of experience working on B2B enterprise apps, each customized for a specific business.
The base flavor
First, let’s create a version of the app where we define the style guide, the design system (including all components and their states), and all screens. This is either a non-branded version or one for a brand that will have the app first. Let’s use this simple app for a pastry shop as an example. We created a comprehensive Figma file that consists of everything we need. That’s why we are turning that file into a library.

Colors
It’s essential to define a color palette with all the colors we will use in the app. That color palette will be changed for each brand, so each flavor will have its own palette. We can add some gradients to the palette as well.
Palette

We can define some colors that stay the same across brands, usually white and some grays. Maybe some signal colors as well (error, warning, success).
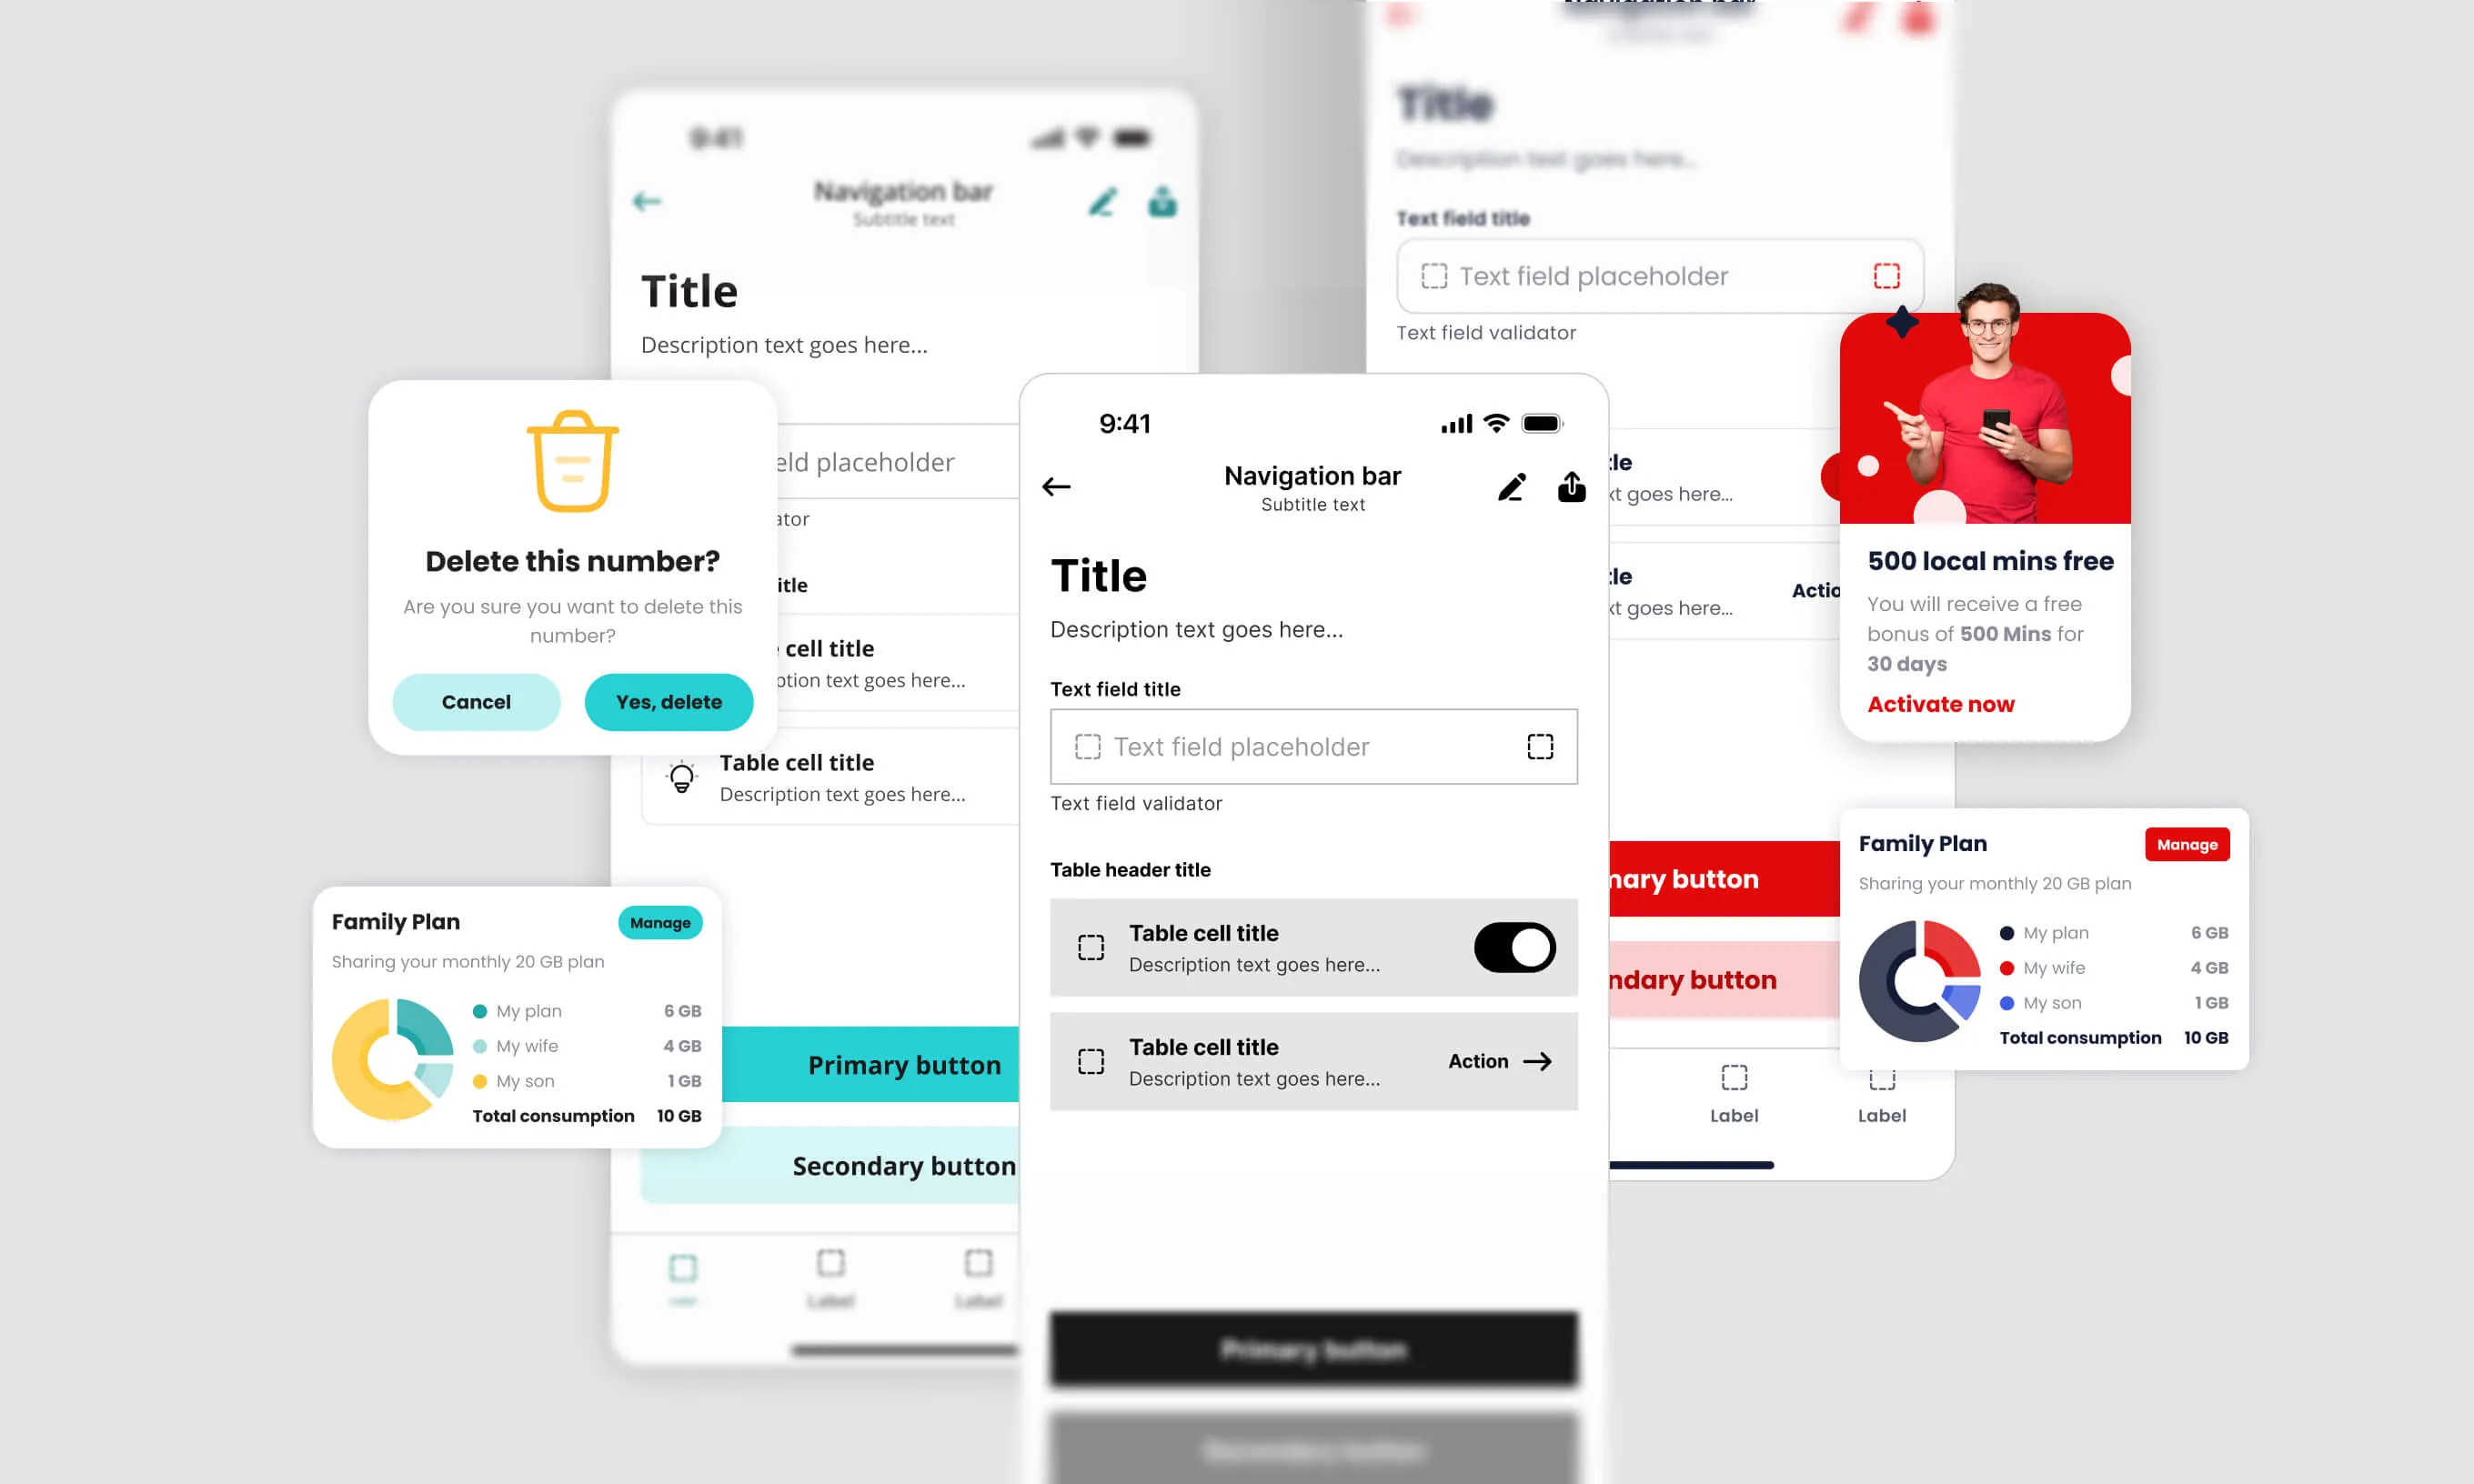
For example, we imagined two different brands, a restaurant and a fruit store.
For each brand we defined 6 color styles:
- primary
- secondary
- item color 1
- item color 2
- item color 3
- background-color-style
File setup and adding other flavors
To create more flavors based on the first one, we need to create a new file in the same project. From there, we have two ways to create the UI for other flavors in the new file.
The first way: Instances of screens
We can create some key screens from the original flavor file as components and add their instances (child components) to other UI flavors. That way, all design changes on the master components are inherited by other flavor files. Nothing is detached from the library. After that, we can select all screens and change colors from one brand to another.

The other way: File duplicates

The other way is to copy all screens on each Figma page and paste them to a new brand’s file, with the same color switching (manually or with a plugin).
The drawback of this method is that there is no connection between the child screens, so keeping all flavors updated requires some work. It’s good practice to leave a note when all instances of a screen for other brands are up to date. Usually, when I’m doing some design changes on a screen, I note that all changes are applied to other brands, and I put it back after I make sure all screens are up to date.

Minor adjustments
To switch other assets (logos, photos, illustrations, or icons) to the new brand, we need to do it one by one since there is no way to do that automatically in Figma.
However, if everything is set up well, including organizing everything using Variants, that should be pretty easy. We just go screen by screen and change a variant to the one that fits the flavor.

Fonts
Currently, Figma does not support swapping text styles on multiple screens at once. However, the Themer plugin can do it for us. One thing to keep in mind is that one structure and layout might not work for a wide range of fonts, so we have to choose fonts keeping their proportions in mind. That’s why I advise using the same typography for all flavors. If that is too limiting, one text style can be used for all body text in the app, while subtitles can be custom-made for each flavor. This way, less stuff can go wrong when we create new flavors.

Graphic assets
For icons, it’s best to use the same icon set for all flavors. That way, we don’t need to pay attention to having distinct icons for each flavor. For illustrations and some other assets, it’s good practice to organize them in Figma Variants, with the brand being one property. That way, we can quickly swap different versions of the same asset.

Assets export
It’s important to name all assets in Figma properly so you can quickly navigate through them. When you select all these assets and export them, they will be organized in a folder structure according to the names in Figma. That is very useful for developers since they have their own project folder file structure for each platform. This means that they will have to place each asset into the belonging folder manually. That could get tiring when they have to place all assets for a new flavor.
Pro tip for easy handoff

I found it useful to create instances of all graphic components in a naming structure that corresponds to the file structure in the project folder for development. When we export these assets, they are already organized in folders as they are in the development project folder. This makes it very easy to import all assets in a project.
Conclusion
One of the things that are very important regarding the white-labeling process is to be consistent across different flavors. When we change something in one version, it’s important to do the exact change in other versions as well. Otherwise, we can quickly lose track of what is up to date and what is not. Luckily, this process helps us easily adapt complete UI across different flavors.
Take a look at how a file should be set up for the easy creation of new app flavors. Using this example, we explain the optimal approach for creating whitelabel apps in our post.