Have you ever wondered how to build a framework or a library? Or how a particular library actually implements all the wonderful functionalities that are available? At Infinum, we are big believers in learning by doing, and if we are not happy with the tools available, we build our own.
This is how we decided to make learnReact, an open source learning exercise for teaching developers the inner workings of React.
Like all good craftsmen, we don’t want our developers only to know how to wield the hammer. They should also understand how the hammer decides which components should be rerendered in the DOM when a state changes.
Building on learnQuery’s legacy
Several years ago we launched learnQuery, an open source learning exercise for teaching developers the basics of JavaScript by building their own jQuery clone. It has its own story.
Since then, learnQuery has become an integral tool for Infinum’s JavaScript team. It is a rite of passage for all new members joining our team, a baptism by fire, you can say. Or perhaps baptism by event bubbling, to be more precise. Not only that, we’ve also been using learnQuery as a learning tool to teach students about JavaScript at our Infinum Academy for years.
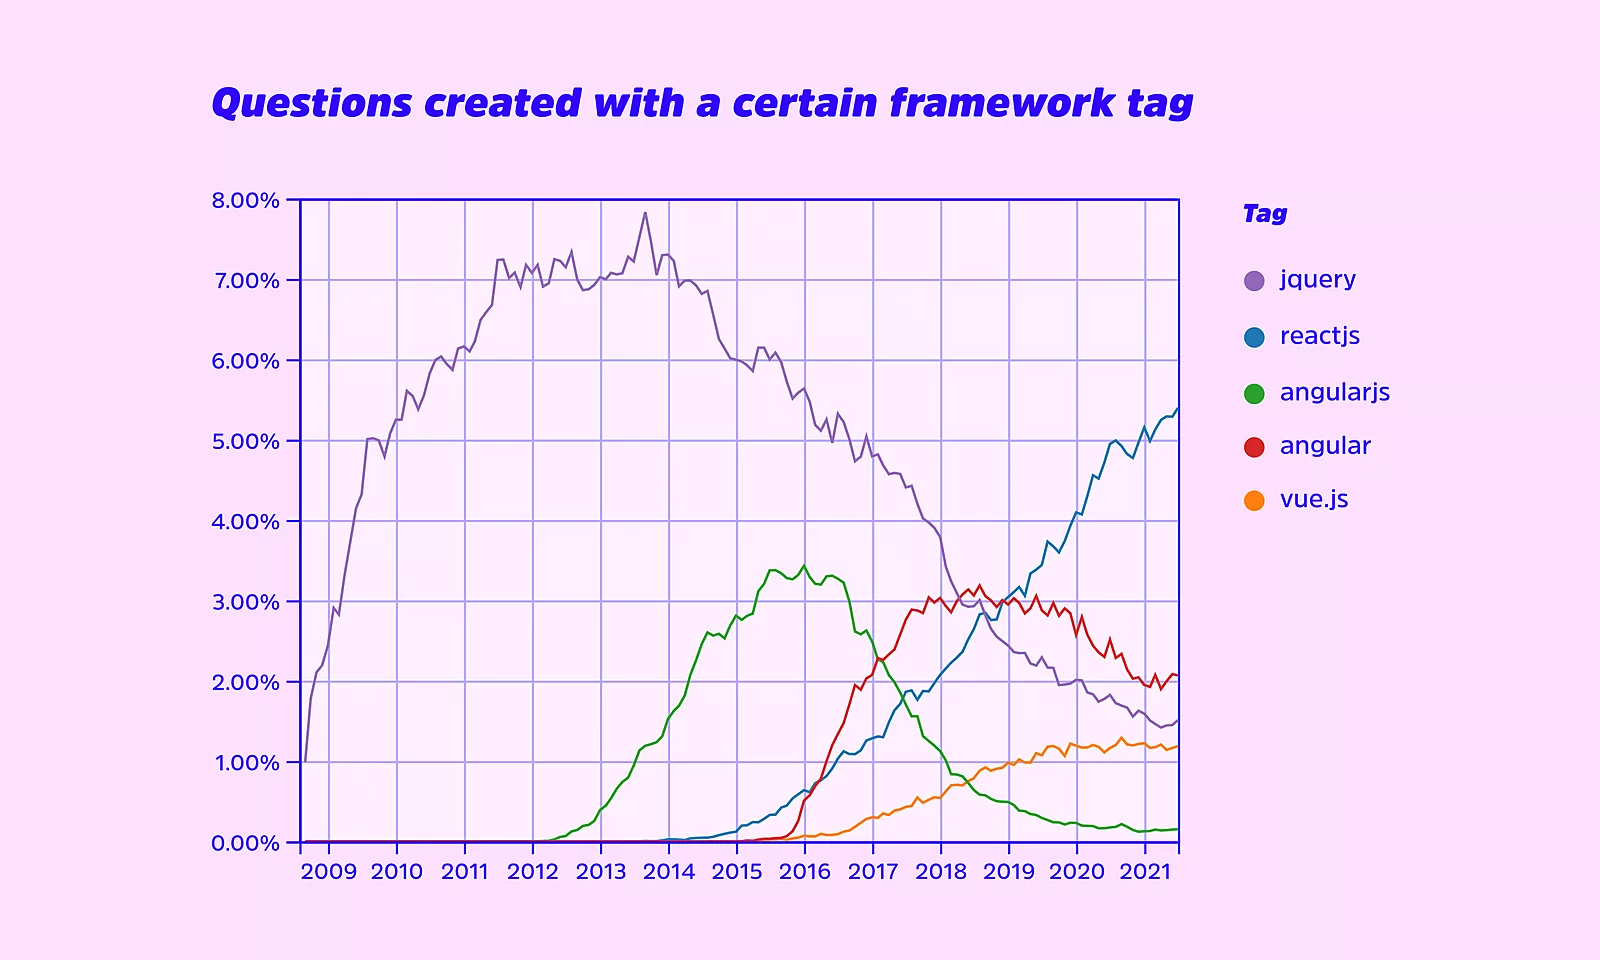
LearnQuery popped the hood on jQuery, exposed the pure JavaScript code, and changed our whole way of thinking about how code can and should be written. Even though learnQuery tasks focus on understanding the core concepts of frontend development, jQuery is no longer one of the main tools used at Infinum. New times call for new tools and that is how the idea of learnReact came to be.

Building blocks
Structure
LearnQuery was very straightforward in its structure. In most cases, you wrote tests, created methods needed for them to pass, moved on to the next task.
With learnReact, things are not so linear. Each task builds upon the previous one and you often have to add implementations from past tasks or rewrite them so that they cover the new requirements.
Instructions
This required us to add some concrete instructions. In every task, we specify which files should be worked on and should you revisit some of the past implementations. To get the learner used to a project’s directory structure, we also placed some placeholder utility functions in the util folder. They can be used as clues to find out how to proceed on a given task.
Tests
But how will you know that the code you wrote actually works? You will need to write the tests as well. Tests are an integral part of development and this is a great opportunity to get more comfortable with them. If you never wrote them, this is as good a time as any to start. For each task, we provide the requirements your tests have to cover, but their actual implementation is down to you.
Here is an example of a placeholder test:
test(“When the button is clicked, the function assigned to an onClick event is triggered”, async () => {
  // YOUR TEST GOES HERE
});
Playground
However, the functionalities you are developing within learnReact are not trivial. The tasks cover certain aspects of a framework that can be pretty abstract. Sometimes it’s hard to imagine what you’re ultimately building based only on code and passed or failed tests.
People imagine and develop things in different ways, so we’ve set up a playground. You can build a simple page structure with the components you created there, which makes troubleshooting much easier.
The project’s readme file provides instructions for the tasks, but it also gives a few tips about the project itself. Less experienced users can benefit from a little more guidance. We included helpful links on how React works, how to write tests in Jest, and how Babel uses the createElement function you created in the first task when JSX is used in the tests.
Scope
The learnReact project should give you a better understanding of how React operates.
We start off with the basic building blocks of the web – elements. In the first task, we start simple with creating an element and rendering it. The second task covers the events triggered on these elements. Finally, in the third task, we cover how the state works and how it changes when we use setState.
After we’ve covered the basics, we tackle the more reactive part of React. In the fourth task we take a crack at components, virtual DOM and rerendering of components. The last task introduces hooks, giving us an insight into functional components as well.
The adventure begins
LearnQuery fans will be happy to know that the Fibonacci example function makes a comeback in learnReact. The function and the accompanying tests give a concrete example of what the code should look like and at the same time make a nice introduction to the project.
LearnReact is best served with a mentor on the side, but it’s not mandatory. Each new team member that will tackle these tasks as part of their onboarding will get one, though. Another pair of eyes on the code is always good, even for experienced developers. Discussing core functionalities of React and understanding them is what makes us better developers.
To tackle the tasks, you’ll need some understanding of JavaScript and React, but most of all, you’ll need to be persistent. Even if they seem easy, creating your own library is no walk in the park. If it takes you longer than you expected, bear in mind that every minute of struggle brings new knowledge if only you stick with it.
Good luck, learnReact
The aim of this project was to expand and enhance our onboarding process. By giving more specific tasks to our new team members who will be working with React, we help them establish a closer connection to it.
LearnQuery is still very viable and a strong part of our toolset because knowing pure JavaScript is useful in any framework. We hope that learnReact will join it in its long tenure and help grow our development team further.


