In this piece aimed at veterans and newbies, I’ll go over some practices and tips that will make you a better Sketch user.
If you’re new to the world of digital design, Sketch is the best tool for screen design on the market. We do a lot of mobile and web design work here at Infinum and Sketch fits right into our workflow. It’s fast but powerful, and you can learn the basics in a few days.
Mastering Sketch takes a bit longer, and that’s what this article is about. In this piece aimed at veterans and newbies, I’ll go over some practices and tips that will make you a better Sketch user.
Organizing your Sketch file
If you take anything away from this post, it should be this – leave no messy files behind. Doing so wastes your developers’ precious time, and you’ll hate yourself if you have to do some maintenance on your design files a few months down the road.
Use pages
Start by dividing your design into pages. Pages live in the left sidebar of Sketch and are hidden by default. Expand the menu to add extra pages.
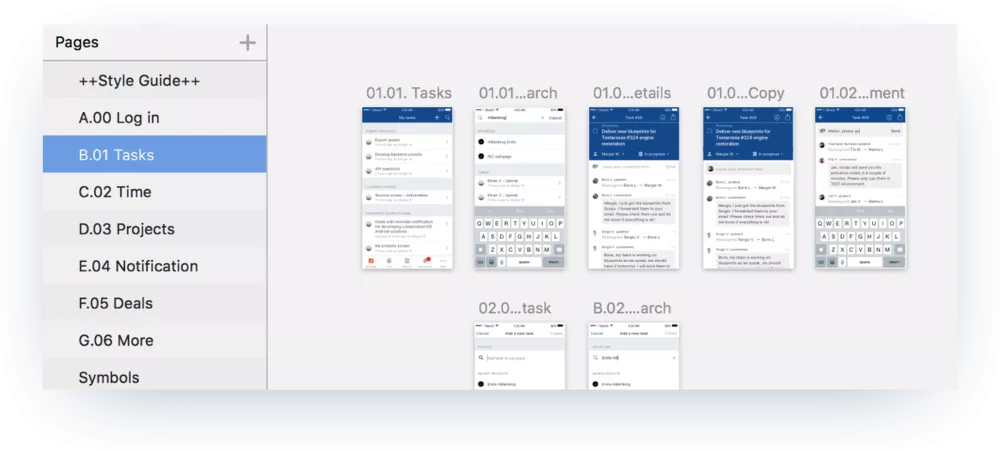
I recommend keeping every major part of the app/website in its own page while dedicating a special page for styles.
Create a style page in the wireframing phase. That way you can easily apply style changes across the entire design later on.
Name your artboards and layers
Naming your artboards allows you to export them in the exact order you want. It also makes things easier when browsing exported screenshots.
I name my artboards in the following format: 0X.0Y (X being the page, and Y the position of the artboard on that page).
Let’s say I’m working on the 01. Tasks section of the app. I’ll name my artboards.
For overlay screens, I append a, b, c etc., to the artboard name.
On the other hand, naming your layers will ease up navigation inside your file. The best time to do this is right after you create a layer. I know it’s a pain, but you’ll thank yourself later.
You can also add a foldername/ prefix to your artboard name to automatically create folders when exporting
Shared Styles and Symbols
Styles and symbols are one of the best things in Sketch. This is where our dedicated page for styles will come in handy. Also, from Sketch 3.7 onwards a page containing all of your symbols is created automatically.
Shared Styles
Shared Styles are applied to layers. Modifying a style on one layer affects all the layers with the same style applied.
Setting up a Shared Style is straightforward:
1
Select the layer whose properties you want to save as a style
2
Click on “No Shared Style”
3
Select “Create New Shared Style”
Don’t forget you can make changes to a style without applying them to all layers that share that style. This makes it really easy to try things out without messing up your file. If you like the change, click on the “refresh” icon to apply it to all layers with this style.
Symbols
A symbol is technically a group. You’ll notice the difference between a symbol and a regular group when trying to modify it. Changing one symbol affects all instances of that symbol. It is similar to styles, but has much greater consequences.
Symbols got major upgrades in the latest Sketch 39 update. It’s now possible to resize symbols without affecting other instances of the same symbol. Also, you can define how each layer inside of a symbol or a group behaves when resizing.
For now, let’s create a symbol out of a group.
1
Select your group
2
Click on “Create Symbol”
3
Click OK
Now you can easily edit your symbol and have changes propagate through all other instances of that symbol.
You can root symbols by using the prefix rootname/ when naming them. For instance, button/blue and button/green. You will be able to access both buttons via one symbol.
Bounds
Bounds are layers used to standardize the dimensions of your design elements. I primarily use them when designing icons and list items.
Let’s set up some bounds.
1
Create a new style with 0% opacity Fill and name it “bounds”
2
Create a layer with the desired dimensions and send it to the back of the group
3
Set that layer style to “Bounds”
When using bounds in list items, you get perfectly sized groups that are easy to arrange in long lists. If you add bounds to your icons, they will all have same dimensions. This makes things easier for you when exporting and for developers when implementing your design.
Shortcuts
You’re not a real Sketch master until you hate to use the mouse while working. Shortcuts are the bread and butter of every power user. You’ll get more done in less time.
Increase/decrease layer size
⌘CMD + ⬆️ / ⬇️ / ➡️ / ⬅️
That is my absolute favorite shortcut in Sketch. It is used to easily change the size of any layer with your keyboard. Be precise or add ⇧SHIFT and go 10px CRAZY.
Copy/paste style
⌘CMD + ⌥ALT + C/V This one might not seem as much, but it can really improve your workflow. It’s especially useful when applying styles to a large number of layers.
Paste in place
⌘CMD + ⇧SHIFT + V This shortcut enables you to paste a layer from your clipboard to the upper-left corner of the selected layer.
Move layers up or down in the layers list
⌘CMD + ⌥ALT + ⬆️ / ⬇️
To move layers to the top or bottom of the layers list just add* ⌃CTRL.
⌘CMD + ⌥ALT + ⌃CTRL + ⬆️ / ⬇️
Moving to the top won’t work if you have Skype open. I don’t know why this happens, but I’m thinking about leaving Skype behind.
Setting up custom shortcuts
So, we’ve covered some pretty cool default shortcuts, and I know it’s a lot to remember, but now comes the sweet part – custom shortcuts. If someone doesn’t believe you’re a Sketch master, just tell them you’ve got custom shortcuts set up, bro!
First, let’s learn how to set up custom shortcuts:
1. Go to Keyboard -> Shortcuts -> App Shortcuts 2. Press that “+” button 3. Select Sketch.app 4. Input desired Menu Title 5. Press desired key combination.
First, let’s learn how to set up custom shortcuts:
Now, let me show you a few of my favorite shortcuts.
Align items
Before we even start, I must warn you that this will include 6 (!) shortcuts. First, we need some menu items. Find them under Arrange > Align objects:
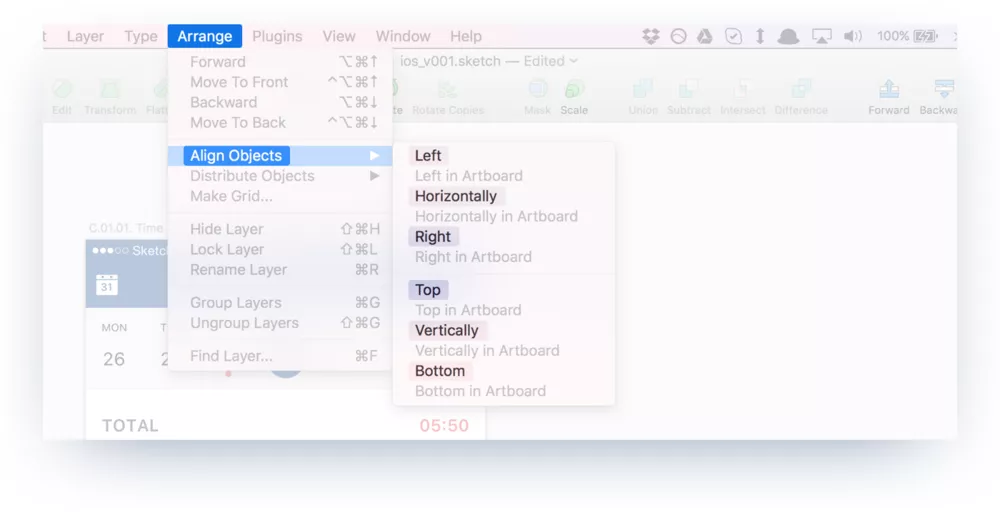
Do the steps we outlined before for “Left”, “Horizontally”, “Right”, “Top”, “Vertically” and “Bottom” menu items.
Key combinations I recommend are:
⌘CMD + ⌃CTRL + 1(Left) / 2(Horizontally) / 3(Right) / 4(Top) / 5(Vertically) / 6(Bottom)
After you’ve suffered through all the pain of adding 6 (!) shortcuts, you’ll be able to do this:
It will take some practice and finger gymnastics, but once you get the hang of it, you won’t go back.
Round to nearest pixel edge
There is a neat command in Sketch that aligns shapes and layers to the pixel grid. Unfortunately, it doesn’t have a keyboard shortcut by default.
To set it up as a shortcut, repeat the same steps from above but use “Round to Pixel” as your menu title. For the shortcut, I use:
⌘CMD + ⌥ALT + K
Plugins
As awesome as Sketch is, third-party plugins make it at least two times better. Plugins you’ll use really depend on what type of a designer you are.
Before we get started, there’s a tool you will love – Sketch Toolbox. It makes finding and managing your plugins a breeze. Download it
here.
Crystal
While technically not a plugin, it is so important I decided to include it. Crystal is an Android app that enables you to preview your designs live on your device.
Cool tip: Press ⌘CMD + P to quickly send designs to your device.
Sketch Better Android Export
This plugin will save you a lot of time when exporting for Android. No more slicing, setting up scaling factors and suffixes. Just select a group/slice/layer and this plugin will magically scale your assets and put them in the right folders.
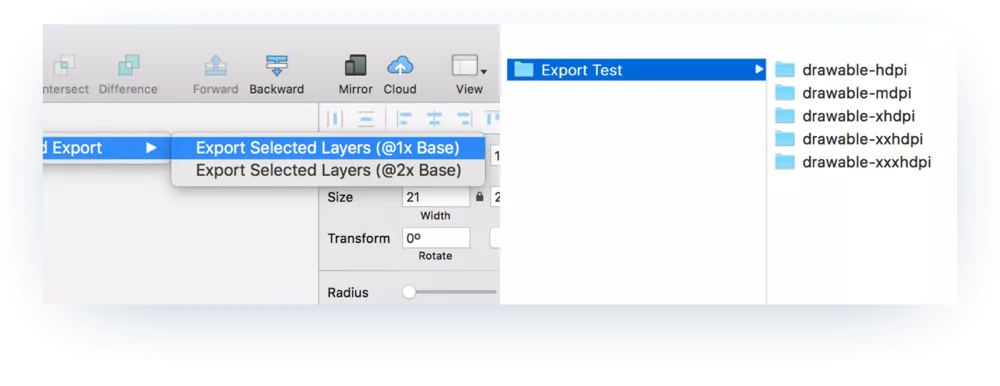
Download it here. Note that this plugin works best if you design in 1x, but you are designing in 1x. Right?
You can export to the same folder multiple times and the plugin will merge new files with old ones.
Craft
Craft enables you to add real, meaningful data to your designs by inserting real articles or headlines as placeholder text. It’s also possible to insert user created image libraries or category-specific Unsplash photos as placeholder images. There are also some handy features for duplicating content. Last but not least, you can generate a dedicated style page with all of your colors and fonts.
Distributor
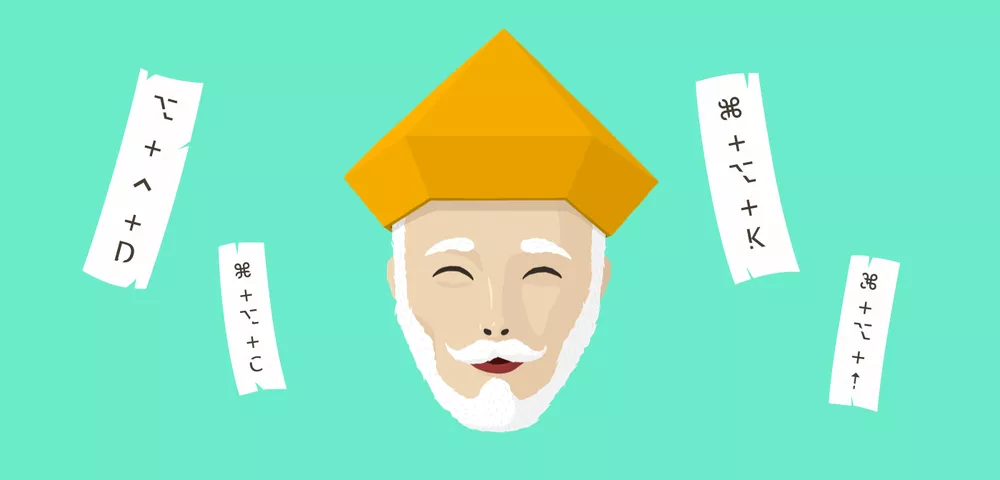
A small plugin I mostly use on my artboards. Just press ⌥ ALT + ⌃ CTRL + D and choose how you would like to distribute layers/artboards.
Download it here.
Repeat the last used spacing by pressing ⌥ ALT + ⌃ CTRL + A.
Zeplin
Zeplin is an awesome tool for transforming your designs into interactive spec documents. This plugin also requires you to have additional software installed on your Mac. Developers can access the web version and admire the beauty of your designs without Sketch or Zeplin installed.
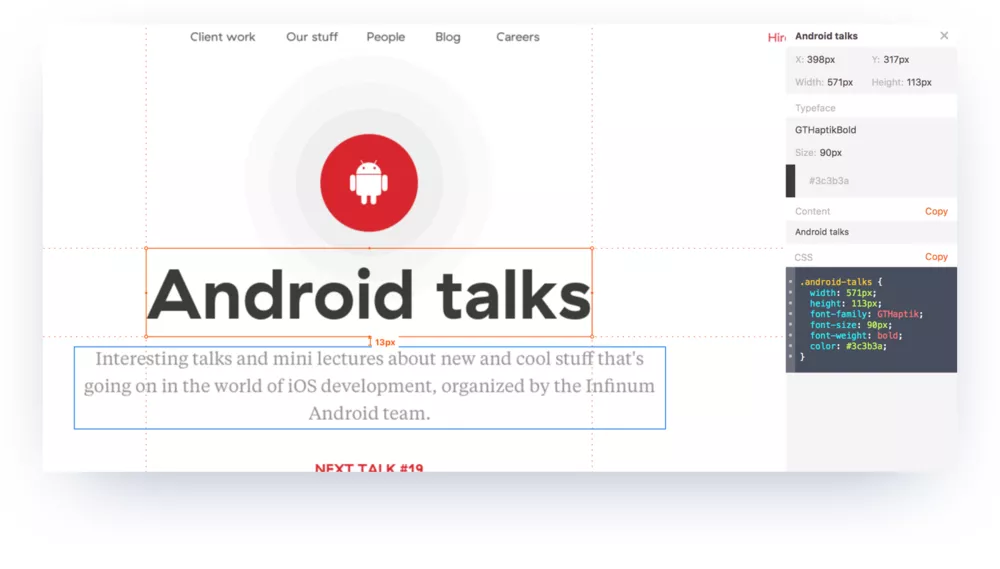
Press ⌥ALT to see all measurements in percentages.
Conclusion
We started using Sketch at Infinum after Adobe discontinued Fireworks. At first, we had our doubts, but Sketch’s speed, simplicity, and great customer support won us over. Although there are some nasty bugs in the latest versions (please fix color picking on the external monitor, I beg you), Sketch still remains my preferred way to do screen design.
And that’s it! I hope you’ve learned something useful. Don’t hesitate to leave your tips and tricks in the comments!

