As an Android developer, one of the worst phrases I could hear was, “We want a custom in-app camera.” If you’ve ever worked with Android Camera APIs, you probably know why almost everyone dislikes it. If you haven’t had to tackle this challenge, be grateful.
I recently worked with Android Camera APIs, and I think I’ve finally conquered them. In this blog post, I will discuss the behavior of the camera, which issues I had along the way, and how I solved them.
Two Versions
To implement a custom in-app camera, you have no choice but to use Android Camera API. Android Camera API has two versions: First, there’s the deprecated version (Camera1), which supports devices older than Lollipop. Then there’s the Camera2 version that is supported only on Lollipop and newer devices.
The main difference between these two APIs is that Camera1 is simpler, and in my opinion, more consistent. Camera2 offers more features, but in most cases these features are unnecessary. Both camera APIs have weird behavior and numerous edge cases, so let’s start with an issue that both APIs share.
Preview
When working with the camera API, the first thing you want to implement is the preview. It’s funny (or actually quite frustrating), because as soon as you start, Android stabs you in the back: the preview you are trying to display does not work as expected, and you see a preview that looks distorted like the image below.
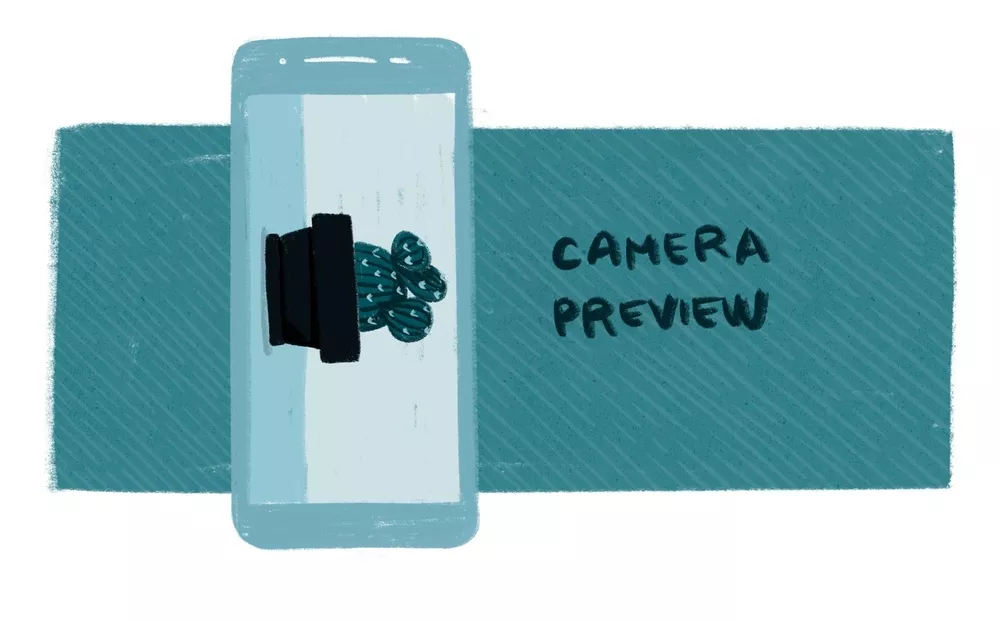
Once you see the preview, you’ll probably wonder what you did wrong. Sadly, nothing. This is the default camera behavior, and now it is up to you to decipher what exactly happened. First, you need to understand how matrix transformations work—otherwise, you are screwed. Matrix transformations are used to rotate and scale the preview. When the camera is started, it automatically rotates the preview to be in sync with the camera’s orientation, and it scales the preview to fit whole view. The preview image is distorted because the X and Y axes are scaled individually—so while the X axis is scaled down, the Y axis could be scaled up to fit the view.
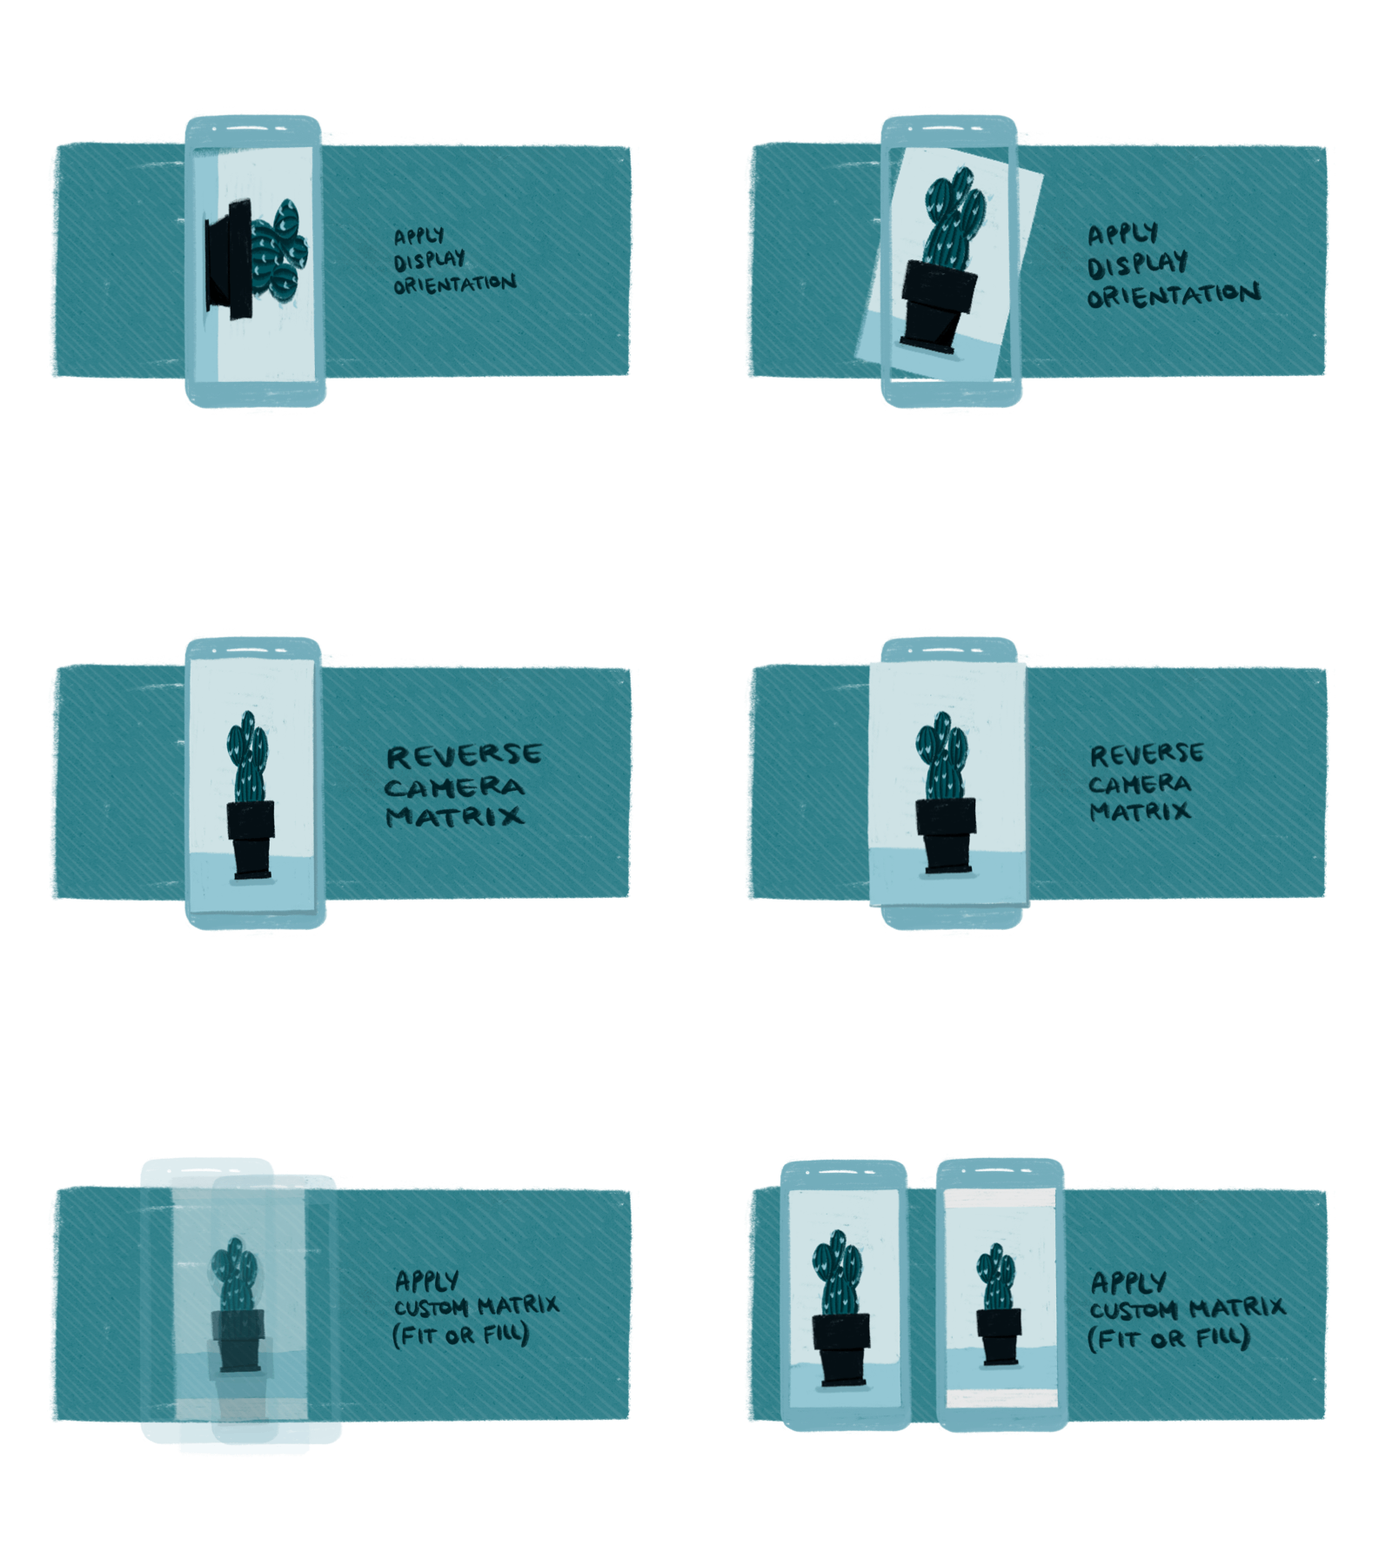
The camera has its own orientation, which is not the same as device orientation. The camera’s orientation is usually 90 degrees (regardless of device orientation), and that is why your preview is rotated. The first step to solving this is reversing the camera orientation. Here you can see the method that calculates the difference between camera and device orientation.
Step two is reversing the scaling of the X and Y axes. To reverse the process, first you need to reverse the matrix to get the original preview size and then apply your own scale depending on your end goal. Here is the method that calculates and applies the correct scale to the preview. The GIF below demonstrates what you have to do to create a nice-looking preview.
Camera1
Camera1 API has been deprecated since Android Lollipop. We work on a lot of apps that must support older devices than Lollipop, so simply ignoring the deprecated API was a no-go. As Camera1 is supported on all Android devices, I decided to first dig into its API.
Parameters
To configure the camera, you need to use Camera.Parameters object, modify it and then set it to the camera instance. Camera.Parameters object contains setters that can be used to change flash, focus, zoom, etc. Just from this explanation, you might think this process is all sunshine and rainbows. Not so much.
The issue with Camera.Parameters is not its complexity, but rather how invalid parameters are reported back to you. They are applied and validated after you execute Camera#setParameters(Camera.Parameters), and if any parameter is invalid, the camera just crashes with message – setParameters failed.
I could not find a more effective way to debug the issue than removing parameter by parameter until I figured out which one exactly caused the crash. My suggestion here is to wrap basically everything that communicates with the native camera API into try/catch blocks and implement better error handling. This allows you to handle all your errors in one place because the camera API is chaotic and unpredictable.
While the preview is active, almost all parameters can be dynamically updated except the preview and picture size. In case you need to dynamically change the preview and picture size, restarting the preview with new parameters should do the trick.
Sizes
This was one of my favorite chuckle moments because the issue was easy to solve—but it was a clear indicator that you should not trust the camera API documentation. Camera API can return a list of sizes that can be used to set the preview and picture size—and I had to deal with two screw ups here.
The first problem arose because I assumed the API will be deterministic. The first three devices I tested with all returned a list in descending order, so I assumed the first element will always be the highest resolution available. This worked fine until I tested on a device that had a blurry preview. I was confused at first, but after some debugging I noticed this specific device returns a list of sizes in ascending order. To solve the issue, I manually sorted sizes in the same order.
The second issue I encountered was this: On Samsung S3 Mini, I received a crash with NullPointerException when trying to sort the list. The issue was clear: the map returned by the camera API was null. The funny part was what what Javadoc said:
/**
* Gets the supported picture sizes.
*
* @return a list of supported picture sizes. This method will always
*         return a list with at least one element.
*/
public List<Size> getSupportedPictureSizes()
The fix was to fallback to the list of preview sizes if the list of picture sizes is not available. Now that I’ve learned from my mistakes, I know to never trust the camera API documentation.
Taking a picture
To take a picture, you call Camera#takePicture and pass two callbacks. When the picture is taken, you receive an array of bytes as a result. If you convert the array into a Bitmap and display the Bitmap, your picture will be rotated. The fix is similar to the preview: you must calculate the difference between the device and camera orientation and rotate the image yourself.
There is one small hidden issue that can happen if you are not careful with image manipulation. When working with Bitmaps and Bitmap transformation, always be aware of potential OutOfMemoryException.
Tap to focus
The tap to focus functionality requires some mathematical skills because there are multiple conversions you must calculate. When you press on your screen, you receive a touch event with X and Y coordinates that correspond to your device’s coordinate system. When you want to tell the camera which area to focus on, you need to give it X and Y coordinates that correspond to the camera’s coordinate system. The mapping is not simple because you also need to calculate in the scaling.
I personally found the last step of implementing tap to focus amusing. This is taken from Javadoc:
* The bounds are relative to the camera’s
* current field of view. The coordinates are mapped so that (-1000, -1000)
* is always the top-left corner of the current field of view, and (1000,
* 1000) is always the bottom-right corner of the current field of
* view.
In short, after you map everything into the camera’s coordinate system, you have to map it into this [-1000, 1000] coordinate system and pass it to the camera. Why? I honestly have no idea.
Camera2
To be honest, after finishing the Camera1 wrapper, I figured Camera2 is newer, and thus, better. My assumption was incorrect. Understanding Camera2 API was much harder than I anticipated, and I found it much less intuitive than Camera1 API.
Taking a picture
Camera2 API gives you more control over the camera, but at the same time it does not provide a concise API so you have to handle everything manually. In retrospect, Camera1 at least had the takePicture method, which was convenient to use. Camera2 API has multiple states, and you must handle those states manually and execute specific methods when the state changes.
I think a single look into this table is enough to see the complexity behind Camera2. Also, the issue was that some devices would lock into one state and it would never trigger the state to take a picture. Other devices would trigger capture state and record a blurry image. I feel like these states are something that should be handled by the API behind the curtains, the same way Camera1 handles it.
I also noticed that introducing flash mode into Camera2 picture taking just introduced more bugs and more mess because it added more states that you have to handle manually. Torch mode is also separate from all other flash modes, so when you want to turn on the torch, you must turn off flash and vice versa.
Recording a video
I used MediaRecorder class to record a video with both Camera1 and Camera2 API. I have to admit that out of all features, video recording was the easiest to implement. Even so, there are some potential traps you should avoid.
MediaRecorder works almost the same as Camera.Parameters. You have to initialize the whole MediaRecorder and when you want to start the video recording—it will crash if you set some unsupported parameter value. Also, just like Camera.Parameters, it does not tell you which parameter caused the crash. Most often, the MediaRecorder would crash because of either non-existent video resolution or video resolution that is too big for it to handle.
To configure MediaRecorder, you can use CamcorderProfile class. It contains a set of parameters that are automatically applied to the MediaRecorder when applied via the MediaRecorder#setProfile(CamcorderProfile) method. Be careful when using this method with Camera2 as some profiles returned by the camera API are false positives. To receive valid profiles, you should check that the returned profile contains the resolution that is supported by the camera.
Camera1 API is awesome
When compared to Camera2 API, Camera1 API is awesome simply because of its consistency. It behaves oddly at times, but once you fix those weird edge cases, it mostly works.
Camera2 is difficult to use, has too many properties and states that must be handled by the developer, and it is not consistent between devices. Sometimes, for some reason, if you do not turn off property A when setting property B, the camera preview goes black without any error. It is discouraging when you have to work with that kind of an API with so many side effects.
I would suggest to use camera1 API even if you work on an application that is intended only for Lollipop and newer devices. Just be extra careful because Camera1 is deprecated and could be removed in the future.
Handling the Camera API is challenging, but you can learn a lot when you want to expose a simple and easy to use interface over something as complex as the Android camera API. Also, when you manage to tame the beast in the end, you’ll have a sense of satisfaction. Hopefully, Google is doing something regarding the camera API (CameraX). In the meantime, feel free to use our GoldenEye library and let me know what you think about the camera API.


