Almost everyone here uses Macs. When a new hire joins us, sometimes they’re not familiar with OS X at all. For someone coming from Windows operating system, switching to OS X can be troublesome at first.
OS X is the operating system running on all Apple computers. My first experience with OS X was 6 months ago, when I started working at Infinum. That’s why I needed a couple of days to get a grip with it. Everything from the keyboard layout to the user interface is different than on Windows.
Considering the fact that most people who join our firm are not familiar with Apple’s platform, I’ve decided to write a couple of tips and tricks to help them switch to Macs more easily.

Like I mentioned, at first I was having trouble with the keyboard layout. It took some time to get used to the CMD (⌘) button being the primary key modifier, instead of CTRL on Windows. But after a couple of days, it gets easier.
Soon after, I realised why Macs are the preferred weapon of choice for doing work at Infinum. Plain and simple, they are just generally easier to work with. Most things work without installing additional drivers. For example, there is no need to install OEM drivers for Android devices.
They have the stability of Unix and Linux, but also a great user interface. They’re equally good for programmers (used to spending 50% of their time in the Terminal) and designers (used to working with visual tools). Mac notebooks (Macbooks) also have awesome battery life.
Installing applications
For most applications on OS X there’s no installation process like on Windows. When you want to install an application on Windows, you have to run an installer that will install it for you.
On OS X you can download an application from the Mac App Store or download a .dmg file from Internet and just drag it to your Applications folder. And that’s it. No installing. You are switching to another Mac? No problem, Apple iCloud will help you switch over without pain.
OS X offers plenty of productivity raising features without installing any third party application. However, we use apps like Alfred to extend OS X features even more.
Using the keyboard
Getting familiar with keyboard shortcuts is essential to becoming more productive. OS X offers many shortcuts by default. You can browse through them in System Preferences > Keyboard > Shortcuts.
CMD is the magic key you’ll use for most of the shortcuts and commands. ALT (⌥) button is also often called option key.
Useful shortcuts to remember:
- cmd + tab – Move focus to next application
- cmd + ` – Move focus to next window
- ctrl + tab – Move focus to next tab
- cmd + w – Close tab
- cmd + q – Close application
- cmd + , – Open preferences of active application
Finder file manager
Finder is OS X’s default file manager. It’s similar to Windows Explorer but with some differences. For example, there’s no classic Cut option which I really missed. If you want to Cut something like on Windows, you have to select the file, press cmd + C and then cmd + alt + V where you want to paste it.
Shortcut keys
Here are also some useful shortcuts to remember:
- cmd + ↑ – Up to higher folder (in the folder structure)
- cmd + ↓ or cmd + O– Open file or folder
- cmd + backspace – Delete selected item
- enter – Rename selected item
Hidden files
In case you want to be able to see hidden files in the Finder, paste this line into your Terminal.app (works for OS X 10.7 and above):
defaults write com.apple.finder AppleShowAllFiles TRUE
Apply changes by holding ALT key and press right click on Finder icon and select Relaunch.
If you just need to see hidden files in the Open/Save dialogs, press cmd + shift + . to display them temporarily.
Navigation in text documents
Getting familiar with the text manipulation is especially useful for developers. There are no HOME and END buttons on most Mac keyboards. But, there’s an alternative – CMD + left/right.
- cmd + shift + ↑/↓ – Select a whole document from the cursor position in a desired direction
- cmd + shift + ←/→ – Select a line to the left or right
- alt + shift + ←/→ – Select a word left or right from the cursor position
If you ditch shift from shortcuts above, your cursor will be moved without selecting text.
Window management
Windows comes with a Snap feature. It’s a way of resizing windows by dragging them to the edges of the screen after what they automatically cover screen halves. That’s the only feature I was missing on Mac. That is, until I met Spectacle. Spectacle is a simple OS X application which lets you reorder open windows with keyboard shortcuts, even without using your mouse.
- cmd + alt + ← – snap window to the left edge of the screen
- cmd + alt + → – snap window to the right edge of the screen
Alfred app
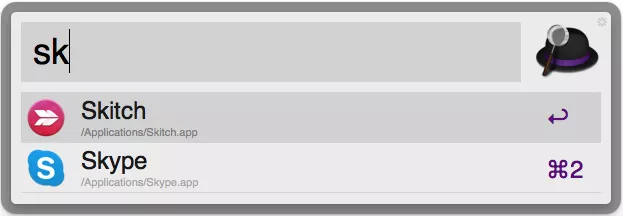
Alfred is a substitute for native OS X Spotlight application. It’s a tool that saves you time when opening new apps or searching local computer or web. It can also be used as a calculator and has a bunch of other features.
To find and start an application just enter the application name and press enter. Alfred is super-fast for searching documents. Just type keyword find before name of the document you are trying to open in Finder. Use open if you want to open a file.


Mouse and Trackpad
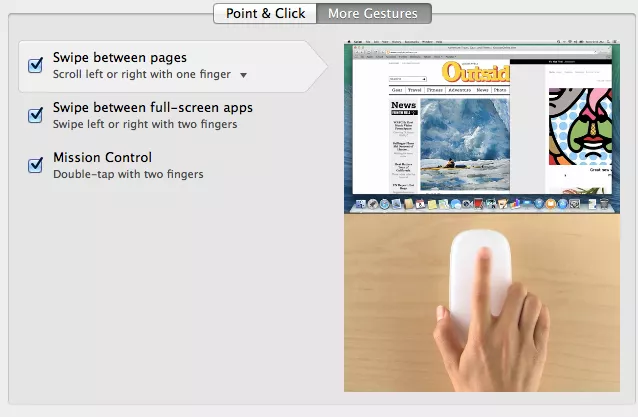
Magic Mouse is awesome. At first I was shocked with the lack of the scroll button. How am I supposed to scroll now? However, there’s a trick – the whole surface of the Magic Mouse is scrollable, you just need to swipe your fingers over it. It also offers some great gestures in System Preferences > Mouse > More Gestures.

Right click
By default, the Magic Mouse and Trackpad come with the right-click option turned OFF. I recommend turning it ON in the Mouse preferences/Trackpad preferences section of the System preferences panel.
Screenshots & screencasts
OS X comes with a lot of built-in features. Taking screenshots is one of them. Without having to install any application, you can easily save a screen or a desired screen area. Of course, it’s possible to do this on Windows as well, but the whole process is simpler on OS X.
- cmd + shift + 3 – Saves whole screen
- cmd + shift + 4 – Saves user selected part of the screen
- cmd + shift + 5 – If you use Skitch – selects part of the screen and opens it in Skitch ready for editing
Recording screencasts
Easy way to record screencast is by using the QuickTime Player application and selecting File > New screen recording. Of course, you can choose to record the whole screen or just a part of it.


