While Android devices have generally gone in the direction of having just a camera cutout or even an under-the-screen camera, Apple has created a brand new user experience with the new camera housing – the notch. Here’s how to implement it in iOS.
Apple introduced widgets in iOS 14, allowing us to have glanceable information on our home screens.
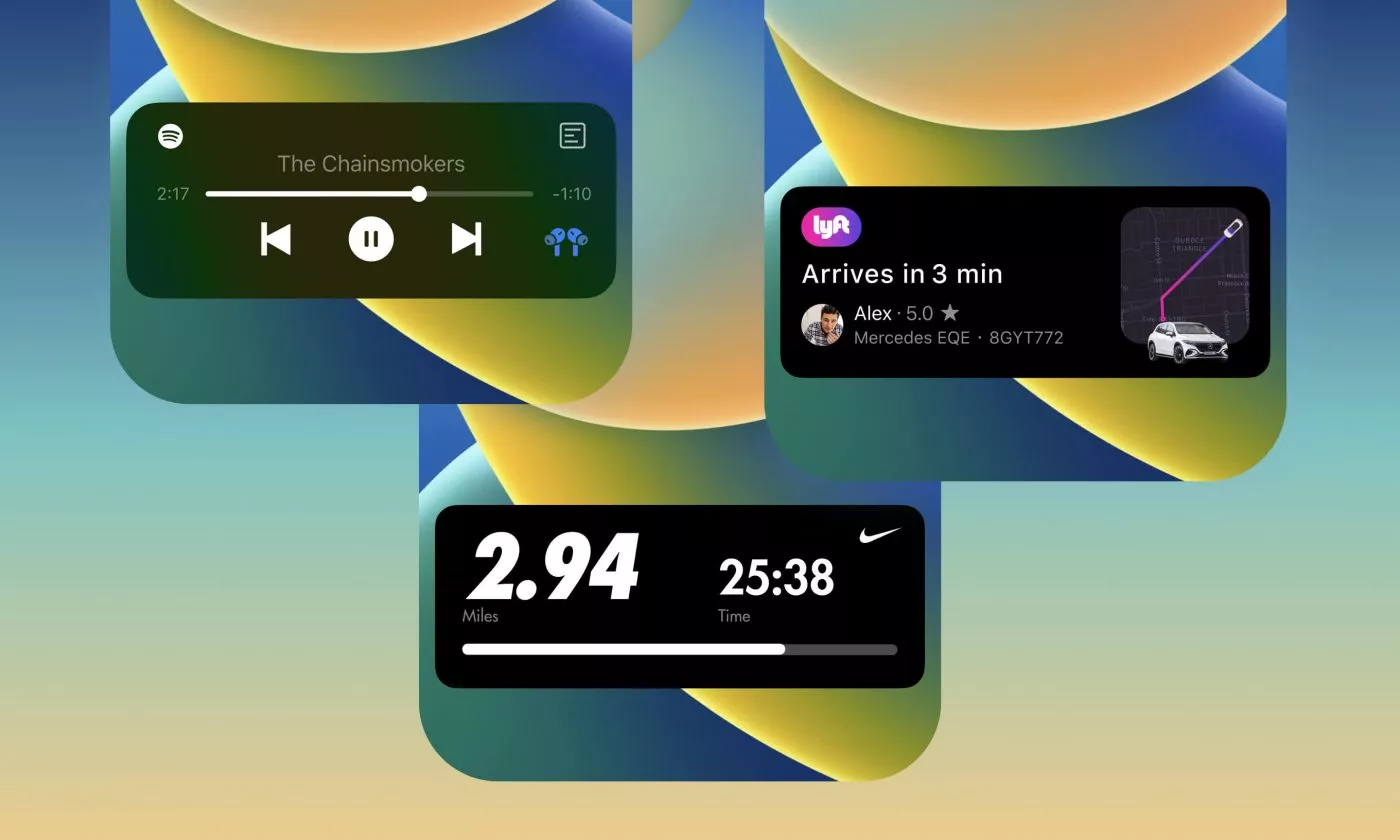
But what if we went a step further and provided contextually relevant information that pops up when needed and doesn’t overstay its welcome? And what if that was done in a way that works seamlessly with the biggest front-facing update our iPhones have seen since the introduction of the notch? No more what ifs – Meet Dynamic Island.

We’ve covered our feelings about the Dynamic Island and live activities from the design perspective, and now is the time to show you how to implement them.
iPhone 14 Pro and 14 Pro Max are the only devices that support the Dynamic Island, but Live Activities are supported for all phones that can run iOS 16.1. So let’s see what’s needed to integrate them into your applications.
The Live Activity lifecycle, explained
Lifecycle is one of the most important things to remember when creating apps. Live Activity can be in three states:
- Not-started
- Running
- Ended
Your application can have multiple live activities at once, so it’s important to keep track of every activity. Before starting an activity, you must specify what data it needs to use. Since we’re talking about a Live Activity, you can guess that there will be some data that will change over time. Your Live Activity data will be separated into dynamic and static data. Dynamic data can be updated over time and static can’t.
For example, we’ll take a look at the FormulaAttributes structure which will contain both types of data.
struct FormulaAttributes: ActivityAttributes {
    public typealias RaceState = ContentState

    // Here you will provide the dynamic data
    public struct ContentState: Codable, Hashable {
        var driverInFront: String
        var driverTeam: String
    }

    // Here you will provide static data
    var lastPlaceDriver: String
}
After starting the activity, it can stay live for eight hours before it ends up being terminated by the system. Eight is enough for most activity use cases, but sometimes you can have an 8-hour flight in which case you wouldn’t be able to track the whole duration with the 8-hour limitation.
Once the Live Activity is live and running, you can update the dynamic data of the activity. One thing to note is that you can’t update the Live Activity via API calls like you can with other widgets. Instead, you must update it via your application or push notifications.
After you end it, the Live Activity will still be available on the Lock Screen for another four hours by default. You can specify if you want to terminate the Lock Screen Live Activity immediately or the system will do it for you after four hours.
Ensure that you update the Live Activity after it ends if you’re not immediately removing it from the Lock Screen to reflect its proper state. That way, your users will have the latest information and know that the Live Activity has ended with the latest results.
How many views does the Live Activity have?
As mentioned before, you can show the Live Activity on the Lock Screen, Dynamic Island, or a banner on devices that don’t support the Dynamic Island. When you’re developing for devices that have the Dynamic Island support, there are five views:
- Minimal
- Leading
- Trailing
- Expanded
- Lock Screen
Every single one of these views can be different from the other.
Minimal view
As the name suggests, it should be minimal, eg. an image that uniquely represents your app. The Minimal view is shown when multiple Live Activities are running at once on the right-hand side of the Dynamic Island with slight padding. Tapping on the view will lead the user straight into your app.

Leading and Trailing view
The leading view will be shown on the left-hand side of Dynamic Island. You can specify some current information from your app related to the Live Activity. Just be careful not to stuff too much information inside the view.
The trailing view will be shown on the right-hand side of the Dynamic Island. It works just like the leading view, which you can see on the image below for the Formula1 tracking Live Activity that we’ll develop in this example.

Expanded view
The expanded view will be shown once the user long-presses the Live Activity and it should be used to display more information about the activity. In our example, we’ll specify which driver is in front and which one is the last. As you can see in the image below, Max is already in first with Latifi sitting in last – a familiar sight if you’ve been watching F1 lately.

This example is quite simple – you can customize it by setting the views in particular regions of the expanded view, and the system will try to size them correctly based on the views you’ve provided. You can check out the image below to see which regions are covered with the expanded view.

Lock Screen view
We’ll use a similar example to show how it looks on the Lock Screen. An important note here is that we can use a different view for this case. It allows us to reuse the existing UI or create new situation-dependent views for Dynamic Island and Live Activities separately. You can see an example of this below.

Getting your first Live Activity Live
First of all, Live Activities are available from iOS 16.1, and I’ll be using Beta Xcode 14.1 for this example.
After you’ve decided on which app you want to liven up, head into Xcode, and under the targets section, you can find a “+” sign where you can add a widget extension.

After you’ve added the widget extension head into the Info.plist file of your application and add a boolean flag for the Supports Live Activities permission and set it to YES.
Now we’re ready to get this show on the road. First, we’ll define the FormulaAttributes I’ve mentioned above. It conforms to the ActivityAttributes protocol which helps us define dynamic data inside our structure. Make sure that when you create the FormulaAttributes.swift file you include it in both the App and the Widget target.
Before we dive into the code, when starting your Activity your application has to be in the foreground while you can update or end it in the background.
Starting the Live Activity
First, we’ll add a button and a reference to our Activity inside the ContentView. The Activity will be set as optional since we want to create it when we need it and the reference is kept so we can update the correct Live Activity later.
struct ContentView: View {
    @State var activity: Activity<FormulaAttributes>?

    var body: some View {
        VStack(spacing: 20) {
            Button(action: { activity = startActivity() }, label: { Text("Start Activity") })
        }
    }
}
The compiler will complain that there’s no startActivity function and we’ll add it inside a private extension on the ContentView. The startActivity function will return the newly created Activity.
private extension ContentView {

    func startActivity() -> Activity<FormulaAttributes>? {
        var activity: Activity<FormulaAttributes>?
        let attributes = FormulaAttributes(lastPlaceDriver: "Nicholas Latifi")

        do {
            let contentState = FormulaAttributes.ContentState(
                driverInFront: "Max Verstappen",
                driverTeam: "Red Bull racing"
            )
            activity = try Activity<FormulaAttributes>.request(attributes: attributes, contentState: contentState)
        } catch {
            print(error.localizedDescription)
        }

        return activity
    }
}
Now that we’ve covered the implementation of our Live Activity, we can start looking into activity updates.
Updating the Live Activity
Add another button inside the content view just like the one we added in order to start the activity and call the updateActivity function. Inside the private extension of the ContentView add the following function:
func updateActivity() {
    Task {
        let contentState = FormulaAttributes.ContentState(
            driverInFront: "not Lewis Hamilton",
            driverTeam: "Mercedes"
        )
        await activity?.update(using: contentState)
    }
}
The function will get the reference we kept for our activity and call the .update(using:) function with some new content. It is wrapped inside a Task since it’s an async function.
This example shows how to update our Live Activity from the app, but as mentioned before, you can also do that using push notifications. The code would differ a bit from our example and you’d have to start the Live Activity by specifying the pushType parameter. You’d need to send the pushToken from your Live activity to the server so it can receive notifications.
Ending the Live Activity
Ending the Live Activity can also be done via notifications or from the app. As I’ve mentioned before, make sure that you have updated the Live Activity with the latest information before you end it.
Add another button to the ContentView which will reference the endActivity function. Inside the private extension of the ContentView add the following function:
func endActivity() {
    Task {
        for activity in Activity<FormulaAttributes>.activities {
            await activity.end(dismissalPolicy: .immediate)
        }
    }
}
The endActivity function goes through all of the started Live Activities with the FormulaAttributes and ends them while specifying that it should remove the Lock Screen activity immediately. Just like the update(using:) function, the end(dismissalPolicy:) is an async function as well.
Live Activity user interface
Since we’re using only the Live Activity Widget for this example, we’ll annotate it with @main. If you’re using more Widgets, please add them to a WidgetBundle. The code below shows the user interface for our formula Widget which was used for prior screenshots.
@main
struct FormulaActivityWidget: Widget {
    var body: some WidgetConfiguration {
        ActivityConfiguration(for: FormulaAttributes.self) { context in
            // Create a view here which will be shown on the Lock Screen and on the Home Screen as a banner
            // For the devices which don't support the Dynamic Island
        } dynamicIsland: { context in

            DynamicIsland {
                // This content will be shown when the user expands the island

                DynamicIslandExpandedRegion(.center) {
                    VStack {
                        Text("Driver in front is \(context.state.driverInFront) ?")
                        Text("Last place driver is \(context.attributes.lastPlaceDriver)")
                    }
                }

            } compactLeading: {
                // This view is shown on the left side of the Dynamic Island
                Text("?")
            } compactTrailing: {
                // This view is shown on the right side of the Dynamic Island
                Image(systemName: "timer")
            } minimal: {
                // This view will be shown when there are multiple activities running at ones
                Text("?")
            }
        }
    }
}
Inside the Widget, we specify the ActivityConfiguration and which Attributes it’s going to use. First, we’ll set the views on the Dynamic Island, and afterwards we’ll add the Lock Screen one.
As it’s a simple example, I’ve only used the center region of the Expanded view to set some data inside. Afterward, there are closures describing which part of the Dynamic Island it covers so you can put whichever view you want it to show.
Now we can set the Lock Screen and the Home banner view. Here’s a Lock Screen view which will have a reference to the context from our attributes so it can be updated properly.
struct LockScreenLiveActivityView: View {
    let context: ActivityViewContext<FormulaAttributes>

    var body: some View {
        VStack {
            Text(“Driver in front is \(context.state.driverInFront) ?“)
            Spacer()
            Text(“Last place driver is \(context.attributes.lastPlaceDriver) ?“)
        }
        .activitySystemActionForegroundColor(.white)
        .activityBackgroundTint(.cyan)
    }
}
After you’ve created the Lock Screen view, initialize it inside the closure for the ActivityConfiguration. And there you have it, you can now run the app and test it out.
Adding DeepLinking inside the Expanded view
Since the Live Activity is a Widget, it can deep link into your app. Every Live Activity view can lead to a different place inside your app, but Apple still recommends that the leading and trailing views lead to the same place. DeepLinking is a great tool to add inside the expanded view where you can have multiple views, some of which could navigate where you need them.
Things to watch out for
- Live Activities can be disabled in the Settings App. You can check if that’s the case and provide a proper explanation to the user, telling them what they’re missing out on
- Make sure to handle the errors with care. Users can have multiple Live Activities running at the same time, and you could also reach a state where your app started too many activities. Make sure you’re not one of the offenders that does this
- The system ignores any animation modifiers when defining the user interface of the Live Activity, but you can modify the animations Apple’s using to create a more unique experience
- Live Activities will be rendered in Dark Mode when the Always-On Retina is on
- Use app updates alongside push notification updates. Sometimes the user won’t receive a push notification due to not having an internet connection or if the Live Activity has ended.
- When using push notifications, the system might throttle your push notifications, and the user might not receive them if you’ve sent too many notifications. This is crucial if you’re building a Live Activity for Formula where you’ll have a lot of updates on the grid. One way to still send a push notification is to send a low-priority one, but no one can guarantee that the user will receive it
- The system can display Live Activities even on devices that don’t support the Dynamic Island as a banner on the Home Screen, but only if the app determines that the update is important enough to interrupt people
The finish line
Live Activities are a new way to show information at a glance. The animations and different views make Live Activities unique from other widgets. Tailor the Live Activities to your app’s needs and make it a unique yet pleasant experience that the users can enjoy.
PS. We probably don’t even need to update our Live Activity since Max most likely won.
Hope you enjoyed the article and happy coding, we’re looking forward to seeing your own live activities out in the wild!
Useful links