Apple revealed the new iPhone X on their last September event, which comes with a bold new design. The device is no longer rectangular. Instead, it features rounded corners, edge-to-edge display, and a notch on top of the screen which holds the TrueDepth camera system for the new Face ID. It also lacks the iconic home button, which is now replaced by a virtual home indicator.
The question is how will current apps behave on the new iPhone X, and how can you adjust your apps for it?

iPhone X starts shipping early November, so it’s time to roll up your sleeves and get your hands dirty. Apps that aren’t adjusted for the new iPhone X will run in compatibility mode, letterboxed with slightly rounded corners.
Getting started
You’ll, of course, need to use Xcode 9 and build your app with iOS 11 SDK. It’s possible that you still use launch images instead of launch storyboard, so you’ll need to migrate to launch storyboard or add one for new iPhone X dimensions. Otherwise, iPhone X will still run the app in letterboxed mode. I recommend using the storyboard approach since you won’t have to worry about future device sizes.
Auto Layout
If you use Auto Layout correctly, chances are your app will be in a pretty good shape with a smaller amount of work. A problem arises if your app has a lot of custom controls (especially in the bottom portion of the screen, since it’s covered now by the virtual indicator), or if you calculate layout manually.
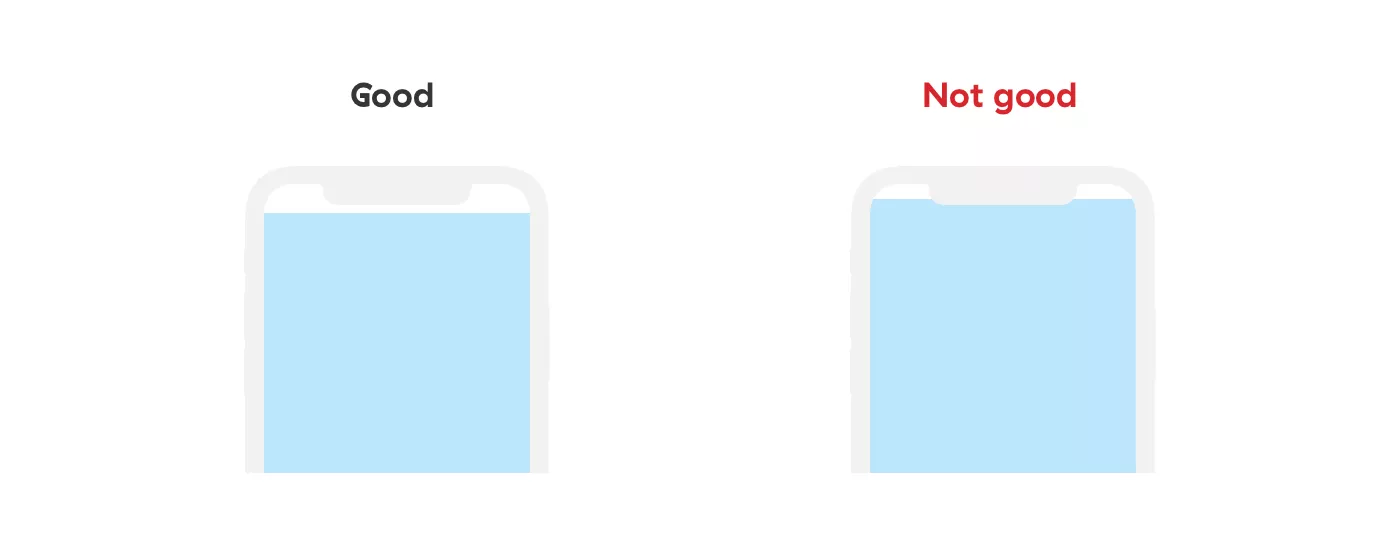
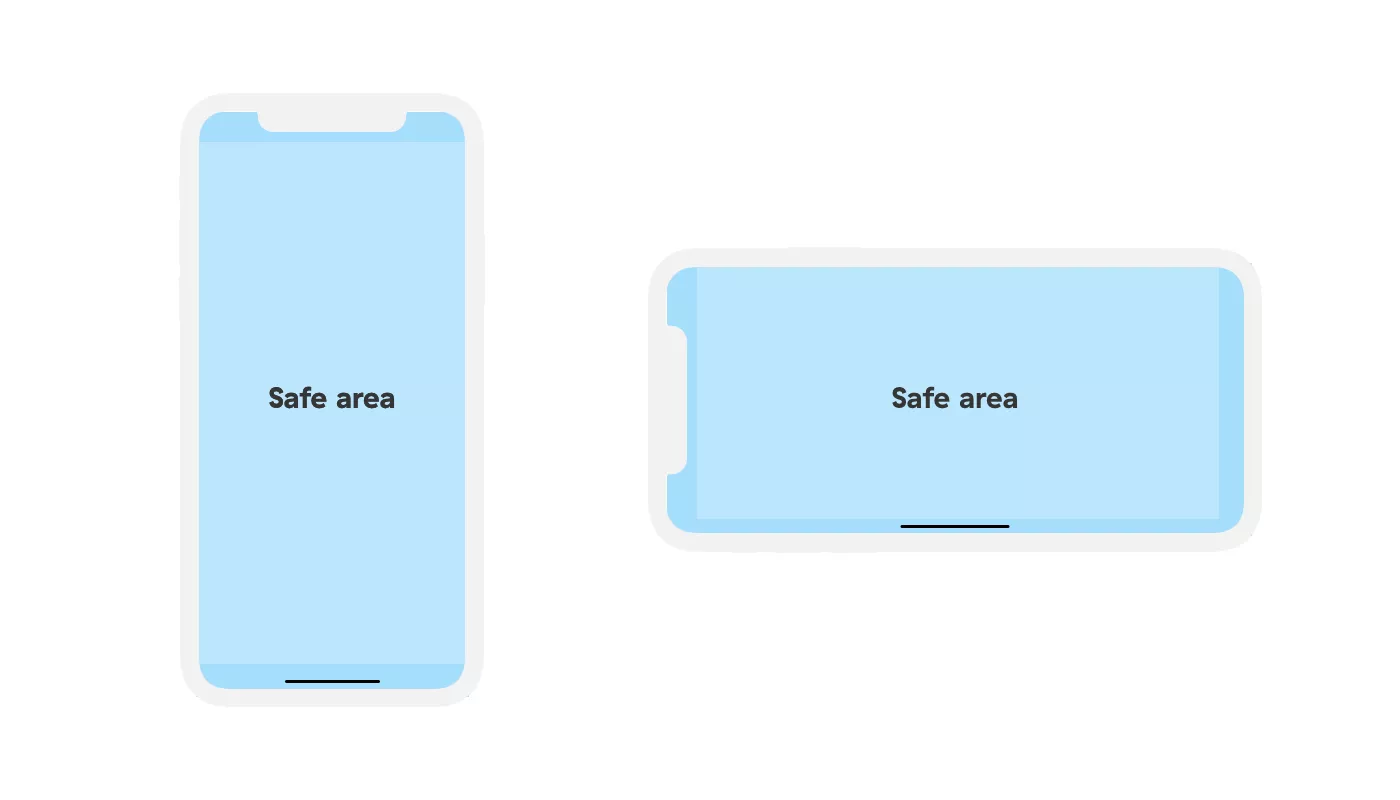
Safe Area
Safe area helps you place your views within the always visible portion of the screen. It’s guaranteed not to be covered by navigation bars, tab bars, toolbars, and other ancestors that can be a part of a view controller’s view.
Safe Area Layout Guides
Safe Area Layout guides are the building blocks when it comes to adjusting your app for the new iPhone X. Apple introduced topLayoutGuide and bottomLayoutGuide in iOS 7 SDK which allowed you to constrain your views to the status bar, navigation bar or tab bar. Now in iOS 11 SDK and Xcode 9, you should use new Safe Area Layout Guides instead. You can also access them through code via safeAreaLayoutGuide property on your view.
The important thing to know is that safe area layout guides are backward compatible up to iOS 9. This means you should drop the support for iOS 8 if you want to adjust your app nicely for iPhone X.
Another important thing to keep in mind is that you can add safe areas to multiple views in your hierarchy. This is useful when you need to constrain some view to edges of the screen, but it’s subviews elements to safe area layout guides.
Migrating Storyboards and Xibs
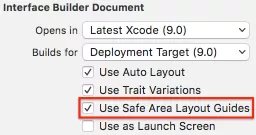
When you open a xib or storyboard in Xcode 9, there is an option to use Safe Area Layout Guides. Once selected, top and bottom layout guides, as well as leading and trailing edges will automatically be replaced with safe area layout guides. You should take some time to go through your xibs and storyboards, and adjust every one of them. Don’t forget to perform a smoke test after each adjusted screen, to see if everything looks good.
Native components
If your app uses native components such as UITableView, UINavigationBar or UITabBar, their layout will automatically be adjusted for the iPhone X so you have one less thing to worry about.
Table view
Table views still cover screen edge-to-edge, and the virtual home indicator is placed above it (and it passes taps to table view). However, cells are constrained to safe area layout guides. This means that in a landscape, for example, cell content will be constrained to the area where rounded corners begin. There’s a new property insetsContentViewsToSafeArea to modify this behaviour.
Search bar
In iOS 11, the search bar is now included in the navigation bar to best use the area where the search bar is usually displayed.
The following snippet shows how should you present search bar now, and how was it done before.
let searchController = UISearchController(searchResultsController: nil)
self.navigationItem.searchController = searchController
searchController.isActive = true
General tips
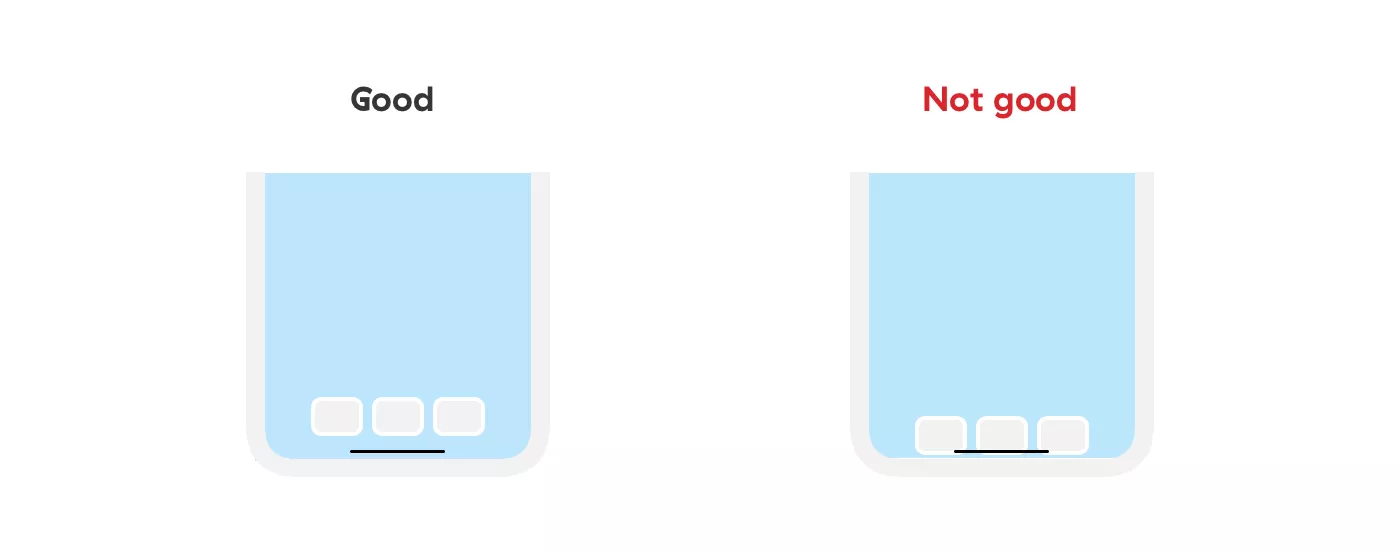
Bottom controls
Don’t place controls at the bottom of the screen. If your app uses custom bottom UI controls, they should be constrained to bottom safe area layout guide, while their superviews can be constrained to the edge of the screen.
Swipe Up Gestures
You shouldn’t use swipe up gestures from the bottom of the screen, this area is now reserved for the virtual home button indicator. You can give your gesture priority, but this is not recommended according to Apple’s guidelines.
Virtual home indicator
You can modify the home indicator behavior to autohide if the user doesn’t touch the screen for some time, but you should only do it in specific cases such as viewing photos or videos in full-screen. When a user taps the screen again virtual home indicator will reappear.
override func prefersHomeIndicatorAutoHidden() -> Bool {
    return true
}
Larger navigation bars
Navigation bar got an update as well in iOS 11. They can now be way taller with larger title fonts. This behavior is disabled by default, but you can enable it if needed.
navigationItem.largeTitleDisplayMode = .automatic
I hope this post helps you in adjusting your app for the new iPhone X!
If you found something interesting while adjusting your app, feel free to share it in the comments below!
More info