Looking for a solution to make API testing easier?
Postman is a popular API testing tool that helps developers maintain collections of HTTP requests. If there are specific endpoints that need to be tested continuously, Postman can help lower the testing time by automating work that would need to be done manually otherwise.
Let’s explore the main features of Postman and go through a couple of examples of simple tests.
Setting up Postman
Setting up Postman is pretty straightforward. There are several steps that need to be done:
- First, we’ll create a new workspace via the My Workspace drop-down.
- After that, we should create a collection by clicking on New -> Collection. A collection is a folder in which you will save your requests and tests.
- After that, you can click on New -> Request. When you enter all the info and choose the workspace you want to save it to, you are ready to start writing your first tests.
Need-to-know basics
Postman has workspaces that help you organize your requests/tests and collaborate with your teammates. One workspace could contain all the collections needed for one project.
Collections are basically folders that help organize your requests. Each collection can test different modules or related APIs.
Once you have created collections, you should also look into defining environment variables so you don’t waste time repeating yourself. For example, this will enable you to run the same tests across different environments, using different users and params.
After creating tests for a module, you can use the collection runner to run these tests in a specified sequence. Lastly, you can also set up a monitor – a scheduled collection runner, which can run all of your requests and send test results back to your email, Slack, etc.

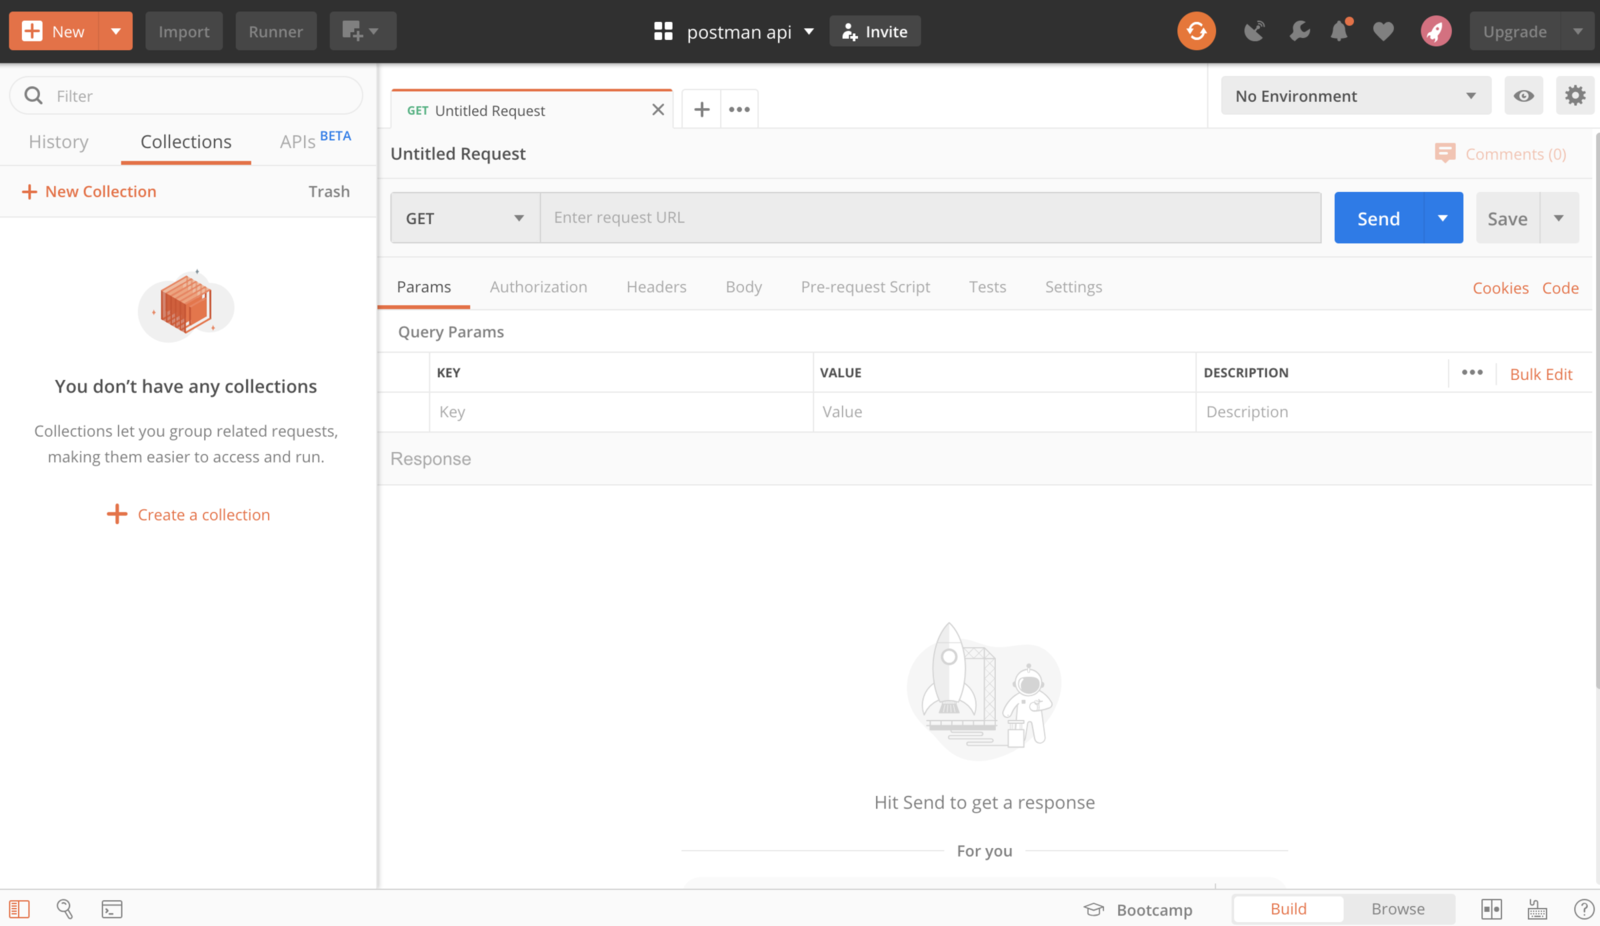
A Postman workspace has different features so let’s quickly go through them:
- History – A list of changes and executed requests.
- Collections – Organize your tests by creating collections, each collection can have multiple sub-folders and requests.
- Params – For easy organization of query params in the form of key-value pairs.
- Authorization – In order to access most APIs, proper authorization is needed.
- Headers – For specifying request headers.
- Body – Add the request body, most often in JSON or XML.
- Pre-request Script – Scripts that will be executed before the request.
- Tests – Scripts executed after the request.
Pre-request scripts & tests
In Postman, you can add scripts to your requests to pass data between requests and write tests. Both are written in JavaScript, include Postman-specific modules, and the tests use the Chai assertion library.
This is what the flow of each request looks like:

Writing your first test with Postman
Postman offers commonly used snippets, which are listed next to the test editor. To begin, let’s set a Request URL to “https://google.com”. After that, navigate to Tests tab and click on the snippet that says, “Status code: Code is 200”.
When you do that, this code should appear in your script:
pm.test("Status code is 200", function () {
    pm.response.to.have.status(200);
});
If you now click on Send, the test will get executed. This is one of the simplest tests you can write with Postman, and it just checks if the returned response status will be 200.
Writing more complex tests with Postman
The aforementioned example is enough to get familiar with the basics, but let’s go through a more complex test.
We’ll use the PokeAPI that returns data about Pokemon. To begin, let’s check the number of Pokemon returned by the API.
Checking the number of Pokemon
Let’s say we want to check that all 964 Pokemon are returned by the API.
This API is paginated and the default page size is 20, meaning you will get 20 Pokemon when you execute a GET request towards Pokemon API.
We can increase the page size by adding the “limit” query param to 1000. Finally, we just need to do a simple check on the body of the response and write an assertion.
The code looks like this:
pm.test("Checks the number of Pokemon", function() {
    const data = pm.response.json();
    const numberOfPokemon = data["results"].length;
    pm.expect(numberOfPokemon).to.equal(964);
});
Hitting the Send button executes the requests and the test you’ve just written.
Checking the name of a Pokemon
In the next example, let’s say we want to check the name of a certain Pokemon. As we all know, the first Pokemon is Bulbasaur.
The request we need to make is GET https://pokeapi.co/api/v2/pokemon/1.
The test itself is pretty similar:
pm.test("Checks the first Pokemon’s name", function() {
    const data = pm.response.json();
    const pokemonName = data["name"];
    pm.expect(pokemonName).to.equal("bulbasaur");
});
Other types of tests
Don’t stop at checking the data retrieved by the API. Here are some other areas to direct your testing:
- schema compliance
- response headers (e.g., cache headers which can greatly influence performance)
- response times
- error handling
- other
Postman delivers
All of the examples mentioned above are simple but hopefully go to show that learning to navigate through the Postman UI with a little JavaScript thrown in for good measure will kickstart your API testing in no time.
The documentation is detailed, and even beginners are able to learn quickly through practice. This makes it one of the best tools out there, even when compared to old industry favorites like SoapUI or code-only solutions like REST Assured.
Oh, and before you ask – yes, you can integrate it into your CI/CD pipeline quite easily. A different kind of mailman, called Newman, is in charge of that.


