
Suppose you are working with the latest technologies as we do at Infinum. In that case, I bet you’ve found yourself in a situation where you are spending more time than needed on a particular problem because the framework you are using is poorly documented or not documented at all.
Documenting code is helpful for both you and your colleagues and can answer any questions and save development time.
Apple took it to a whole new level during last year’s WWDC by introducing DocC in Xcode 13. As of Xcode 13.3 Beta, Xcode will be able to build the documentation from Swift code in executable targets such as apps and command-line tools. You can read more about it in the release notes.
About DocC
DocC is a fully integrated documentation environment used to document public APIs for Swift frameworks and packages.
It’s basically a compiler that creates reference documentation from your in-source comments, and you can view it from Xcode’s documentation window or even host it online. The best thing about it is that you can customize your documentation to suit your project’s needs.
How it works
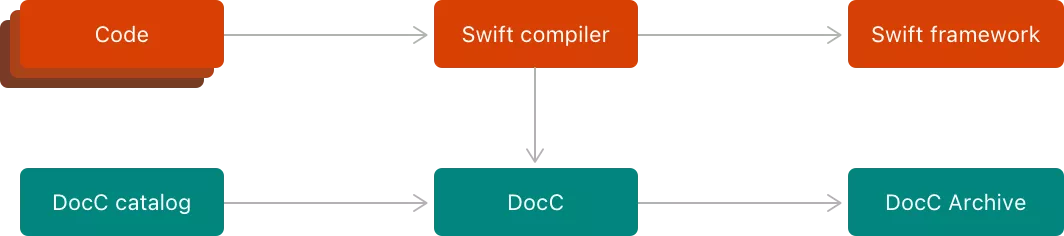
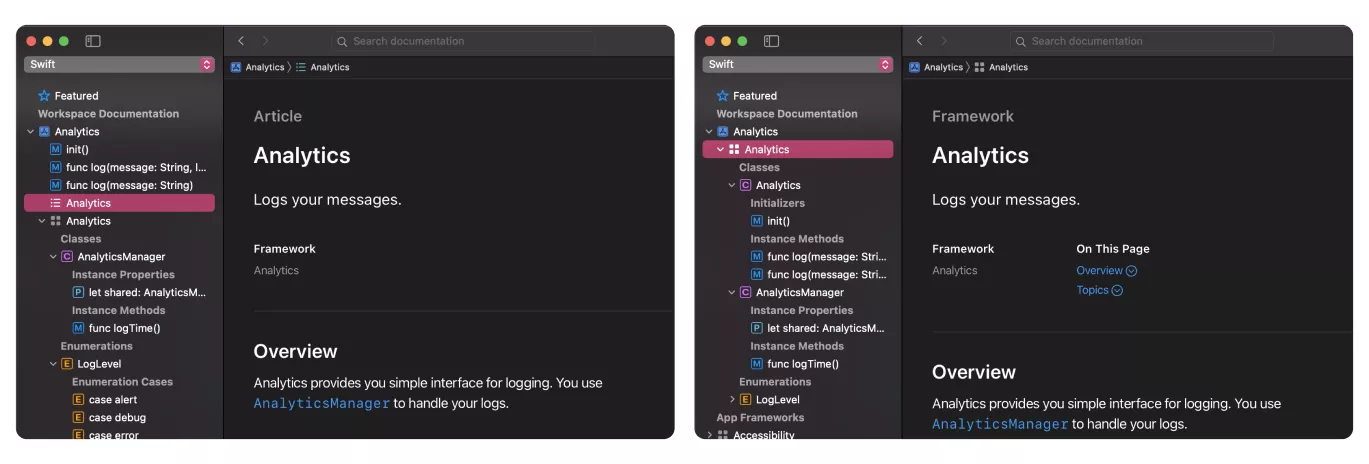
For this blog post, I created a simple Swift framework for logging called Analytics. When you create your framework, you can select the “Include documentation” checkbox, but I left it unchecked for now. The framework has two classes, and I documented methods from each class. To see what it looks like, I built my documentation by going to Product -> Build Documentation. I opened my build in Report Navigator in Xcode to look at my documentation build. As you can see, Xcode built the framework first and then the documentation.

When you build documentation for your Swift framework, Xcode actually builds your framework first to save additional information about your API together with compiled artifacts. DocC uses that information during documentation compilation and creates a DocC archive. If your framework uses other Swift frameworks, Xcode will repeat the process for each one of them.
You can automate documentation builds if you set a Swift setting to build your documentation every time you build your project. You can also use a new xcodebuild command docbuild.
Rich documentation
The documentation created after the first build is an overview of the framework API, and it’s called Reference documentation. You can customize it by adding code snippets, images, or just Markdown, for which you need to use the DocC catalog. Xcode creates it for you if you select the “Include Documentation” checkbox when creating a framework. DocC compiler uses the catalog’s contents to generate a rich DocC Archive.
Documentation types
DocC catalog contains documentation files and resources (media), as well as three new documentation types: References, Articles, and Tutorials. You use them to write documentation in different ways, depending on your project’s needs.
- References – Overview of the APIs, the default version you get when you build your documentation framework without any customization
- Article – Shows the purpose of the framework (a top-level article included in DocC catalog as an empty landing page) or examples of usage (task article)
- Tutorial – A step by step form that teaches you how to implement the framework in your project
Syntax
When documenting your API, you use single-line comments /// or block style comments /**. You can also customize your in-source documentation by providing additional context, such as a summary or discussion, which you can view in Xcode’s Quick Help or in the documentation viewer for the documented symbol.
Markdown is used for writing documentation files. To create a section header, put 1, 2, or 3 hashes (#) before the header title. Level 1 header should be used for the page title.

Symbol linking
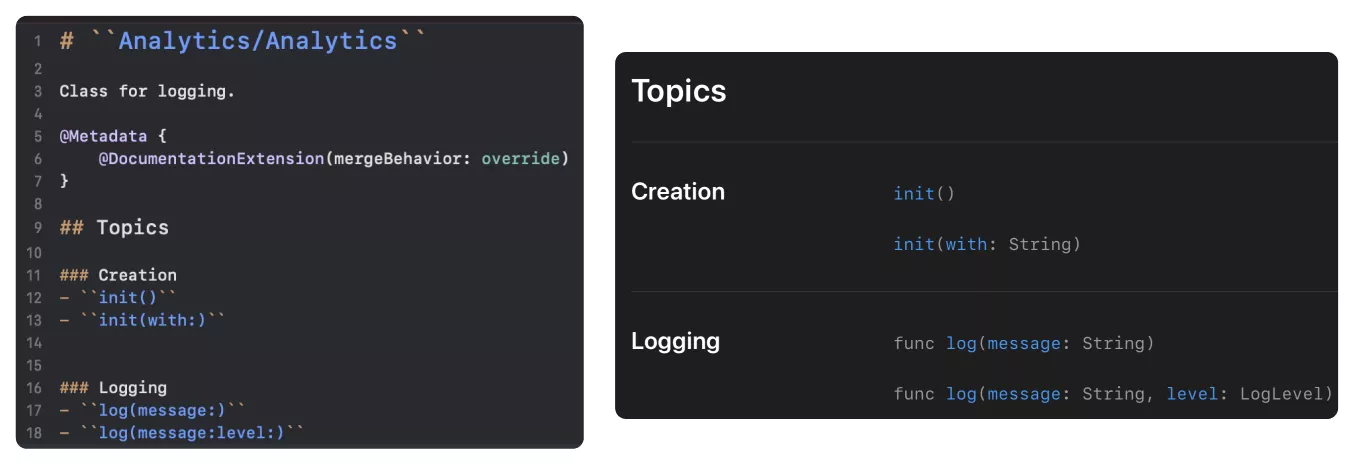
Symbol linking is a feature that enables navigation between documentation pages. You can link symbols, articles, tutorials, and URLs. To create a symbol link, wrap its name in a set of double backticks “. The first example of symbol linking is the landing page. To create it, you need to link your framework’s name in your title so Xcode doesn’t treat it as an ordinary article.
Organizing your doc
When you first build your documentation, you get a list of your top-level public symbols under the Topics section, and they are grouped by their type. Instead of grouping symbols by types, it’s possible to create custom groups by adding level 3 section headers for each new group and by listing the symbol links prefixed with a dash.
You can create an extension file for each symbol with nested symbols and rearrange them further. The title of the page must be an absolute path to the symbol. Extensions can also be used to append to or override source documentation comments. To do that, use metadata directives.
Adding images to your documentation
All the images from the documentation are stored in the documentation catalog. Their names must be unique, and the name format is defined as follows:
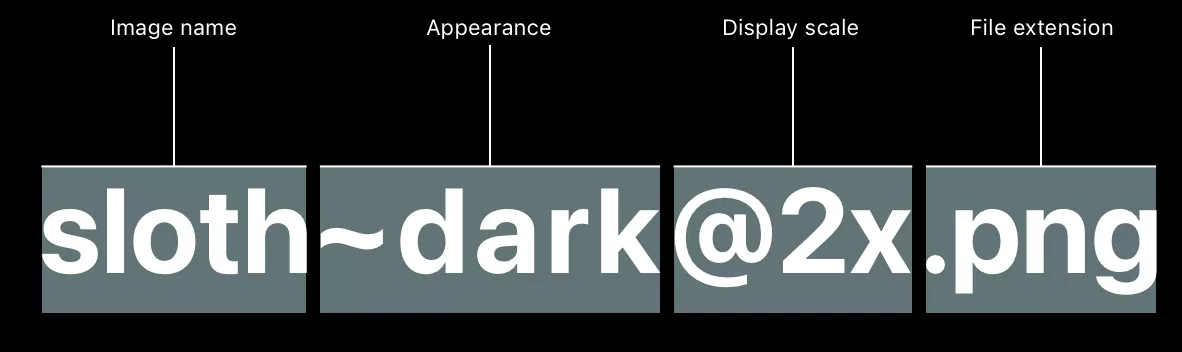
The image name and file extension are required. Syntax for adding images to documentation is .
Adding code listings
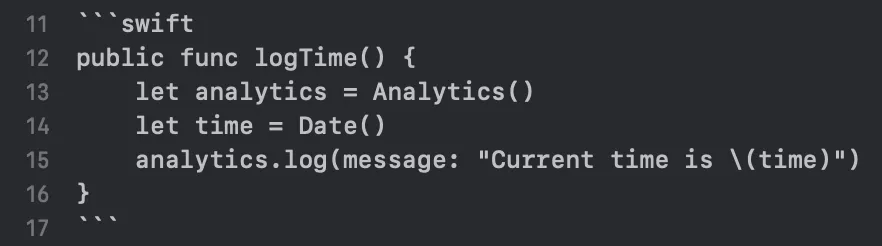
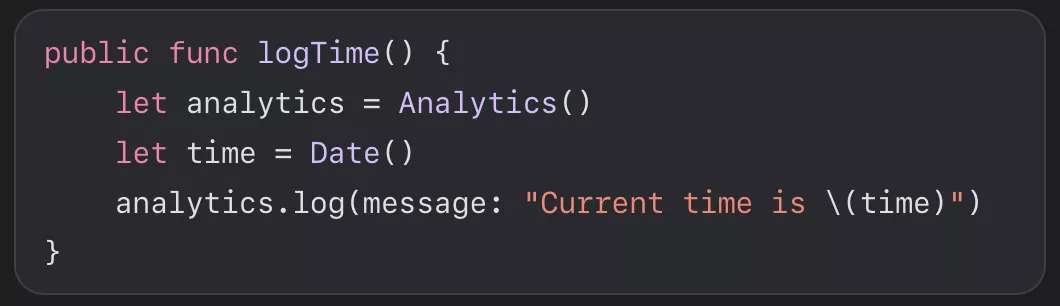
Code examples are a must when writing an article or a tutorial for your framework. You use a set of triple backticks ``` to create a code listing and spaces instead of tabs for line indentations.
What’s fantastic is that DocC applies syntax color formatting to your piece of code based on the programming language you listed after the first triplet of backticks.
Other features
DocC also supports lists (numbered, bulleted, or term), tables of data, asides (notes, important, warnings, tips, and experiment), special characters, and text formatting. See more examples.
Doc sharing
Suppose you want to share your documentation with someone else, or you want to read someone’s documentation in Xcode. In that case, you need a documentation archive, a container that holds the data for viewing documentation in Xcode and hosting it online.
It can be exported from the Xcode documentation viewer or by using the xcodebuild command docbuild.
xcodebuild docbuild -scheme -derivedDataPath ~/Desktop/documentation
When you build your documentation, Xcode saves the .doccarchive to the derived data directory.
Command-line building comes in handy when hosting documentation online since xcodebuild supports CI integration, so the documentation doesn’t need to be uploaded manually. Also, when hosting documentation online, you have to handle incoming requests for pages (/documentation and /tutorial point to index.html) and for resources.
Doc, build, and share
Hopefully, this has been a fun introduction to the DocC. Have you already added documentation to your framework? We’re looking forward to reading the documentation for Swift frameworks we already use and for the new ones that are yet to come.
I’ve documented my part – now it’s up to you to share it.