To successfully release an app (or an update of an existing app) to the Google Play Store™, you're going to need a couple of things. First and foremost, you need an APK/AAB file. For more information on this, check out the Play store section of this handbook.
Secondly, you should check that you have been granted access to the Play Store Console (link). If this is not the case, contact the team leads, lead engineers, or your PM.
About testing tracks
Now that you have a build that you wish to release and the right to do so, your first task is to select a track. Tracks come in a couple of different shapes with several key differences:
- Internal test track
- Closed track
- Open track
- Pre-registration track
- Production track
Track fallback status
Depending on deployed APKs/app bundles, you could see various validation messages that denote how this track compares to others. If a track is set as shadowed, this means that one APK shadows another APK when it serves part or all of the same device configuration and it has a higher version code. When a track is promoted, this means that all of its active APKs are contained in the fallback track's active APKs (e.g. all active beta APKs are also active in production). You may see this if you release first to a testing track and then move the APKs to a more stable release. When all of the active APKs in a track are completely shadowed by active APKs with higher version codes, the track gains a superseded status. Finally, a track can be partially shadowed, meaning that at least one APK is shadowed by a higher version code APK. This would mean, for example, that some users get the beta APK, while others get the one from production. Usually, this is a result of a mixup with the version codes.
Internal test track
The internal test track is meant to be used for internal testing and quality assurance checks. Through this track, your app is immediately available, usually skipping regular Play Store security & policy checks1. It's worth mentioning that the test users can only access the app through an opt-in URL (the APK isn't discoverable on the Play Store). Additionally, this track can only contain a total of 100 users per app. Lastly, the users can only be added through their Gmail or G-suite account, so make sure they have one.
Test users can also install your paid app for free, and the device exclusion rules don't apply to them.
1If this is the first time you're publishing your app, it may take up to 48 hours for it to become available.
Closed tracks
A closed release is primarily used to test out a pre-release version of your app on a wider population. Unlike the internal test track, closed tracks can have a total of 100 000 users per track, which should suffice even for the largest of apps. Additionally, you can add users through Google Groups or by importing CSV files, making it even simpler to manage large user populations.
By default, Play Store automatically creates one closed track, aptly named Alpha. In some cases, though, you may require additional closed tracks. You can easily add these through the developer console, but remember that new tracks will lack some features (read more about those here).
Finally, the main trade-off of using closed tracks is that your initial build, as well as any build that includes major changes, will be subject to a beta review process before publishing. Luckily, this process only takes a couple of hours to finish and should not represent a problem.
Open tracks
By using open tracks, you're making your app discoverable on the Play Store, which means that you now have a test pool of about 2 billion users at your disposal. What you can do, though, is limit the maximum number of test users, but the minimum you must allow is 1000.
If the app is yet to see its first release to production, the store listing will show it as an early access app. Otherwise, if you're only releasing an update of the app, a beta version will be presented to users that have installed the production version. As is the case with closed tracks, Play Store automatically creates a default open tracked called Beta.
By using open tracks, user feedback can be gathered directly from the Play Store, but are not public, meaning that they won't affect your total production listing.
Pre-registration track
With this track, you enable users to pre-register for your app before it is actually available. When the app becomes available, it will be automatically installed to all the pre-registered users. It is mostly used to boost pre-launch game campaigns and improve retention metrics.
Production track
Finally, when you create a production release, your app is available to all users in the countries you've targeted.
Creating a release
Having selected a track, it's time to release your app. Go to your Play Console and select the app (if this is your first release of a new app, check out how to create a new app listing here).
Follow these simple steps to get you going:
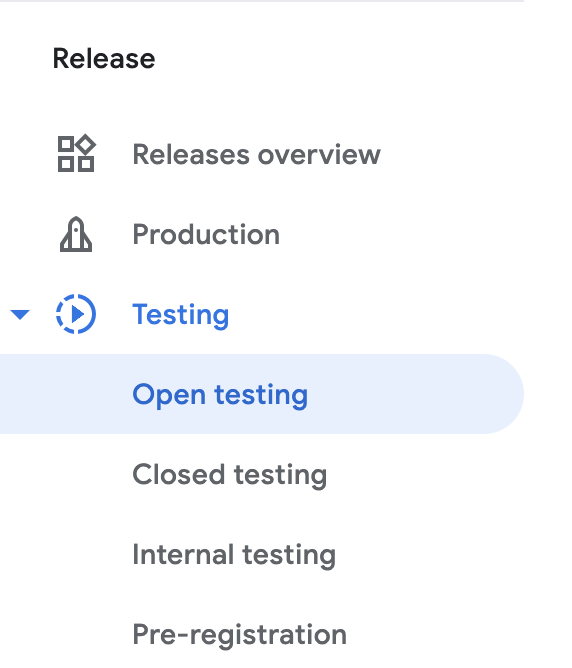
Click on your preferred track from the side bar and then the Create release button on the top right corner.
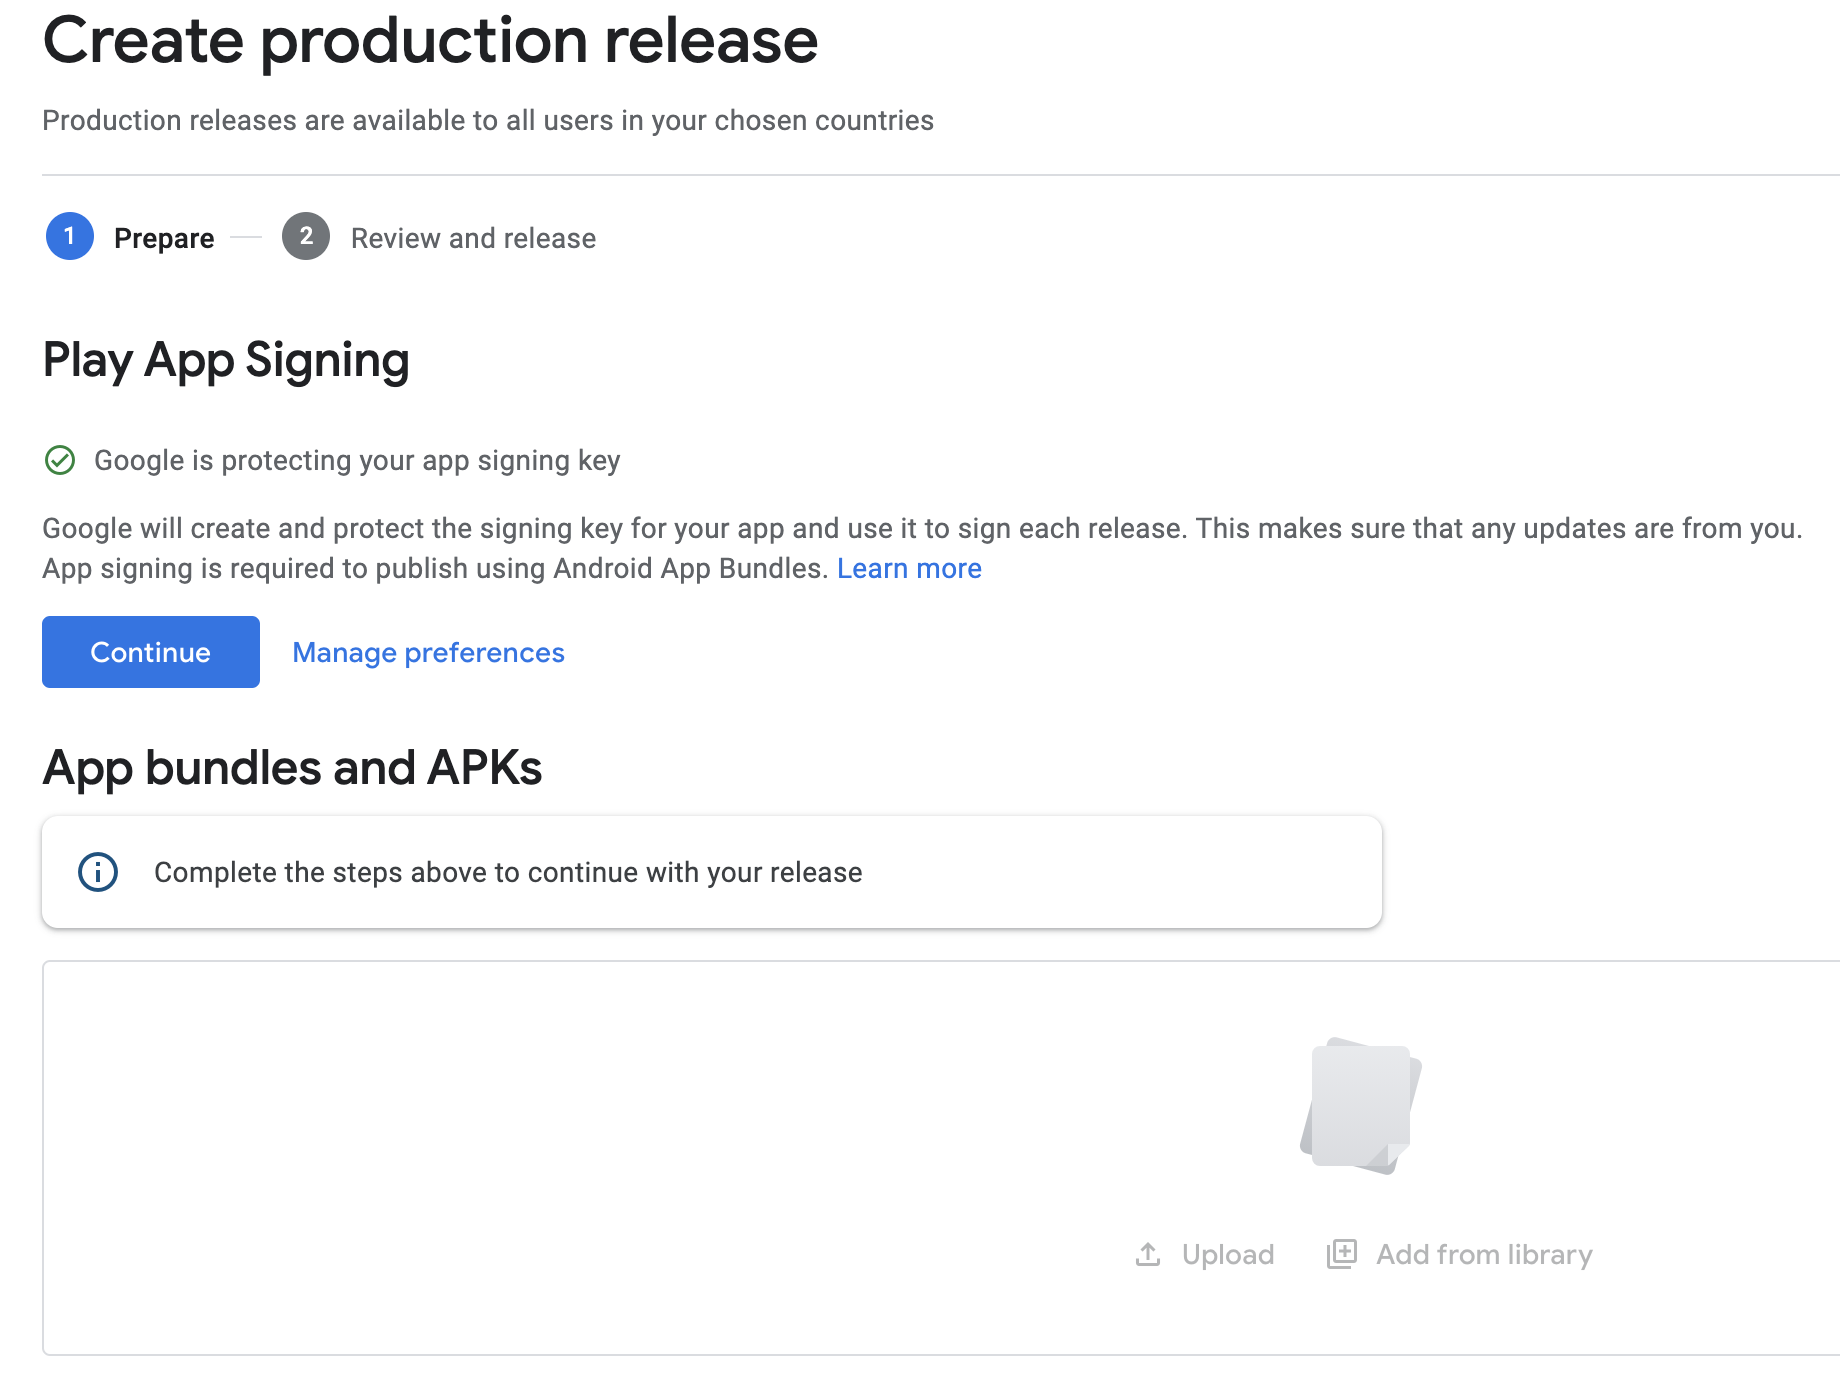
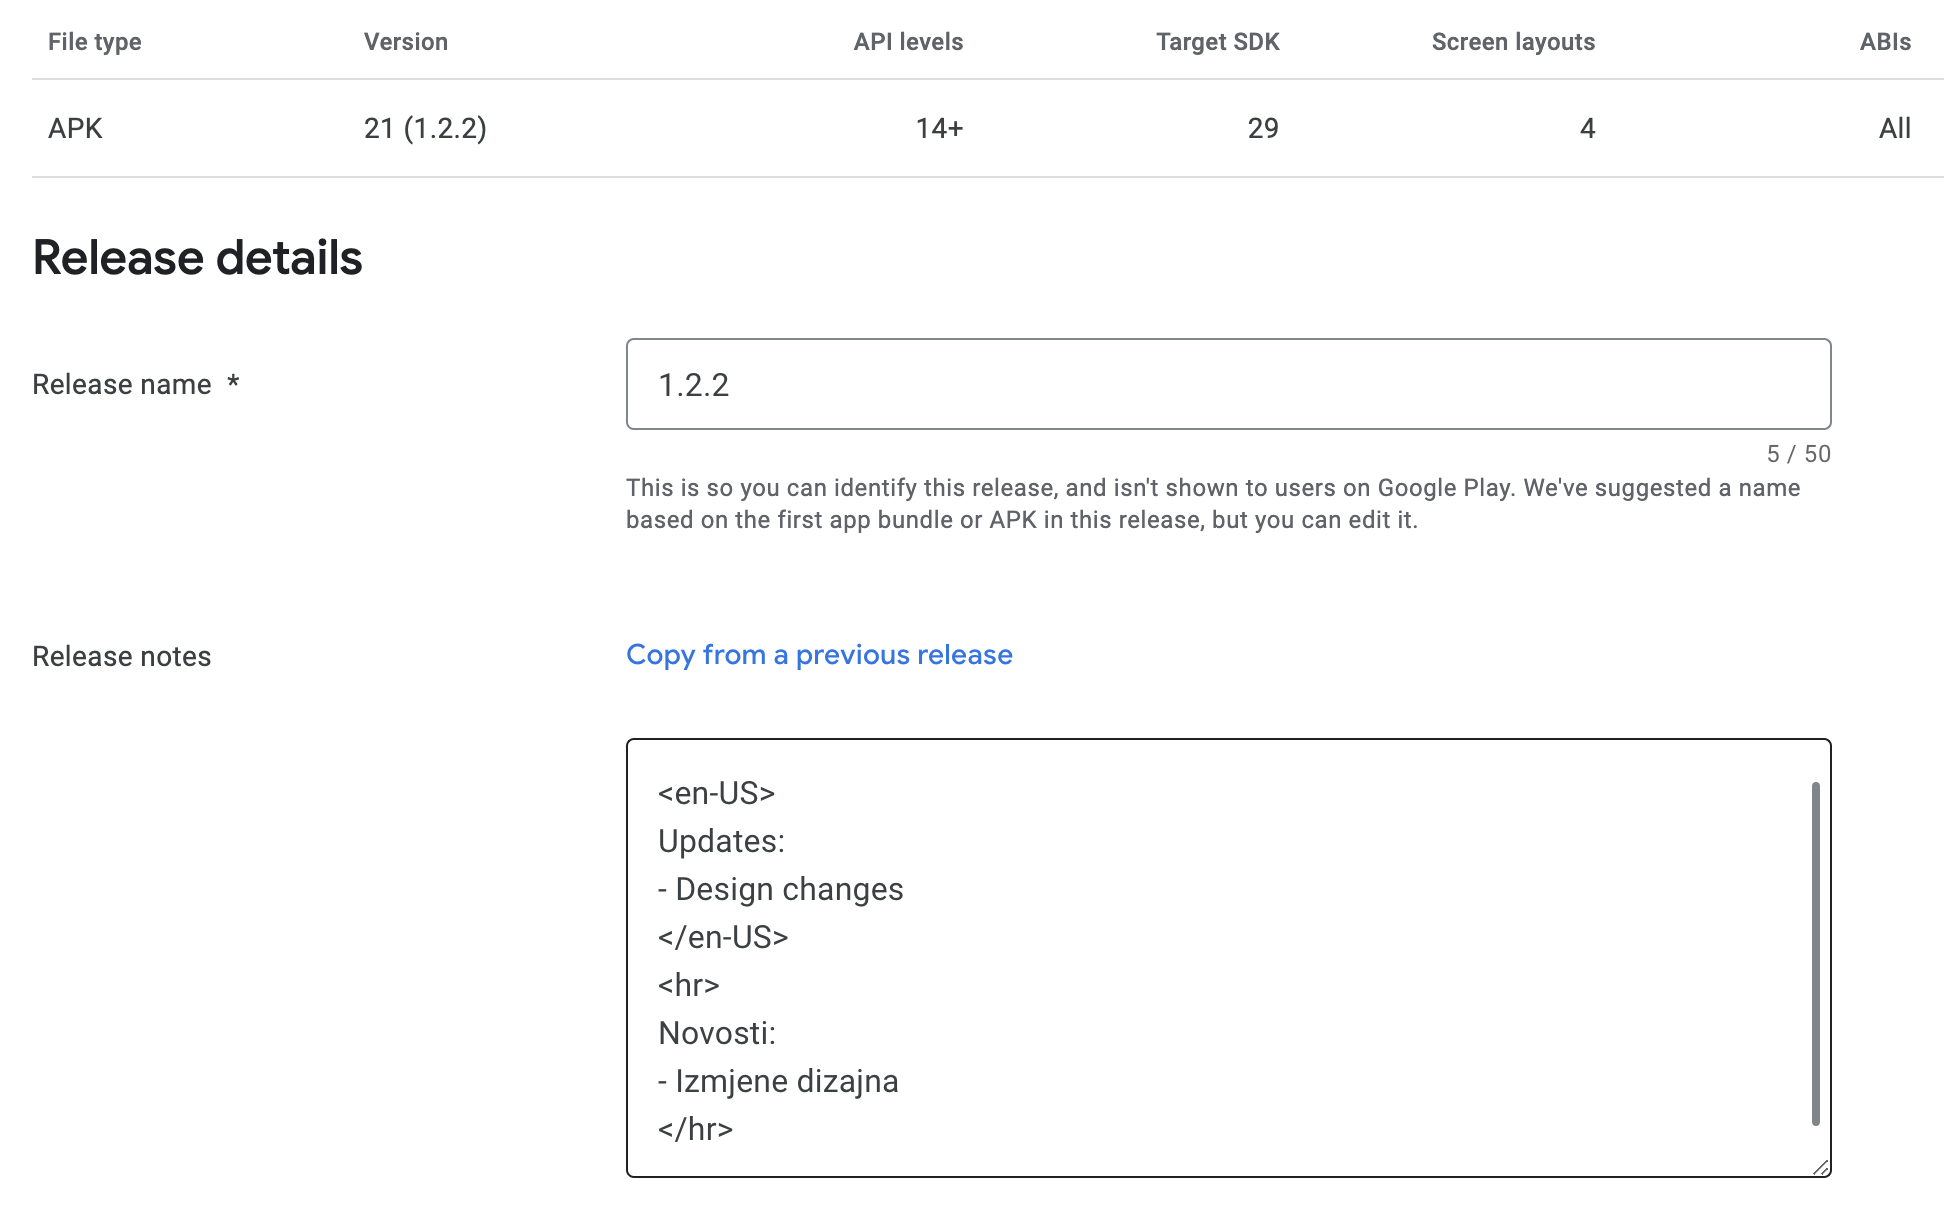
Follow the on-screen instructions to add APKs or app bundles, double-check the APKs/Bundles to (de)activate or retain, name your release and describe what's new in this release.
Note: To save your progress at any time, just press the Save button at the bottom of the page.
Once finished, press the Review release button that will lead you to the final review step.
Review & rollout
Prerequisite: Before you can roll out your release, make sure you've completed the store listing, content rating & the pricing & distribution sections. When each section is complete, you'll see a green checkmark next to it on the left menu.
The final review & release page is useful to check once more if everything is set up the way you planned. It offers a quick overview of all added/deactivated/retained APKs/Bundles, as well as the what's new section and all the language translations.

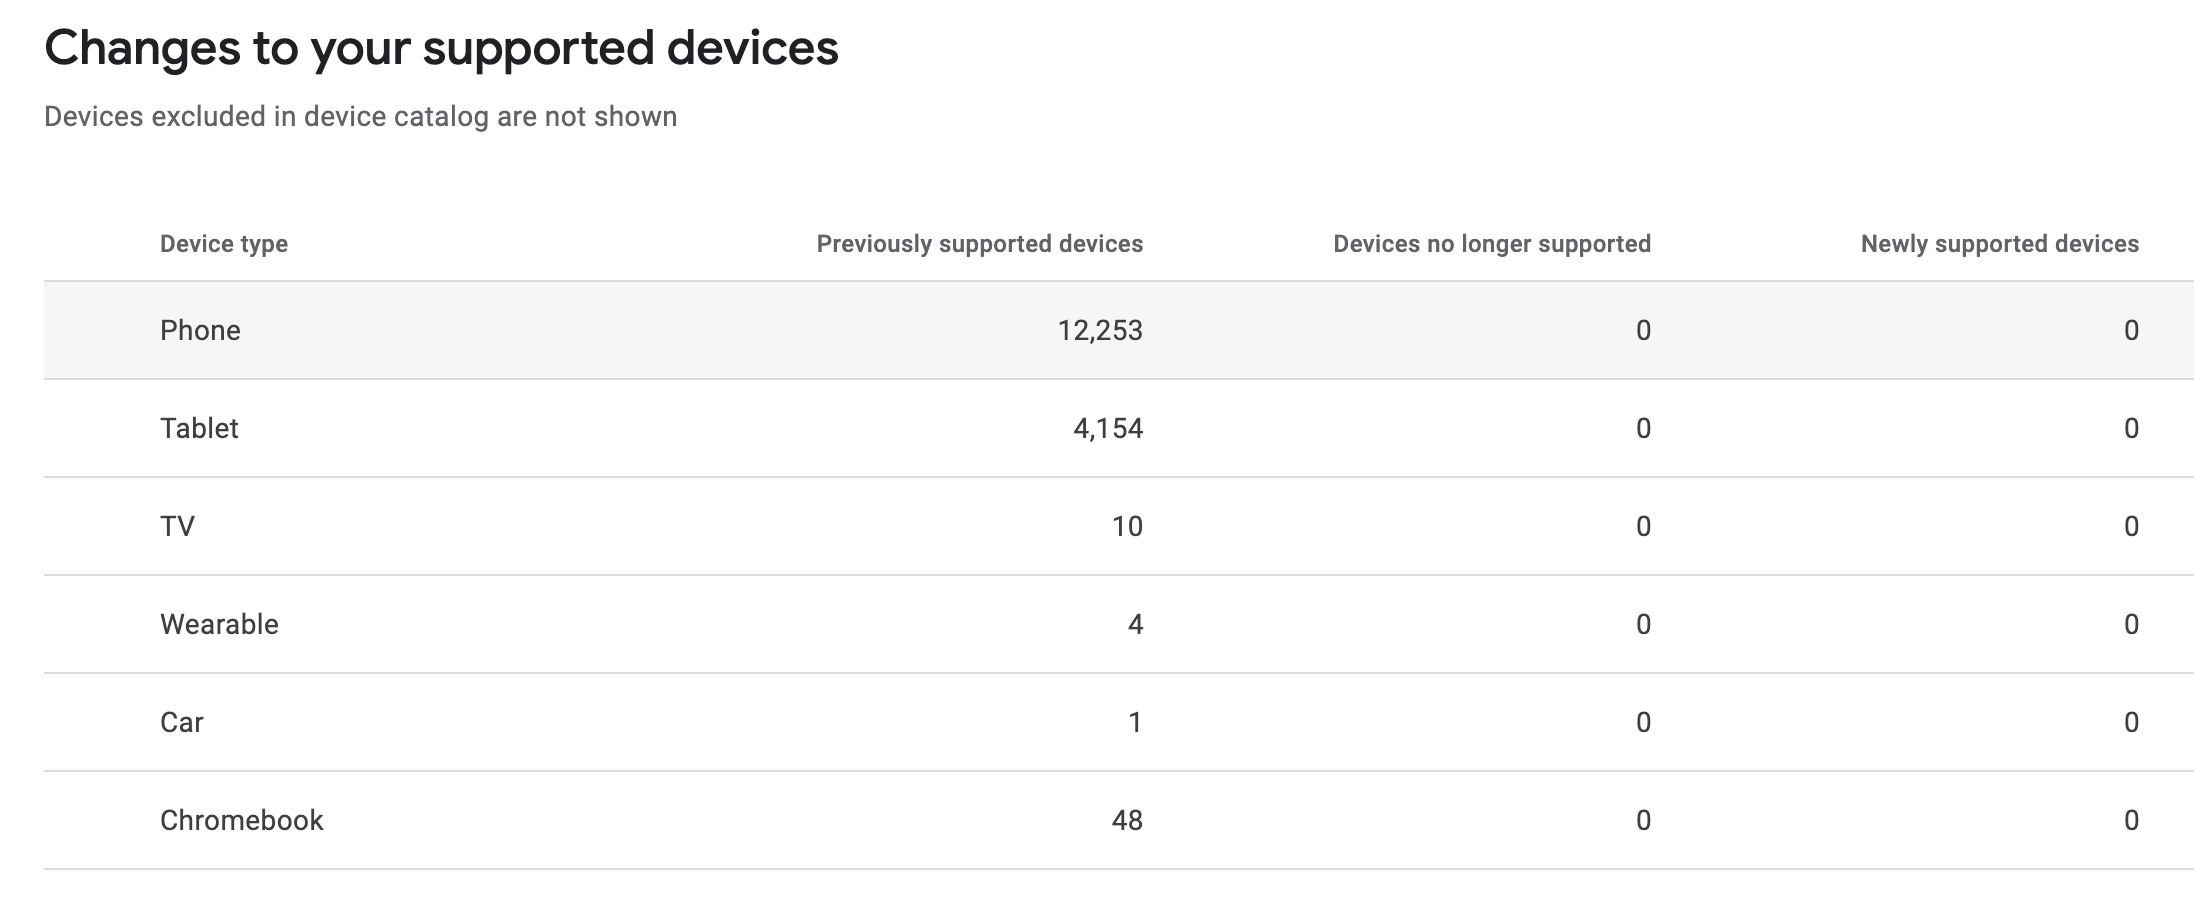
Before you release anything, double check the number of targeted devices, just to make sure that you didn't mess up anything by accident. If the numbers don't match the previous release, and it wasn't your plan, go back to the release page and see why this is so.
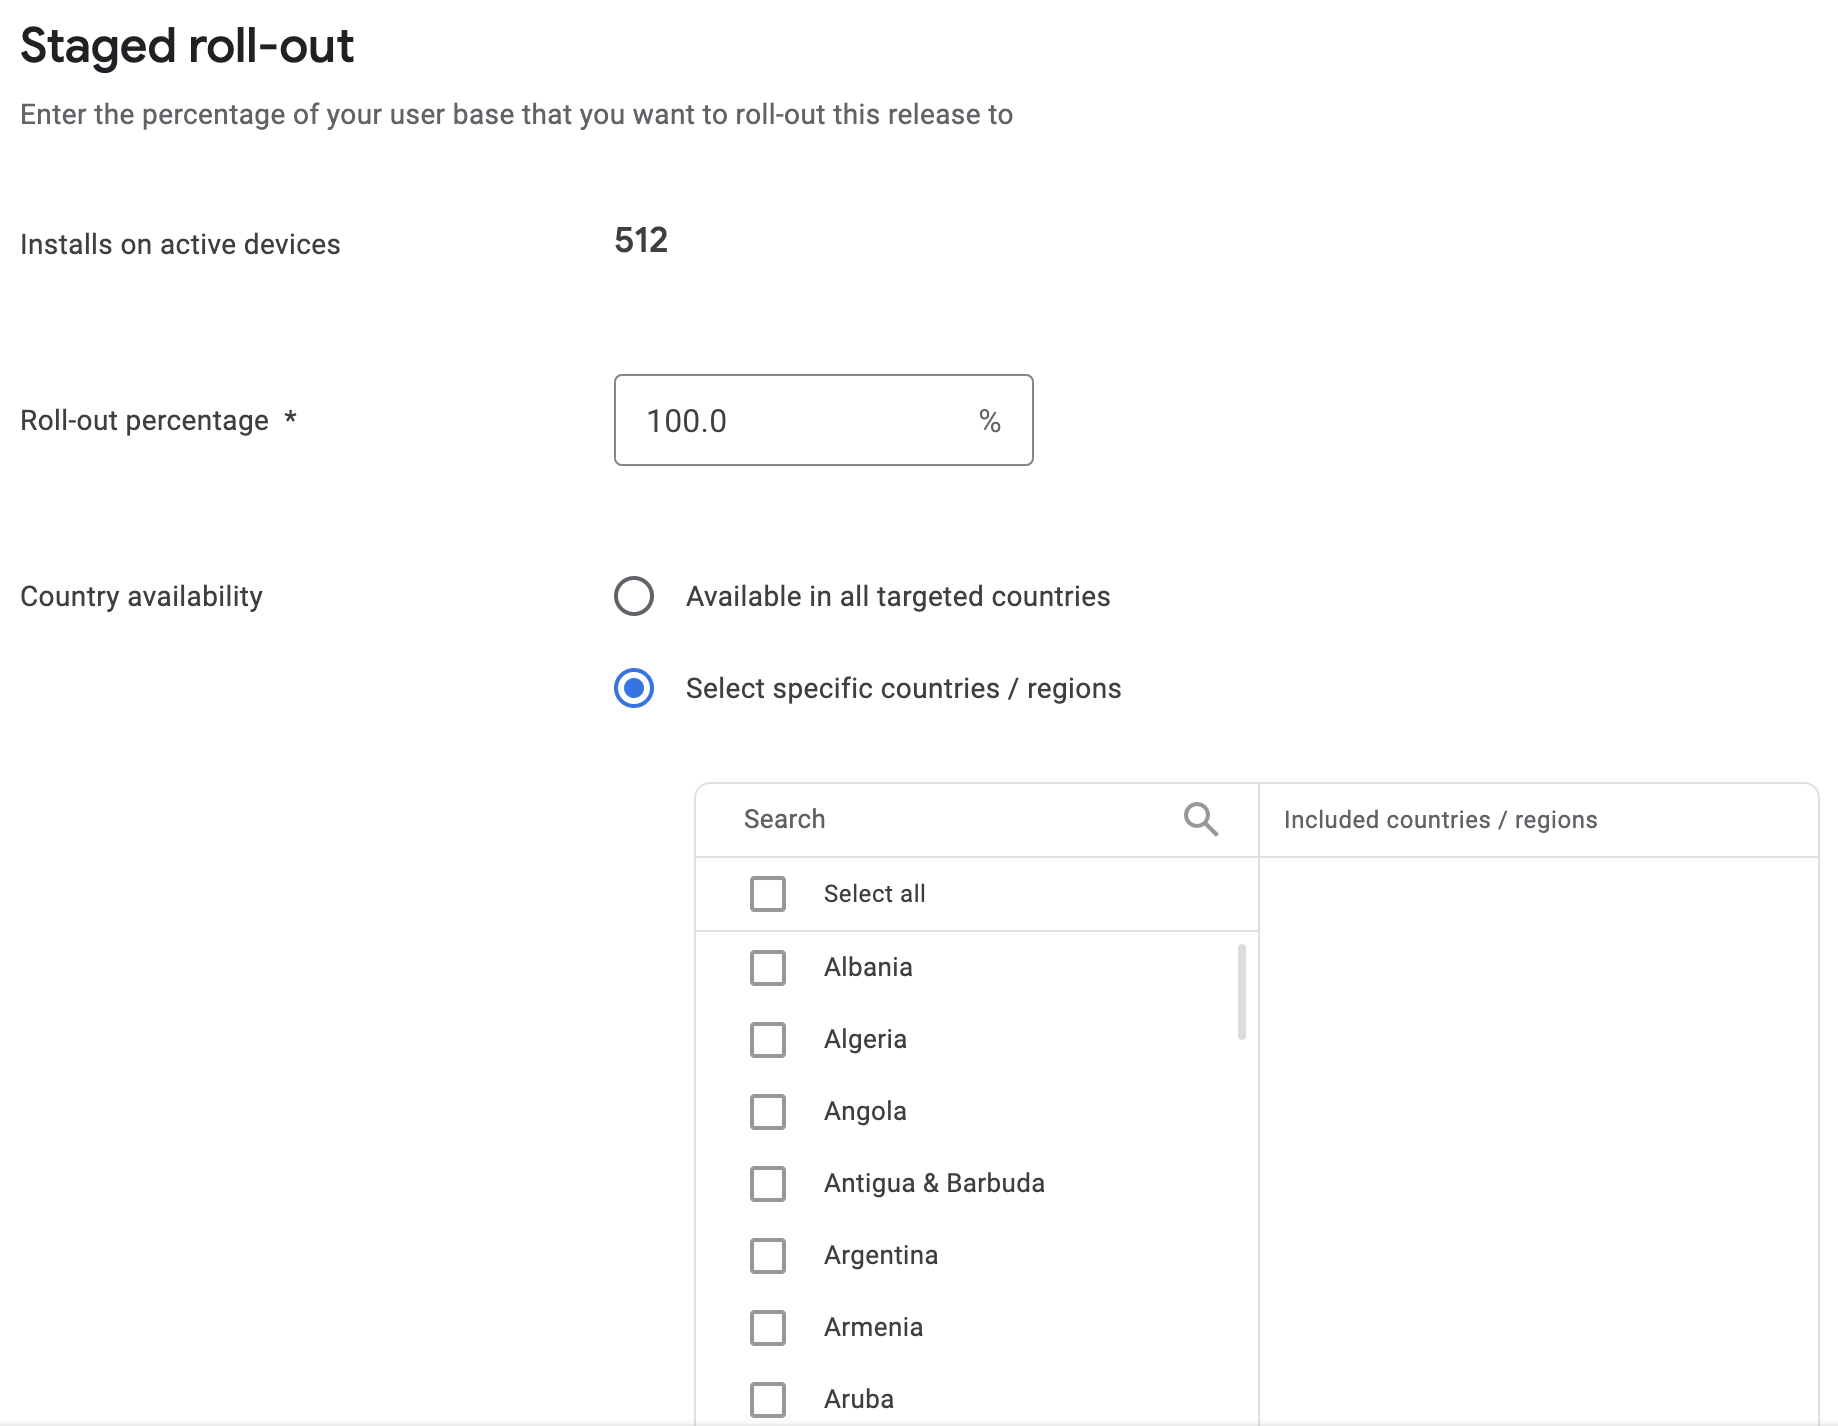
By default, the release will be available in all targeted countries. You can still manually select the availability of a release for specific countries/regions by checking Select specific countries/regions and picking individual countries.
Staging rollouts
The review & release page also contains a section for setting the percentage of the targeted users for the new update (if you're publishing the app for the first time, skip this step). If you set anything below 100%, you're doing a staged rollout. Staged rollouts provide a way to limit the scope of issues introduced with new versions of your APK. For example, if your release performs poorly, it's better if only a small percent of users experience this rather than your entire user base. You can fix any issues in your app and push out a new version to the users, continuing to test each APK. If everything goes well, you can gradually increase the target percentage, monitor the metrics and keep going until you reach 100%.
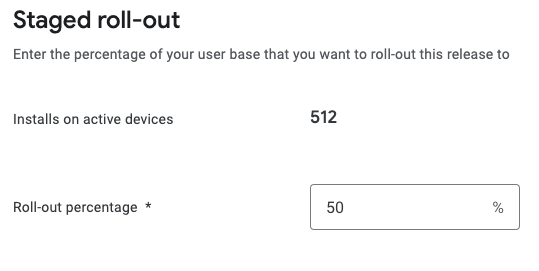
Important! Keep in mind, your app's staged rollout percentage won't increase automatically. You must do this manually through the Console by choosing your release and clicking the Update rollout button & selecting a new percentage.
Halting a rollout
If you encounter a breaking issue, notice your metrics are off or a spike in the number of user complaints, you can easily halt further distribution of your new APK. Users that have been targeted by the rollout, but haven't installed the update yet will no longer have access to it. However, those who have already got the new version will not downgrade.

When you're done with the hotfixes and are ready to make a new update, the new release will use the same group of users as the previous staged release.
Final tips
- If your app update requires changes to the store listing, update your listing after your release targets 100% of the user base
- Closely monitor crash reports and user feedback during each rollout stage
- Plan your stages before you start the rollout & set reminders so that you don't forget to bump the percentage
Publishing status
Once you release your update into production, your app publishing status will be set to one of the following:
- Published - The app is published and available on Google Play
- Update rejected - The update has been rejected due to a violation of Google Play policies (your previous published version is still available on the store)
- Unpublished - The app has been unpublished from Google Play and isn't available to new users, but is still available for existing users
- Suspended - The app is suspended due to a violation of Google Play Policies
- Removed - The app is no longer available on Google Play or for existing users
- Update pending - The update has been submitted and is being processed
Managed publishing
When you select managed publishing, your update needs to be processed before it can go live. Processing takes up to a few hours. When your update is processed, you'll see a Go live button. When you select it, you'll make the update available on Google Play within a few minutes.
Unfortunately, Google Play still doesn't offer automatic releases. It is your responsibility to press the Go live button in order to push the update to the store. Additionally, note that managed publishing is only available for updates! If activated, managed publishing remains on until you manually turn it off.
To turn on managed publishing:
- Go to the Publishing overview section in the sidebar
- At the right side of your screen, press the Manage button
- Review the information, select the switch Managed publishing on and press the Save button

Exceptions for Managed Publishing
- Increasing an existing staged roll-out to 100%
- Updating your app’s ”Release notes” section
- Changes to device exclusion rules
- Managing testers
- Unpublishing your app
- Changes to your app’s In-app products page
- Price changes