App re-signing
In case you are provided with .apk file which is already signed, or not signed at all, you can follow these steps to re-sign it with correct signing key.
You need:
- .apk file to sign
- .jks signing key file
- signing password
- Android/sdk/build-tools latest version (you get this by default when installing Android studio, but can be installed separately if needed)
Let's put these in same folder.
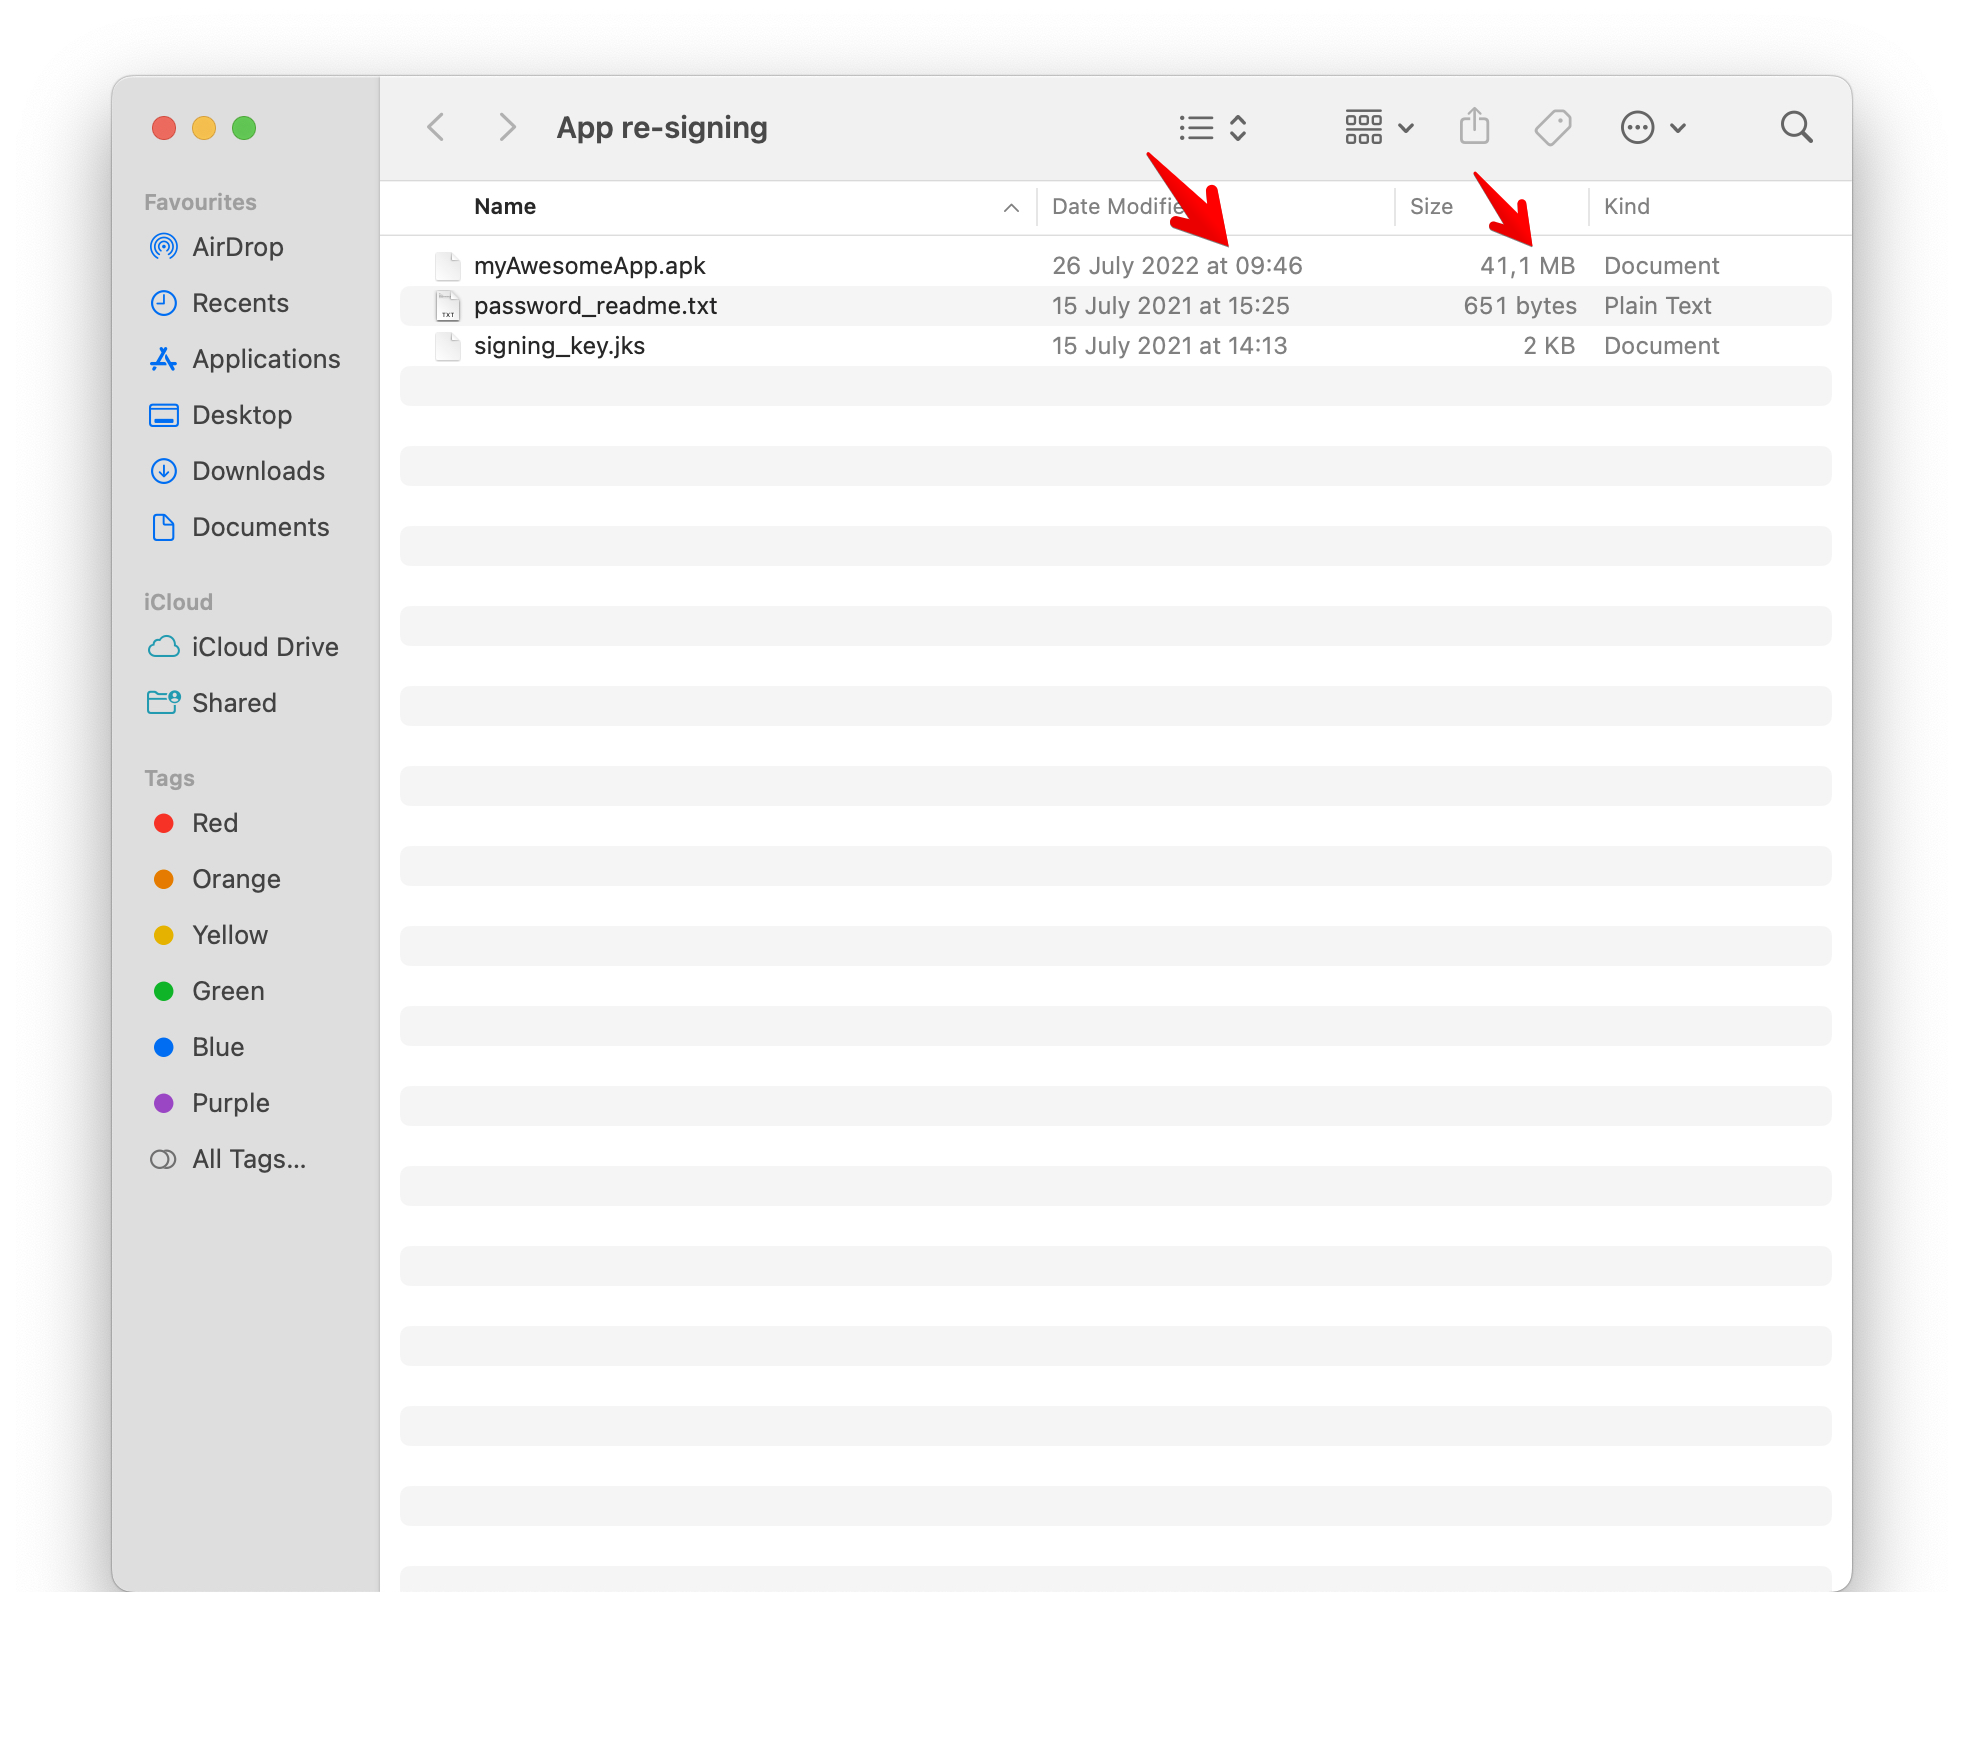
Step 1 - check .apk file details
If you open the folder in finder, you can easily check for file size and time modified, which we'll use later to confirm the app was modified by our signing key
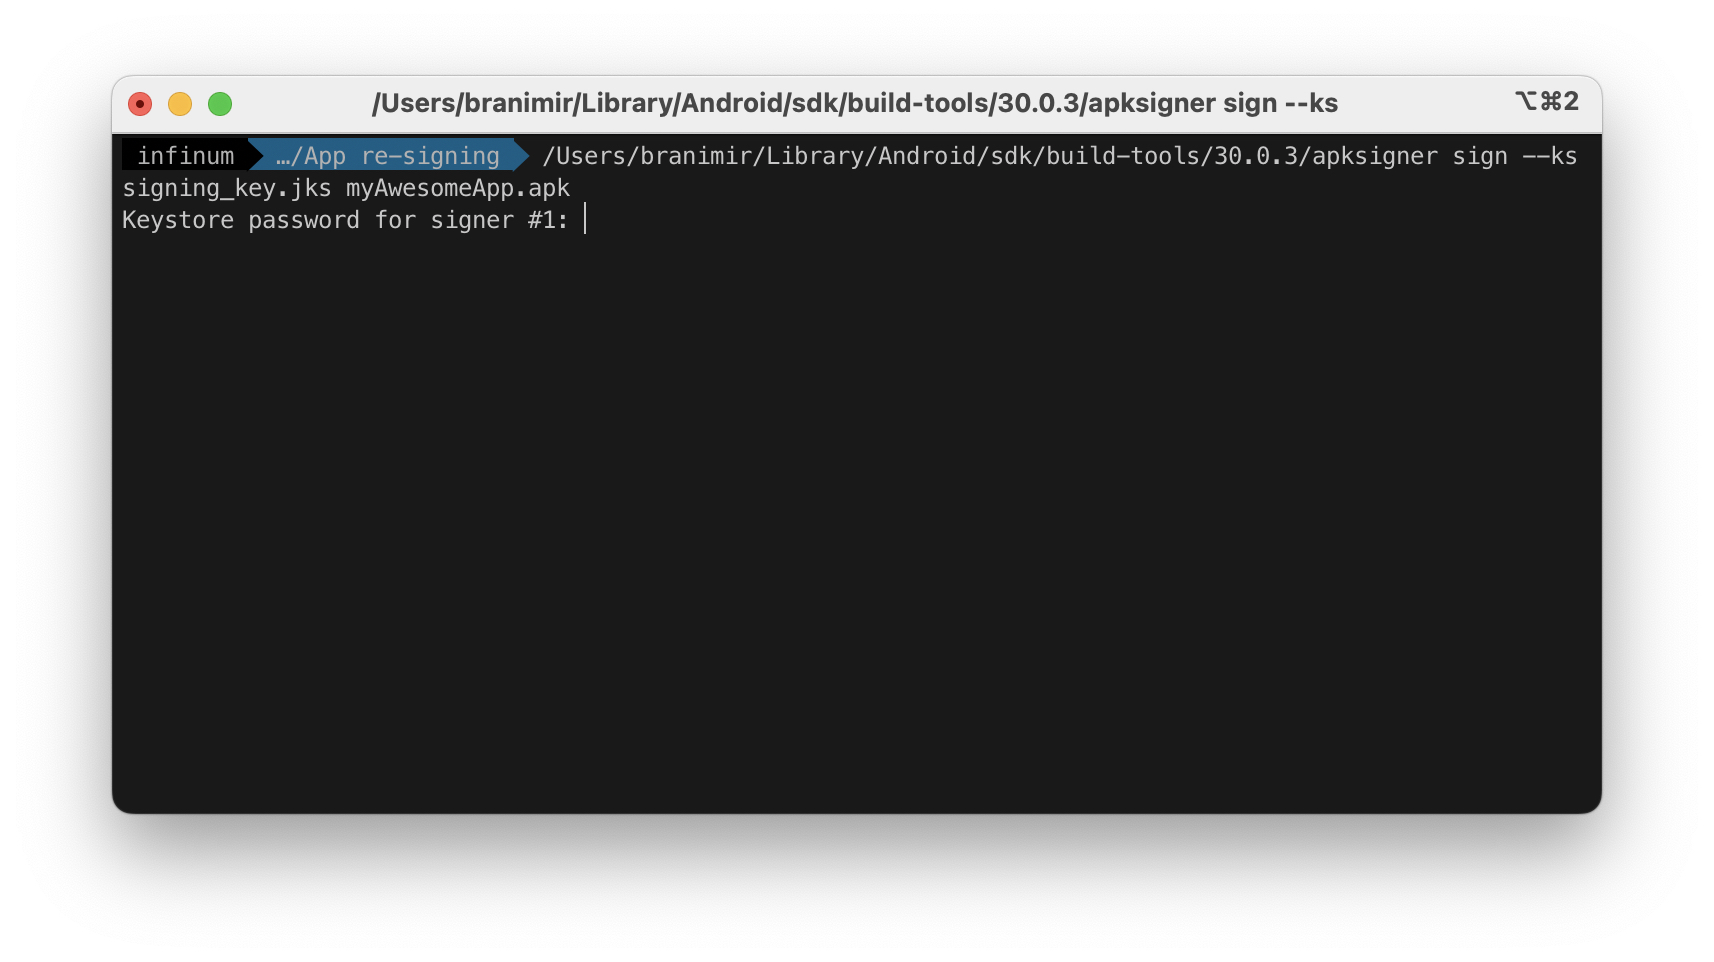
Step 2 - run apksigner sign
Using the installed build tools, run the following:
/Users/<your user name>/Library/Android/sdk/build-tools/<latest version>/apksigner sign --ks your_signing_key.jks myAwesomeApp.apk
You'll be prompted for a password, so please enter it (copy/paste may not be allowed here). Also, be careful with storing and sending this information.
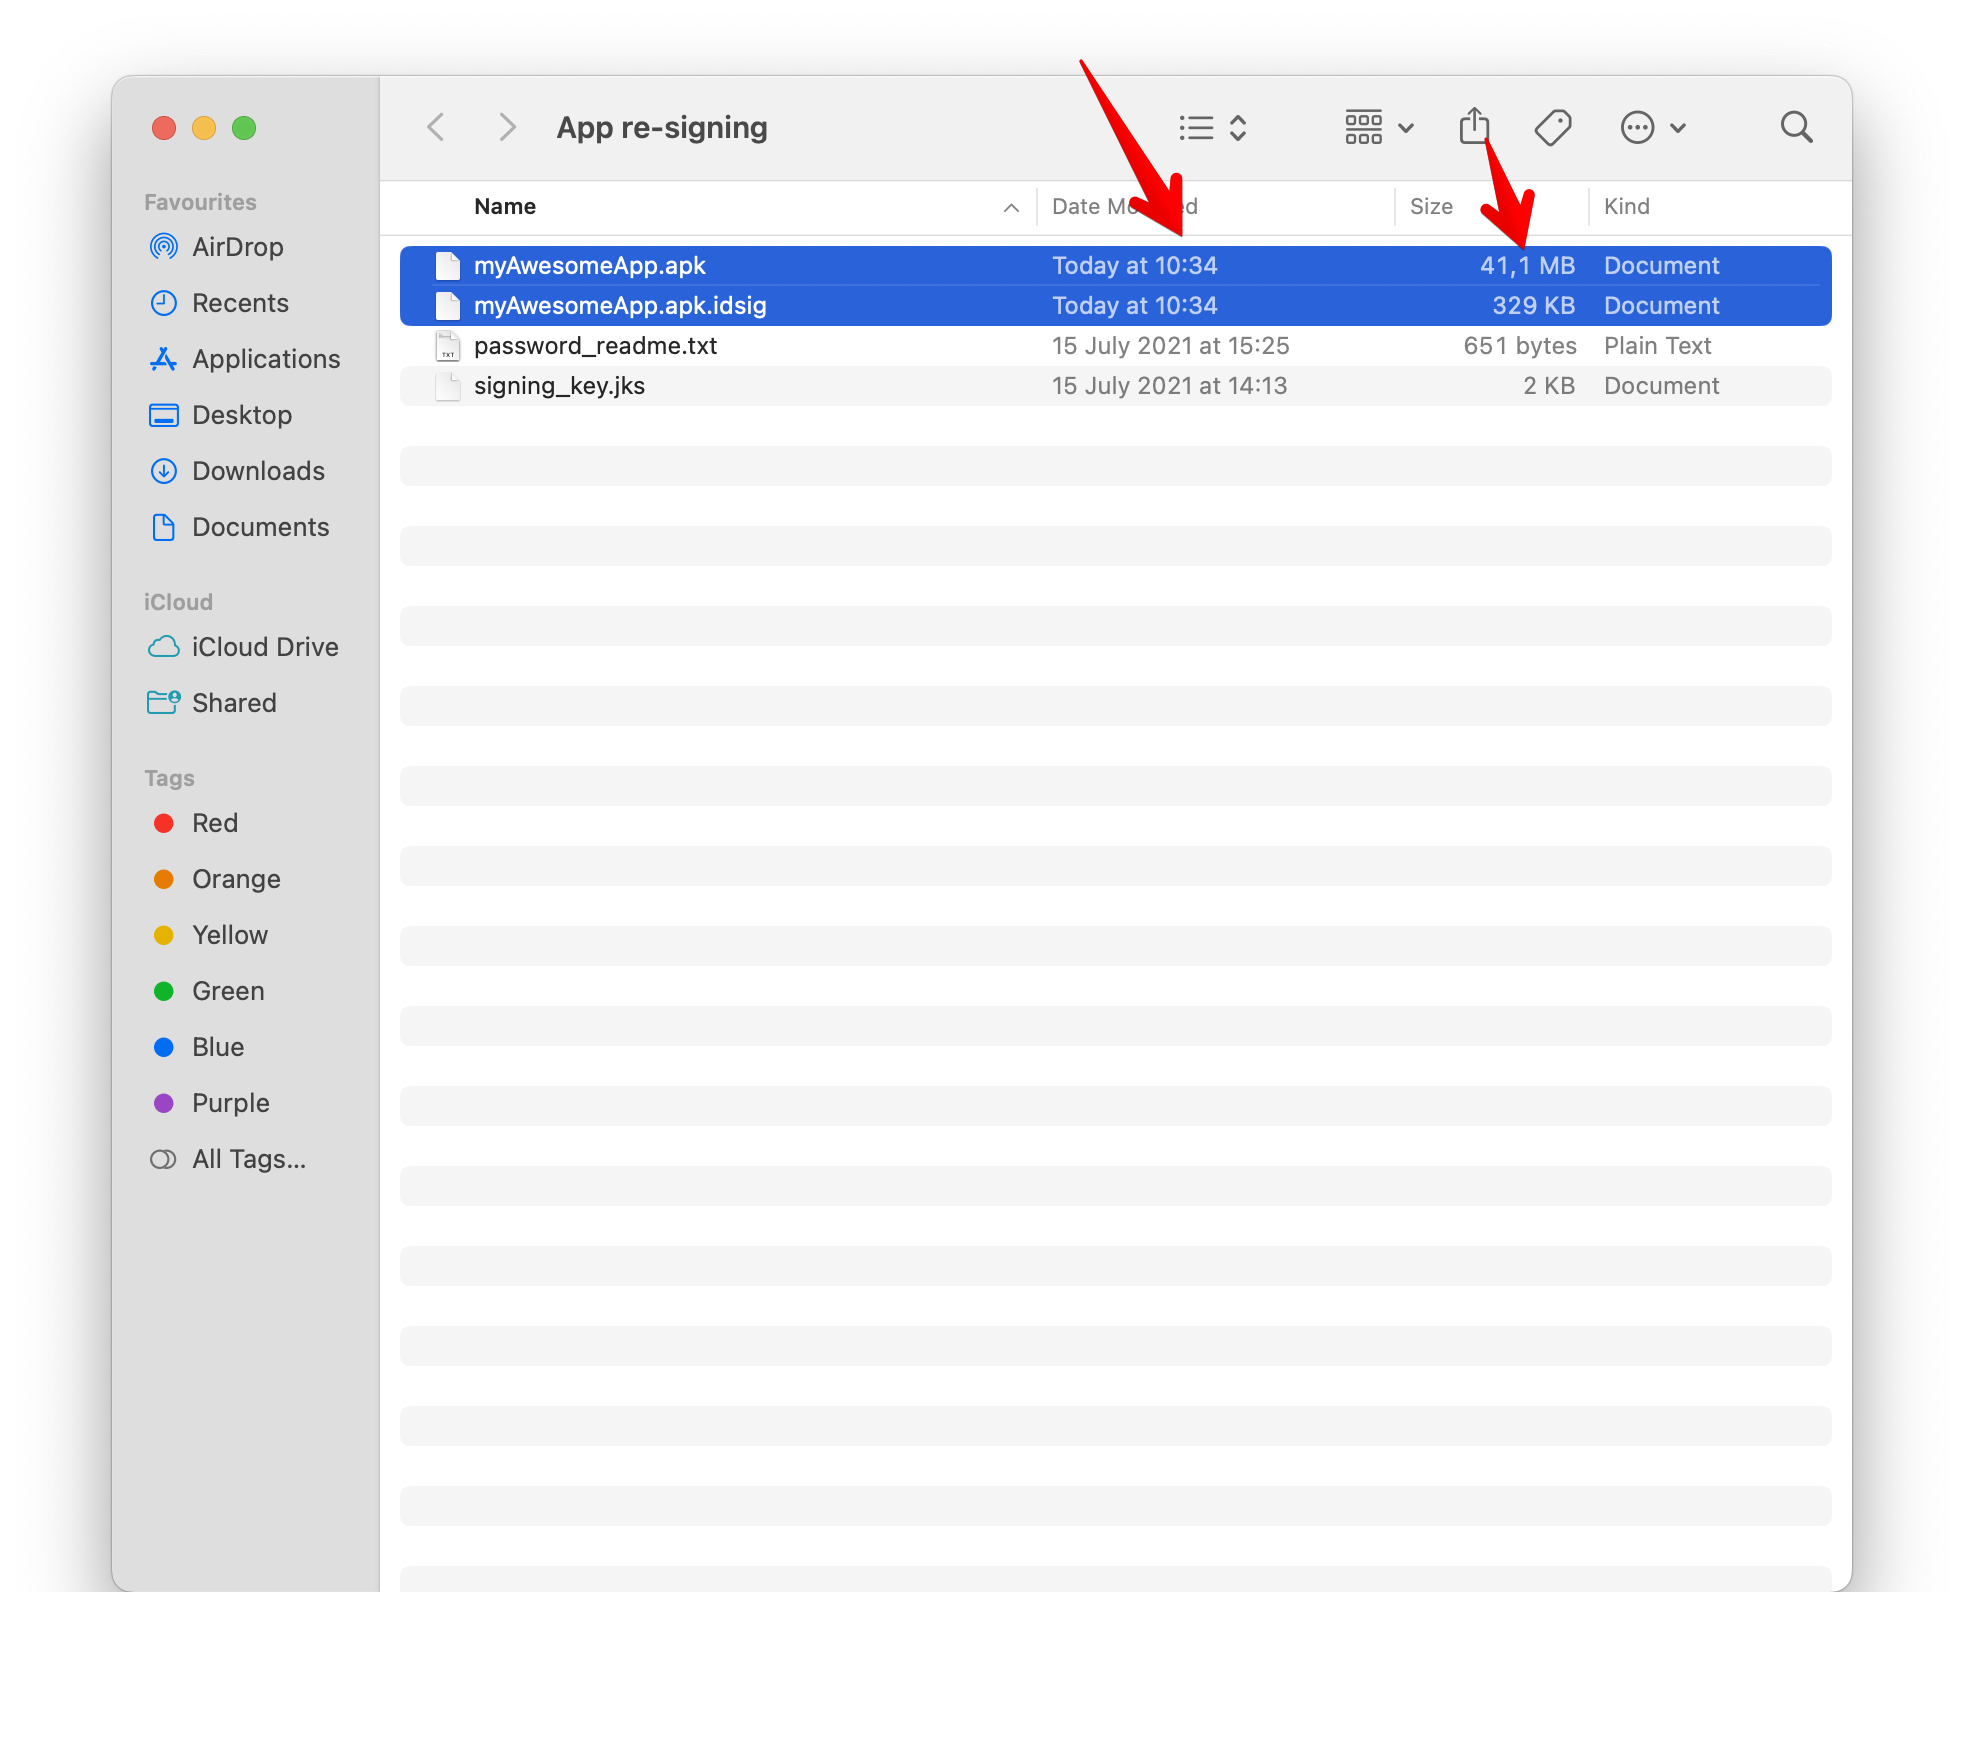
Step 3 - Confirm idsig file was created
idsig represents the signature file. Please be aware that it is not the signed app, the signed app is actually your original .apk file, but modified. Please check app size and time modified and compare them with the details from step 1. You can see that signing was completed.
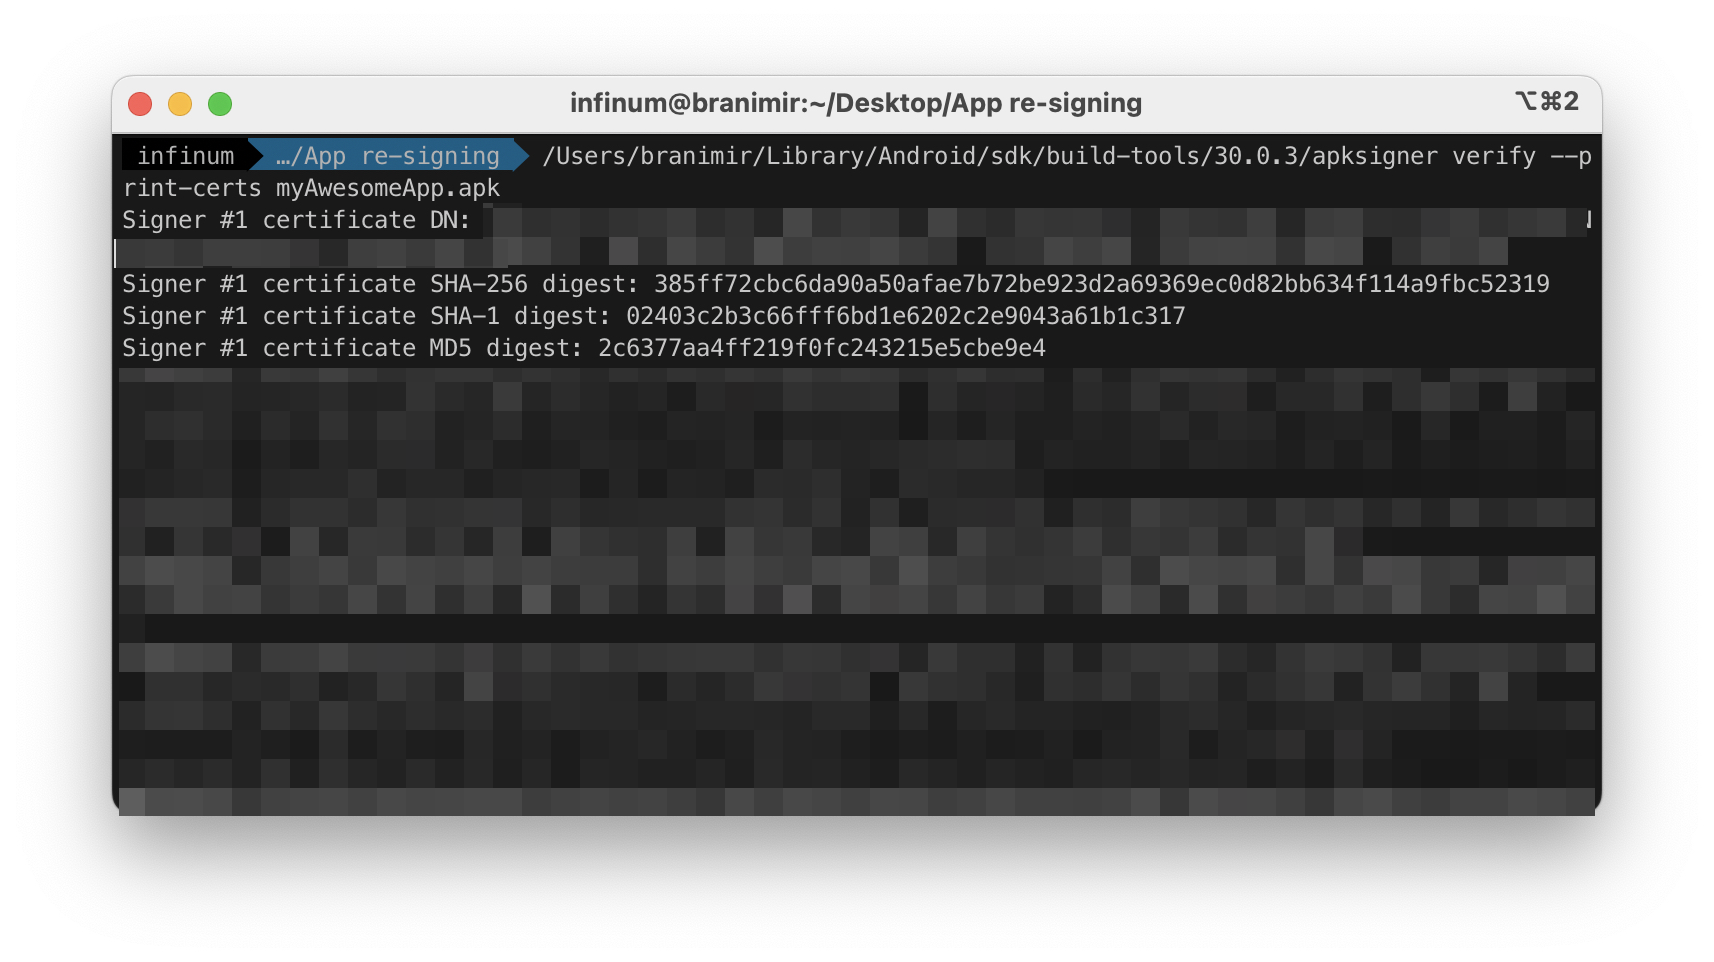
Step 4 - run apksigner verify
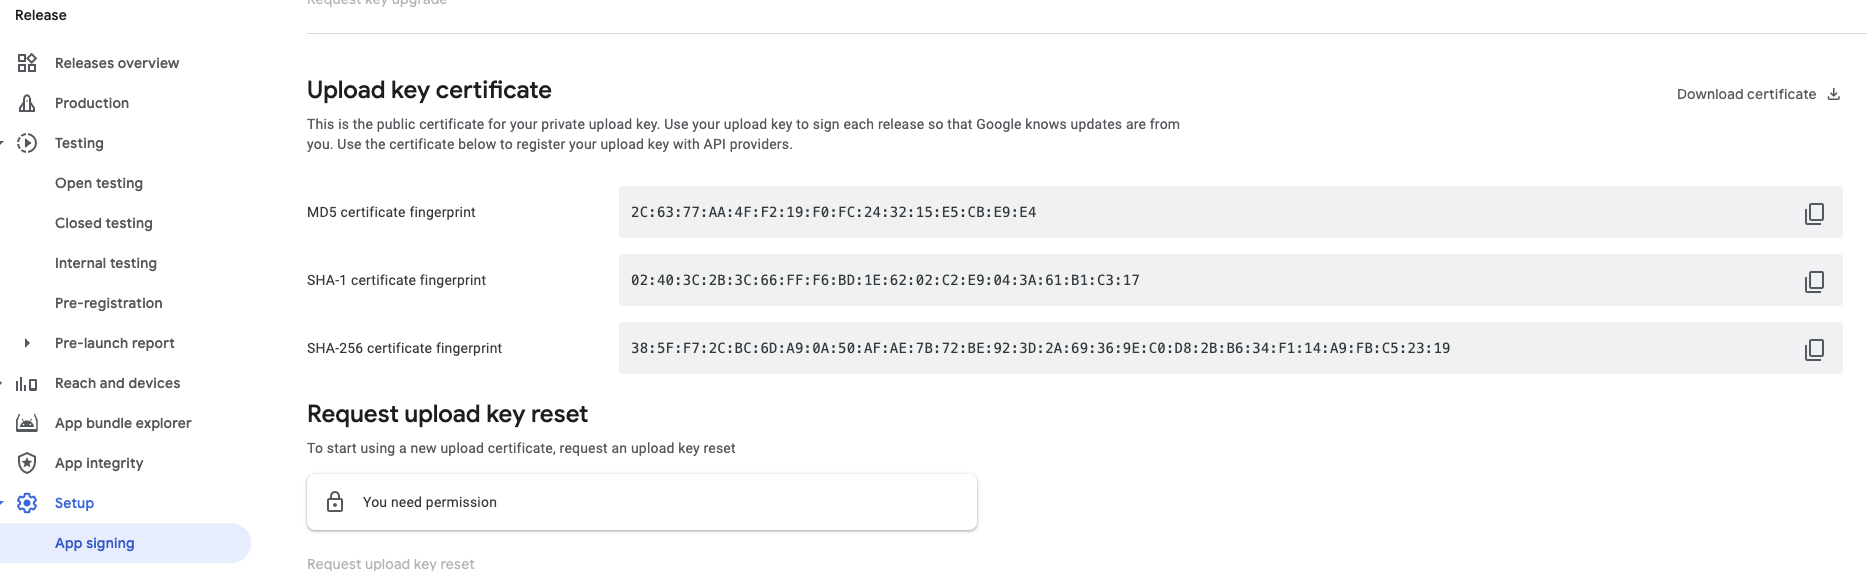
To make sure our signing is correct and will pass Google Play validation, we need to check SHA-256, SHA-1 and MD5 digest data. Run the following:
/Users/<your user>/Library/Android/sdk/build-tools/<latest version>/apksigner verify --print-certs myAwesomeApp.apk
It'll print out the data we need. Now, go to Google Play Console of your project and find App integrity -> Upload key certificate section. Digest data writen there must match the output in the console.
Step 5 - All done
.apk is properly signed and you can inform the responsible person and/or the client.
You can find more details in the official docs.