
The Croatian Automobile Club (HAK) oversees and carries out all driving exams in Croatia. To introduce a digital dimension to the whole process, Infinum built an application that helps the examiners track the course of an exam.
The app notes the applicant’s mistakes, exam duration, driving path and records the exam using a third-party WiFi camera connected to the tablet while the app is used.
In this article, we will focus on the camera implementation aspect.
Camera implementation challenges
The development process wasn’t free of hurdles. The first significant one was WiFi discovery and connection. We realized that there was no cohesive and understandable API before Android 10 to perform these tasks. Eventually we came up with a solution, but in all honesty, we had a complete mess on our hands.
We had to use dozens of deprecated methods and properties as well as massive methods with a lot of try/catch clauses just to get our app to scan for a camera and connect with one. We were also worried about a deprecation notice saying that the app-initiated WiFi scans are going to be completely removed in future versions. However, there is no need to dive into pre-Android 10 network API in this article.
Somewhere along the road we decided to move the minimum version of the app to Android 10. We could afford to do so, because HAK examiners use only one type of device, and that device was updated to Android 10. This also allowed us to obtain access to WifiNetworkSpecifier API, which helped a great deal.
We discovered some more challenges in the recording feature:
- Connecting the camera to the application over TCP
- Implementing a client to send commands to the camera and receive responses
- Streaming the live camera feed to the app
- Maintaining and restoring the connection if something goes wrong
The dashcam
For the recording feature we decided to use a car digital video recorder or a dashcam. The camera is placed on the car’s dashboard or windshield and connected to the app over WiFi.
These are the camera’s features:
- WiFi connectable
- Recording to an SD card
- Streaming the feed over WiFi
- Removable SD card to store the videos
- Command interface to communicate with the client app
The camera connects to the application over WiFi. The user can control the recording through that connection and send some additional commands. Two connections are made with the camera:
- TCP socket connection for sending commands and receiving responses. For example, requesting and receiving info about the available storage data is done this way, as well as setting the exam ID for the video and starting or stopping the recording.
- HTTP connection for streaming the camera feed to the application.
When the recording is initiated, the camera records videos and stores them on the SD card. Each recording session is stored in a separate folder for easier navigation and the videos are recorded in multiple 1-minute recordings. Each video has a timestamp and the exam’s ID so that they can be sorted for each exam.
WiFi Network Specifier API
Android 10 introduced a new API to handle in-app WiFi connections. In-app connection here means literaly that. The connection is established while the application is used and then automatically disconnected when the application is closed.
Thanks to the new API, the whole process became much easier to implement.
Let’s dive into it step by step:
Building a specifier
val specifier = WifiNetworkSpecifier.Builder()
   .setSsidPattern(PatternMatcher(ssid, PatternMatcher.PATTERN_PREFIX))
   .setWpa2Passphrase(password)
   .build()
WifiNetworkSpecifier is a kind of a query object for available network connections. We specified the SSID (name) of the network we wanted to connect to in its builder.
In this case we had predefined SSID patterns for our dashcams so that’s what we were passing in the variable SSID.
PatternMatcher.PATTERN_PREFIX is a constant that says we will use the value passed in SSID and use it as a prefix for possible access points. Access points that do not start with the SSID value are ignored.
For example:
val ssid = "Dashcam_"
Available networks:
- Dashcam_123
- My Home Wifi
- Office
- Dashcam_234
Networks shown by the WiFi connection dialog:
- Dashcam_123
- Dashcam_234
We filtered out all access points that are not a dashcam. Optionally, we could have added a password so the connection is established faster. Otherwise, the dialog asks for password input. In our case the passwords were also predefined, so we used:
setWpa2Passphrase(password)
Building a NetworkRequest
After specifying the access point, we needed to build a NetworkRequest object with some additional configuration for our connection. First, we set the transport type to TRANSPORT_WIFI, by which we said that the connection would be established over WiFi. We then removed the connection’s internet capability, as our camera and application were communicating peer-to-peer. We finally added the specifier that we had built earlier to NetworkRequest.
val request = NetworkRequest.Builder()
   .addTransportType(NetworkCapabilities.TRANSPORT_WIFI)
   .removeCapability(NetworkCapabilities.NET_CAPABILITY_INTERNET)
   .setNetworkSpecifier(specifier)
   .build()
With everything set up, let’s move on to requesting a connection using ConnectivityManager.
Requesting a network connection
Since it is a fairly simple procedure, we decided to use ConnectivityManager and define a callback to handle all the outcomes.
private val networkCallback = object: ConnectivityManager.NetworkCallback() {
   override fun onAvailable(network: Network) {
       // handle success
   }

   override fun onUnavailable() {
       // handle failure
   }

   override fun onLosing(network: Network, maxMsToLive: Int) {
       // handle losing connection
   }

   override fun onLost(network: Network) {
       // handle lost connection
   }

   override fun onLinkPropertiesChanged(network: Network, linkProperties: LinkProperties) {
       // handle network changing LinkProperties
   }

   override fun onBlockedStatusChanged(network: Network, blocked: Boolean) {
       // handle blocked status of a network change
   }

   override fun onCapabilitiesChanged(network: Network, networkCapabilities: NetworkCapabilities) {
       // handle network capabilities change
   }
}
After defining a callback we just needed to call connectivityManager.requestNetwork(), passing in the request and the previously defined callback.
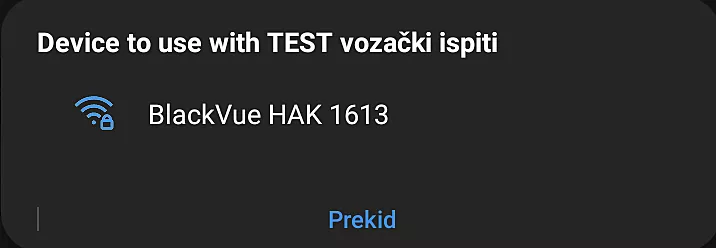
A native dialog would pop up showing the available access points that meet the parameters passed to the specifier object. In the following picture there is a dialog showing one of our cameras named “BlackVue HAK 1613”.
Clean up the request
In case the connection is lost or not found we needed to unregister the request by calling:
connectivityManager.unregisterNetworkCallback(networkCallback)
Camera – Application communication
With the connection successfully established, let’s dive deeper into the implementation of camera communication.
We have two separate clients communicating with the camera in the application. The first one is a TCP socket used for commands and simple data correspondence. The second one is an HTTP connection client that transfers the camera’s live feed to the application.
Callback and propagating to the caller
Before moving on to the network request callback, we needed a utility interface to propagate connection events to the corresponding view components. Every view component requiring a connection with the camera would be implementing this interface.
interface WifiConnectionListener {

   /**
    * Called after a connection has been established successfully.
    */
   fun onConnectionEstablished(ssid: String)

   /**
    * Called if a connection attempt failed.
    */
   fun onConnectionFailed(ssid: String)

   /**
    * Called when disconnected from a Wi-Fi network at a point in time after being connected to it.
    */
   fun onDisconnected(ssid: String)

   /**
    * Called when the connection attempt is cancelled using WifiConnectionController.
    */
   fun onCancelled(ssid: String)
}
In the network callback for requesting a connection, we handled the outcomes of that request:
private var cancelled = false
private var networkWithTargetSsidFound = false

override fun onAvailable(network: Network) {
   super.onAvailable(network)

   if (cancelled) {
       unregisterNetworkCallback()
       return
   }

   connectivityManager.bindProcessToNetwork(network)
   networkWithTargetSsidFound = true
   listener.onConnectionEstablished(ssid)
}

override fun onLost(network: Network) {
     super.onLost(network)
     unregisterNetworkCallback()

     connectivityManager.bindProcessToNetwork(null)
     listener.onDisconnected(ssid)
}
In addition to notifying the listener about the connection, we also bound the connection to the process. You might notice the canceled flag. We used it so that the user can cancel a connection attempt. The flag can be set from WifiConnectionManager, which is just a wrapper class for all the WiFi-related code. The manager is used on every screen that leverages the WiFi connection.
To account for connection time-out and other methods from WifiConnectionListener, here are other methods from WifiConnectionManager:
private fun startResponseTimeoutCountdown() {
   if (timeoutCountdownStarted.not()) {
       timeoutCountdownStarted = true
       Handler(Looper.getMainLooper()).postDelayed(::onTimedOut, NETWORK_CALLBACK_TIMEOUT_MS)
   }
}

private fun onTimedOut() {
   timeoutCountdownStarted = false
   if (networkWithTargetSsidFound.not()) {
       unregisterNetworkCallback()
       if (cancelled.not()) {
           listener.onConnectionFailed(ssid)
       }
   }
}

override fun cancel() {
   cancelled = true
   listener.onCancelled(ssid)
}
This way we have successfully propagated the callback to the screen. The listener covers all the bad cases so we can show the appropriate message or try to connect again if we want to. Maybe we’ll want to try and reconnect if the camera disconnects in the middle of an exam. In that case, we just start the whole process again until we get that onConnectionEstablished callback again.
After establishing the connection and propagating the callback to the caller, there was still some work to do. We had to set up the clients to communicate with the camera over WiFi.
Setting up the clients
Dashcam client
The first client to set up was the dashcam command interface client. We decided to use a third-party library that provides a TCP socket implementation for Android called OkSocket.
The socket is set up in the following block of code:
connectionManager = OkSocket.open(ConnectionInfo(DashcamApiService.DASHCAM_IP, DashcamApiService.DASHCAM_PORT)).apply {
  option(OkSocketOptions.Builder(option).setReaderProtocol(readerProtocol).build())
   registerReceiver(socketActionAdapter)
   connect()
}
It creates the socket that connects to a given IP address and port. In our case, these were predefined by the camera manufacturer. The method returns a so-called IConnectionManager object that we could use to check the connection status.
The command’s requests and responses come as a predefined set of bytes. Not to go into details about what each of the bytes represents, those interested can take a look at the IReader and DashcamCommand implementations that serve as a custom mapper for headers and payload in each of our requests and responses.
private const val DATA_SIZE_START = 8
private const val DATA_SIZE_END = 12
private const val HEADER_LENGTH = 12

private val readerProtocol = object : IReaderProtocol {

   override fun getBodyLength(header: ByteArray?, byteOrder: ByteOrder?): Int {
       return header?.let { BigInteger(header.copyOfRange(DATA_SIZE_START, DATA_SIZE_END)).toInt() } ?: 0
   }

   override fun getHeaderLength() = HEADER_LENGTH
}


sealed class DashcamCommand(
   val code: String
) : ISendable {

   override fun parse(): ByteArray = Hex.stringToBytes(code)

   class GetSdCardInfo(val listener: (SdCardInfoResponse) -> Unit) : DashcamCommand("00000001" + "07D0" + "000F" + "00000000")

   class StartRecording(val listener: () -> Unit) : DashcamCommand("00000001" + "07D0" + "0010" + "00000004" + "00000001")

   object StopRecording : DashcamCommand("00000001" + "07D0" + "0010" + "00000004" + "00000000")

   class UpdateUserString(userString: String, val listener: () -> Unit) :
       DashcamCommand(
           "00000001" +
               "07D0" +
               "0012" +
               String.format("%08x", userString.length + 1) +
               Hex.bytesToStringUppercase(" $userString".toByteArray())
       )
}
With the socket and protocol set up, all we needed to do is make a client that would use these implementations to communicate with the camera. In the following section, we are going to go over the most important methods from DashcamClient.
// DashcamClient.kt
private val commandQueue = mutableSetOf<DashcamCommand>()
private var currentlyExecutingCommand: DashcamCommand? = null

fun enqueueCommand(command: DashcamCommand) {
   commandQueue.add(command)
   if (connectionManager?.isConnect == true) {
       executeNextCommand()
   }
}


private fun executeNextCommand() {
   if (connectionManager?.isConnect == false) {
       log("Socket disconnected. Aborting.")
       return
   }

   if (currentlyExecutingCommand != null) {
       log("Another command is currently executing. Aborting.")
       return
   }

   if (commandQueue.isEmpty()) {
       log("Command queue is empty. Aborting.")
       return
   }

   commandQueue.first().let {
       currentlyExecutingCommand = it
       sendCommand(it)
   }
}
The commands need to be executed one at a time. The client uses a command queue so that all the commands can be kept and executed sequentially. Before executing a command we have to check that the connection is alive and there is no other command executing at the time. After executing a command we use the following method to make sure everything is ready for the next one.
private fun dequeueCommand() {
   if (commandQueue.isEmpty()) {
       log("Command queue is empty. Aborting.")
       return
   }

   if (currentlyExecutingCommand != null) {
       commandQueue.remove(currentlyExecutingCommand)
       currentlyExecutingCommand = null
   }
}
Finally, the following block of code shows how we send commands and receive responses from the camera.
private fun sendCommand(command: ISendable) {
   connectionManager?.send(command)
}

private fun processResponse(data: OriginalData, currentCommand: DashcamCommand) {
   when (currentCommand) {
       is DashcamCommand.GetSdCardInfo -> {
           val sdCardInfo = parseSdCardInfo(data.bodyBytes)
           currentCommand.listener.invoke(sdCardInfo)
       }
       is DashcamCommand.StartRecording -> {
           log("Recording started.")
           currentCommand.listener.invoke()
       }
       is DashcamCommand.StopRecording -> {
           log("Recording stopped.")
       }
       is DashcamCommand.UpdateUserString -> {
           currentCommand.listener.invoke()
       }
   }
}
The socket connection adapter handles sending and receiving data from the camera. When the response arrives, it calls the processResponse method shown above. Every command takes a callback action in the constructor, invoked when the response arrives.
The GetSdCardInfo command takes an additional parameter in the callback, showing the SD card storage information.
The client and commands just described are enough to cover all of the camera operations during an exam. They work well even if the connection is lost during the exam because of the command queue that keeps all of the unexecuted commands.
When the connection is lost, the WifiConnectionManager attempts to re-establish connection and the commands are executed afterwards.
Camera feed streaming client
The second client we made is called LivestreamManager. It transfers the stream from the camera to the app in real-time. There are 2 use-cases for this feature in our application:
- Camera preview screen – after connecting to a camera there is a screen with a live feed, so the examiner can make sure they are connected to the right camera. Since the exams usually start from the same place, there can be several cameras nearby and it’s possible to connect to the wrong one.

- Driving exam screen – we built in a small live feed window in the app drawer just in case the examiner wants to check the recording.

LivestreamManager features:
- Uses WifiConnectionManager to manage connection to the camera
- IP Cam View – library to display stream from the camera endpoint
- Observes the lifecycle of an activity or a fragment and resumes or pauses the streaming accordingly
IP Cam View library offers a series of classes that help with subscribing to the stream and displaying it on screen. Streaming can be heavy on the device’s resources, so we added an observer on the screen lifecycle. That way we can stop streaming when the app is not in the foreground. LivestreamManager implements LifecycleObserver, which means it is tied to the lifecycle events of its host component and can react to them, given that the component implements LifecycleOwner.
Similar to DashcamClient, LivestreamManager uses WifiConnectionManager to handle camera connection. If the camera disconnects, the app will try to re-establish the connection and notify LivestreamManager so it could resume streaming.
Here are some significant code blocks that show how LivestreamManager works.
private var streamSubscription: Subscription? = null
private var stream: MjpegInputStream? = null

init {
   dashcamWifiConnectionManager.addListener(dashcamWifiConnectionListener)
   lifecycleOwner.lifecycle.addObserver(this)
}

@OnLifecycleEvent(Lifecycle.Event.ON_RESUME)
private fun openLivestream() {
   if (stream != null) {
       log("Stream already opened. Aborting.")
       return
   }

   if (streamSubscription != null) {
       log("Livestream already requested. Aborting.")
       return
   }

   if (isLifecycleOwnerResumed().not()) {
       log("Lifecycle owner not in resumed state. Aborting.")
       return
   }

   if (dashcamWifiConnectionManager.isConnectedToDashcam().not()) {
       log("Device not connected to dashcam. Aborting.")
       return
   }

   streamSubscription = mjpeg.open(DashcamApiService.DASHCAM_LIVESTREAM_ENDPOINT).subscribe(
       { stream ->
           log("Stream opened.")
           streamSubscription = null
           if (isLifecycleOwnerResumed()) {
               log("Lifecycle owner in resumed state.")
               this.stream = stream
               livestreamListener.onLivestreamAvailable(stream)
           } else {
               log("Lifecycle owner not in resumed state. Closing stream.")
               closeLivestream()
           }
       },
       { throwable ->
           log("onError called in startLivestream. Retrying.")
           streamSubscription = null
           openLivestream()
       }
   )
}

@OnLifecycleEvent(Lifecycle.Event.ON_PAUSE)
private fun closeLivestream() {
   stream?.let {
       livestreamListener.onLivestreamUnavailable()
       it.close()
       stream = null
   }
}

private fun isLifecycleOwnerResumed() = lifecycleOwner.lifecycle.currentState.isAtLeast(Lifecycle.State.RESUMED)
Stream events are sent to the activity or fragment through the LivestreamListener interface since LivestreamManager is not a UI component. The listener interface handles two possible cases, as can be seen in the following code block.
interface LivestreamListener {

   fun onLivestreamAvailable(stream: MjpegInputStream)

   fun onLivestreamUnavailable()
}
When the stream is connected and passed to the screen, it is passed as a source to MjpegSurfaceView, which is just a custom view for displaying a video stream. It is also a part of the library that we used to subscribe to the stream.
Key takeaways for technical implementation
The sections above explain the technical side of what is needed for successfully recording a driving exam.
These are the key takeaways:
- WiFi Network Specifier API helps us to find the camera and connect.
- Our app now handles WiFi connection like a pro, disconnects, timeouts, you name it.
- We created a client to send commands to the camera and receive responses.
- Displaying the camera’s live feed from over WiFi is wrapped nicely in the LivestreamManager
It was a challenging but very educational journey. We implemented a feature that an average Android developer doesn’t see every day. Connecting an application to a camera was not a simple task, considering all the features, commands, streaming, etc. WiFi Network Specifier really saved us some work, because the old network scanning API was very difficult to work with.
We did have to move the minimum Android version to API level 29, but luckily for us this specific client uses only one tablet model and that one has an Android 10 update.
OkSocket and IP Cam View did their part in transferring the data between the application and camera and we took all the measures to keep the connection alive or reconnect if needed.
Ensuring greater transparency
Thanks to camera integration, the driving examination app now has an extra feature. Exams are recorded and documented through the app, so if there happens to be a complaint about an exam’s result, the examiner, the candidate, and the Croatian Automobile Club now have solid evidence for everything that happened during the exam.
Digitizing the driving evaluation process means less paperwork and more transparency – and hopefully many more great drivers on the road!