NOTE: Once a certificate or key from this chapter is created, it should be sent to the Lead Engineer so that they can securely store it!
Before you go and create a new certificate, check with LEs if the certificate you need already exists. If we have that certificate securely stored, you should use that one instead of creating a new one.
Certificates
Certificates are a part of the app development process called code signing.
When you registered as a developer for the iOS Developer Program, you were offered an option to create a personal development certificate.
If you haven't created it then, you can do it now. The process is pretty straightforward:
- Open up the Keychain Access app.
- From the menu, select Keychain Access -> Certificate Assistant -> Request a Certificate from the Certificate Authority.
- Populate the necessary fields in the Certificate Assistant dialog and choose to save the request to disk.
- Go to developer.apple.com in your favorite browser.
- Log into the Member Center.
- Go to Certificates, Identifiers & Profiles -> Certificates.
- Under Certificates—Development, choose to add a new development profile (hint: the magic plus sign [+]).
- In the certificate creation dialog, choose iOS app development for the certificate type and click continue until you get to the "Generate" section. Upload the "certificate signing request" file which you've generated in step #3 in this section.
- The last step is downloading and opening the generated certificate file.
- Check your Keychain app for your personal ADP certificate!
You can find it in the Keychain app in the "My Certificates" section.
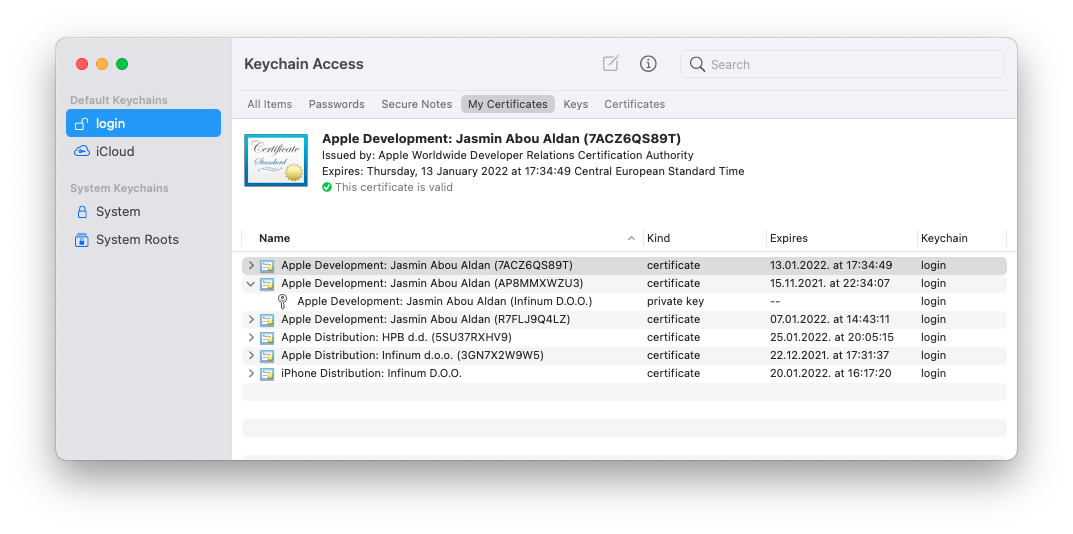
The main part of the certificate is your public/private key pair, which is a guarantee that the apps are truly developed/distributed by you.
This is of key importance for app distribution, no matter whether the distribution target is the App Store or in-house.
At Infinum, we have two different Apple Developer Program accounts. One is meant for App Store distribution (Infinum d.o.o), and the other one, the enterprise account (Infinum D.O.O.), for in-house distribution.
Provisioning profiles
To understand provisioning profiles, there are a few more things you should know how to do.
App ID
The App ID uniquely identifies the app among all other apps. The App ID string contains two parts separated by a period (.)—an App ID prefix that is defined as your Team ID by default, and an App ID suffix that is defined as a Bundle ID search string.
The Bundle ID is created by following the reversed URI convention. For an app named "My App", the Bundle ID could be defined as com.infinum.my-app.
Device UDID
To run the development app on a device, the device should also be added to the developer portal. The Device UDID is an identifier that uniquely identifies the device, just like the App ID identifies apps.
Provisioning profile sum-up
The provisioning profile binds the App ID to the device UDID(s) and Code Signing identity, and enables us to run or install the apps on devices with UDIDs that are added to the developer portal.
When you create a provisioning profile, you're basically associating the iOS devices you have listed in the Provisioning Portal with the certificate signed by Apple in the previous step. The result is a .mobileprovision file that is used during the compilation process of an iOS app, which also has to be deployed to the device. To install this provisioning profile, simply download it and double-click it. XCode will automatically add it to the list of provisioning profiles in the Organizer.
Provisioning profile types
There are a few things that should be kept in mind when describing provisioning profile types. There is a difference between a regular ADP and the enterprise one (ADEP). Since the enterprise one is used for in-house development only, the provisioning profile types that can be generated are iOS development, ad hoc and in-house.
In-house distribution
In-house distribution is another way to distribute apps besides the App Store. As we have both the ADP and ADEP, this kind of distribution is commonly used for sending test builds to the clients. Prerequisites in the developer portal are:
- generated App ID
- generated Distribution Provisioning Profile (select in-house distribution when prompted)
- provisioning profile downloaded and opened in XCode
- in the Build Settings, under Code Signing, select the created provisioning profile under the Release section
Ad hoc
For the regular ADP, the provisioning profile types which can be chosen are: development, ad hoc and App Store.
Ad hoc profiles are used to distribute the app to the devices which are chosen while generating the certificate. So, the devices on which the app should run are predetermined and should be pre-added to the developer portal.
TestFlight is another common way of sending the builds directly to clients. You use the App Store provisioning profile type, and the build is uploaded to App Store directly.
APNS - p8 key
For the iOS platform, push notifications are available through the APNS server. In order to establish communication with the APNS server, you'll have to create the Apple Push Notification service key. Once that key is created, you should upload it to the push notification provider (e.g. Firebase) configuration page or to the server if notification handling is done manually.
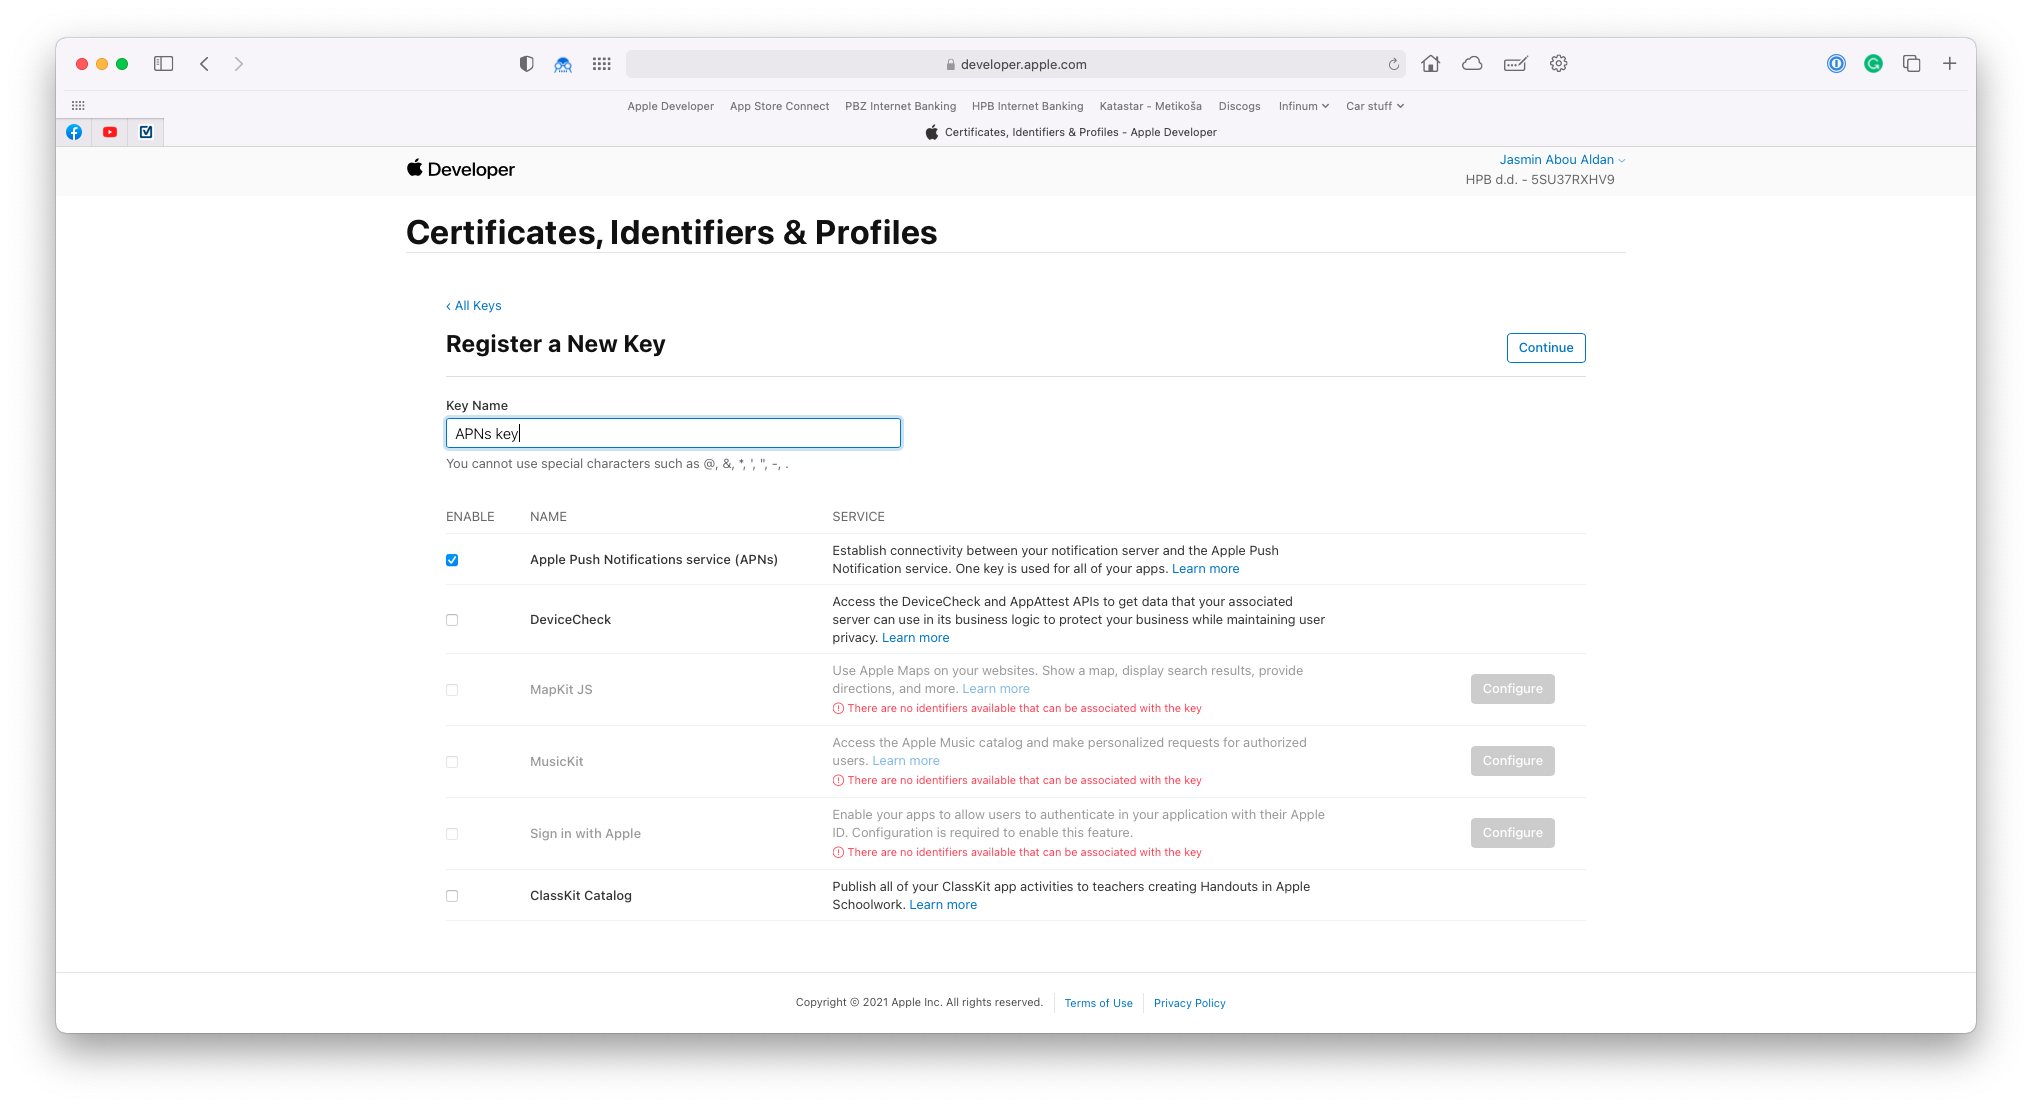
To create the key, visit the developer console and select the Certificates, Identifiers & Profiles option. On the next page, select Keys and then +. Add the key name (e.g. APNs key) and select Apple Push Notification service (APNs).
Once key is created, you'll be able to download it. Keep in mind that you can download that key only once!
Send created key to the Lead Engineer so that they can securely store it.
If you are using Firebase for the push notifications, you'll have to upload that key into the project settings, under the Cloud Messaging tab.

APNS - certificates (deprecated)
Another (deprecated) way to establish that communcaion is through the SSL certificates. They can be generated using the developer portal under the "Certificates" section. You will probably need both the development and the production APNS certificates.
As certificate can expire and you'll have to recreate and upload new one every few years, consider using p8 key as they don't have the validity date.
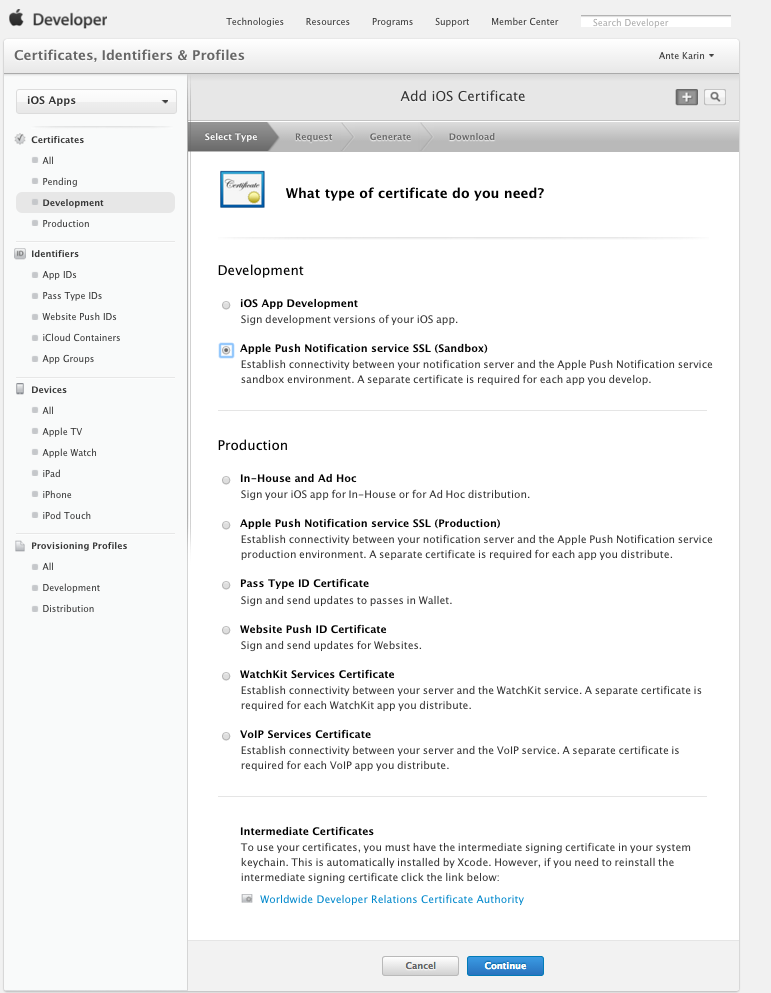
The attached image displays the generation of an APNS development certificate. After continuing, you should select the App ID for the target app and upload the certificate signing request. Again, the process is the same as with generating a personal certificate:
- Open up the Keychain Access app.
- From the menu, select Keychain Access -> Certificate Assistant -> Request a Certificate from the Certificate Authority.
- Populate the necessary fields in the Certificate Assistant dialog and choose to save the request to disk.
- Upload the CSR to the developer portal.
After completing the CSR upload, save the APNS SSL certificate to disk (you can find it in the Keychain App).
Generating APNS Production certificates is very similar. All you have to do is choose "Production" under "Certificates" and choose the Apple Push Notification service SSL (Production) in the "Select type" step. The following steps are the same as for the Sandbox SSL certificate generation.
The certificates will be used by the API, which will be responsible for initiating push notification messages.